Things You'll Need
Floating floor planks
Vacuum cleaner
Foam padding
Jig saw
Wood trim
Hammer
Finishing nails
Tip
Sponsored tip: Need tools for your project? Check out RentalHQ and get connected with local businesses that’ll help you rent the equipment and tools you need.
Laminate flooring is durable, affordable and easy to install, which makes it a great project for do-it-yourselfers. When working in tight spaces, laminate flooring installation does offer some advantages. It comes in planks, which are easier to slide into tight spaces than a sheet of vinyl. In addition, the tongue and groove installation system means you can snap the floor in place instead of trying to fit all your tools in the tight area as well. To install laminate flooring in tight spaces, have all your materials prepped in a separate work area so you can easily access the floor.
Step 1
Clean your subfloor thoroughly before you install laminate floors. Use a small broom and a dustpan to remove any dust, dirt or debris on the floor.
Video of the Day
Step 2
Inspect the angles of your space. To make your laminate flooring installation move as easily as possible, install it so the grain of the wood runs in the direction that will require the least amount of cutting. For example, if you small space is a closet, run the grain of the laminate wood so it's parallel to the two longest walls.
Step 3
Cut foam padding so it fits in your small space. It may be easier to measure your space and cut the foam padding out of the space where you have more room. Foam padding is flexible, so it's easy to roll it up after you make the cuts then unroll it in your work space. Seal the seams in your foam padding with duct tape.
Step 4
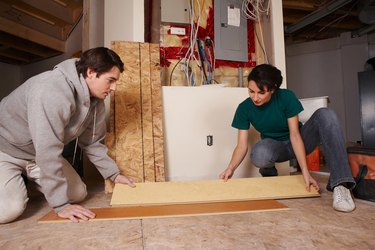
Start working in the corner farthest away from the opening to your small space by laying down your first laminate flooring plank. Planks are a great option for small spaces because they're easy for you to handle. They are also light weight, so you can hold it with one hand while you stretch into position in your small work space.
Step 5
Insert the tongue on your second laminate flooring plank into the groove of the first plank. Snap the plank down towards the ground to put it in position. This style of laminate floor floats above the surface, which makes installation in small spaces much easier. There's no glue or sealant required once it snaps into place.
Step 6
Cut laminate floor planks down to size with a circular saw. Make your cuts outside your work space, then bring it back and see if it fits.
Step 7
Leave a gap about 5/16-inch wide between your laminate flooring and your wall. As temperatures rise and fall, your laminate floors will expand and contract. Leaving that gap allows the floors to shift as needed without hitting the wall and potentially buckling.
Step 8
Hide the gap between your flooring and the wall with wood trim. Nail the trim to your baseboards all the way around the room.
Video of the Day