Things You'll Need
Newspapers or scrap paper
Fine-grain sandpaper
2 wood craft sticks, 3/4 inch wide
Acrylic or washable paint
Paintbrush or foam applicator
Paper cup
3/4-inch ribbon, about 5 feet long
Scissors
White glue
Heavy book
Stickers, plastic gems, foam shapes or markers
Fabric paint pens
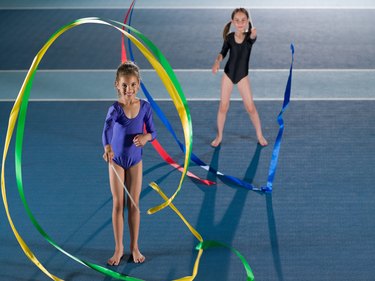
If your child enjoys watching graceful rhythmic gymnasts twist, twirl and throw a colorful ribbon stick -- a long piece of ribbon attached to the end of a wooden handle -- create your own version that she can use while dancing or hosting an impromptu gymnastics "competition" in your living room. Use basic craft supplies including wood craft sticks, ribbon and paint to design ribbon sticks that your child can personalize with favorite colors, patterns or initials.
Step 1
Cover your work area with old newspapers or scrap paper to make cleanup easier and protect the surface from paint spills or adhesive residue.
Video of the Day
Step 2
Rub fine-grain sandpaper over two 3/4-inch wood craft sticks to remove any small cracks in the wood that may cause splinters.
Step 3
Paint the sticks with acrylic or washable paint in your child's favorite colors using a paintbrush or foam applicator. Stand the painted sticks inside a paper cup to keep them from sticking to anything as they dry. Let the paint dry for at least one hour.
Step 4
Cut a 5-foot piece of 3/4-inch ribbon with scissors. Use a color that coordinates with the painted sticks.
Step 5
Apply a thin line of white glue down the center of each craft stick, starting and finishing 1/2 inch in from the top and bottom of the stick.
Step 6
Press one end of the ribbon along the length of one stick, completely covering the glue. Smooth the ribbon with your finger.
Step 7
Place the second stick, glue side down, on top of the other stick. This will sandwich the ribbon between the two sticks. Set the ribbon stick beneath a heavy book and let the glue dry for at least two hours.
Step 8
Decorate the stick, if desired, with stickers, self-adhesive plastic gems, foam shapes or markers. You can also embellish the ribbon itself with stickers or fabric paint pens.
Tip
If you can’t find 3/4-inch wood craft sticks, use regular 1/4-inch craft sticks or wood sticks recycled from ice cream treats. Use 1/4-inch ribbon with the thinner sticks, or simply let the 3/4-inch ribbon hang off the sides of the sticks.
If your child has trouble twirling the long ribbon, adjust the length by snipping a piece off the end.
If your child prefers more movement as she waves her ribbon stick, sandwich two or three pieces of ribbon between the wood craft sticks instead of just one. Use scissors to cut the ribbon pieces to the same length, and use ribbon with different colors, patterns or textures. Add small dabs of white glue between each layer of ribbon.
Warning
Check the ribbon stick frequently to ensure pieces of the stick do not break off. If your child plays with the rhythm ribbons often, the sticks may begin to crack and can cause splinters. Wrap the sticks in another length of ribbon for a smooth finish.
Video of the Day