Things You'll Need
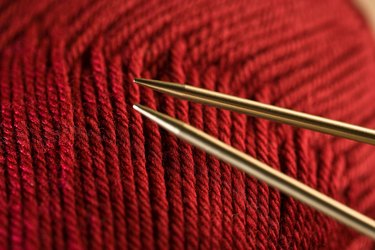
Knitting needles
Yarn
Scissors
Yarn needle
Thick bath towel
Rustproof pins
Stockinette stitch is one of the easiest and commonly used stitches in knitting. With flat knitting, stockinette is achieved by knitting all the stitches on the right side of the work and purling them on the wrong side of the work. With circular knitting, it is achieved by knitting every stitch. Stockinette stitch naturally curls along both its horizontal and vertical edges. One way to stop the edges from rolling is to knit a border or a flat stitch around the stockinette stitch. Learn how to keep a stockinette edge from rolling on a stockinette scarf utilizing a seed stitch border. Garter stitch, ribbing or a large variety of pattern stitches can be used as an alternative to seed stitch, and the same method can be applied to any knit project.
Step 1
Cast on the desired number of stitches for your scarf. To determine how many stitches to cast on, knit a gauge swatch, count the number of stitches per inch, then multiply this factor by the desired width of the scarf. If the number is odd, round it up to the next even number.
Video of the Day
Step 2
Knit five to ten rows of seed stitch. To do this, knit one, purl one (K1, P1) and repeat to the end of the row. Repeat this for each of the seed stitch rows.
Step 3
On the next row, knit five to ten border stitches in seed stitch. Pick a number closer to five for a chunkier knit, or closer to ten for a finer-gauge knit. Knit in stockinette stitch (i.e. knit all stitches on the right side, purl all the stitches on the wrong side) until the last five to ten stitches remain on the needle. Knit the remaining stitches in seed stitch.
Step 4
Repeat Step 3, knitting the seed stitch border at the sides and stockinette stitch in the middle until the scarf is a few inches shorter than your desired finished length.
Step 5
Knit the final five to ten rows in seed stitch. Bind off and weave in the yarn ends.
Step 6
If your scarf is knit from natural fibers, block it. Soak the scarf in cold water and carefully squeeze out most of the excess.
Step 7
Smooth the scarf out over the bath towel and pin it to the towel along all four edges so that it lies flat. Fold the towel over the scarf and leave it flat until it is completely dry. When you remove the pins, the scarf should remain flat and the edges unrolled.
Tip
It is sometimes possible to add a border to a stockinette stitch garment that is already finished. Unroll the edge of the fabric and pick up stitches evenly along the edge. Knit these stitches in any firm, non-rolling stitch to make a border, then block the knit. Use yarn in a contrasting color to create an attractive, intentional look. Some non-rolling stitch patterns that will act as a stabilizing border around stockinette stitch include: garter stitch, 1-by-1 rib, sand stitch, basket stitch and horizontal cables.
Video of the Day