A crochet toilet seat cover is an easy needlework project for anyone who has mastered a few basic crochet stitches. The cover will work up quickly and can be made in the color of your choice. Select a fine-gauge yarn for a lacy, old-fashioned look, or choose a bulkier yarn for a more contemporary or casual design. Use a machine washable cotton yarn so your toilet seat cover will be easy to care for.
Video of the Day
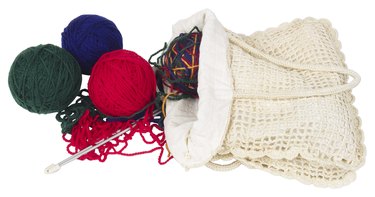
Things You'll Need
5 Oz. Worsted Weight Yarn
Size G Crochet Hook
Step 1
Chain (ch) 13, single crochet (sc) in second stitch from hook, then sc in each remaining stitch to end. Turn.
Video of the Day
Step 2
Ch 1, sc twice in the first stitch in the row. Sc in each stitch across to last stitch. Sc twice in this stitch. Turn. Repeat this row for rows 2 through 8.
Step 3
Ch 1, sc in each stitch all the way across. Turn. Repeat this row for rows 9 through 25.
Step 4
Ch 1, sc next two stitches together. Sc in each stitch all the way across until the last two stitches in the row. Sc the last two stitches together. Turn. Repeat this row for rows 26 through 33. Do not turn the last row.
Step 5
Begin to work in the round. Chain one and turn the piece so that you are working the stitches that form the ends of the rows you just crocheted. Skip the first stitch, then sc next 32 stitches. Sc in each stitch across what was your first row, then sc in 32 end stitches, skip one stitch, sc in stitches all across your last row.
Step 6
Ch four, then double crochet (dc) in the last stitch you crocheted. Dc, ch 1, dc all the way around. Ch four. Repeat for next three rows.
Step 7
Ch 1, then sc in each stitch all the way around. Repeat this row one time.
Step 8
Begin working back and fourth across the back of the seat cover. Ch 1, sc in each of next 126 stitches. Turn.
Step 9
Ch 1, sc next two stitches together, sc in each of next 13 stitches, sc next two stitches together, sc in each of next 20 stitches, sc next two stitches together, sc in each of next 13 stitches, sc next two stitches together, sc in each of next 18 stitches, sc next two stitches together . Repeat the pattern between the asterisks to the end of the row.
Step 10
Ch 1, sc next two stitches together, sc in each of next four stitches. Repeat this pattern across the row. Turn.
Step 11
Ch 1, sc in every other stitch across. Turn. Ch 1, sc in each stitch all the way across. Tie off.
Step 12
Fasten thread to the bottom left side of the lid cover. Ch 2, dc in first stitch of row, sc in next stitch. Repeat this across, forming loops all the way around the lid cover.
Step 13
Make a drawstring by chaining 225 stitches. Thread drawstring through the loops around the cover.
Tip
Alternate colors of yarn for a striped cover. Or make a solid color top and embroider a design on the top.