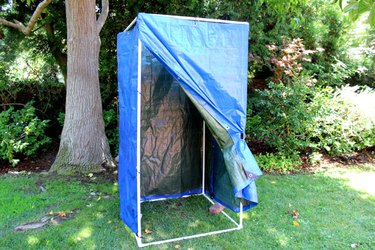
Next time you go camping, why not bring a portable camp shower? We'll show you how to make a partition that can be set up in minutes, and is either free-standing or it can be hung from a tree branch. This provides the privacy—you'll need to provide the water, so be sure to bring a portable shower that you can find at any camping store. And better yet, when not being used as a shower, it can also be used as a clothes changing area.
Below, you choose how you would like to make your shower: freestanding or hanging. Each come with their own Things You Need list and instructions.
Video of the Day
Video of the Day
How to Make a Freestanding Shower Enclosure
Things You'll Need
Four 6-ft. sections of 1/2-in. PVC pipe
Eight 3-ft. sections of 1/2-in. PVC pipe
PVC pipe cutter
Eight 1/2-in. PVC corner pieces
Two 6-ft. by 8-ft. vinyl tarps
Cable zip ties
Bricks or sand bag
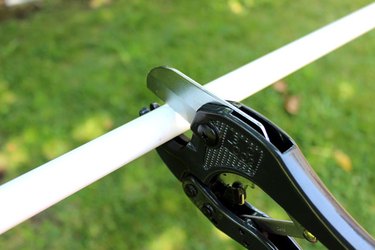
1. Cut the PVC pipe to desired lengths
PVC pipe comes in standard 10 feet lengths, so you will need to cut them to size using a PVC pipe cutter so you have four 6-feet sections and eight 3-feet sections.
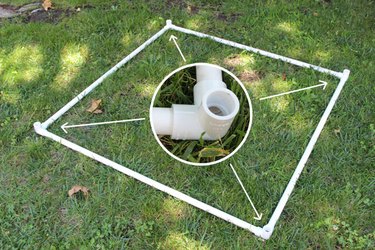
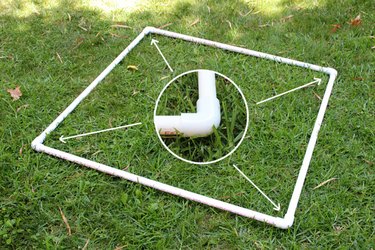
2. Connect the base pieces
Start with the base of the shower enclosure. Connect four 3-feet pipe sections with four PVC corner pieces. These corners are also called 90-degree side outlet elbows.
3. Attach the vertical pipes
Attach the four 6-feet PVC pipe sections vertically to the corner pieces.
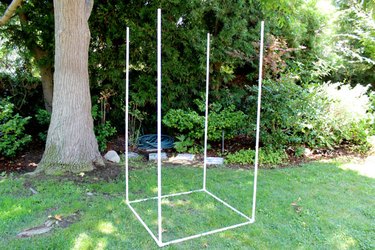
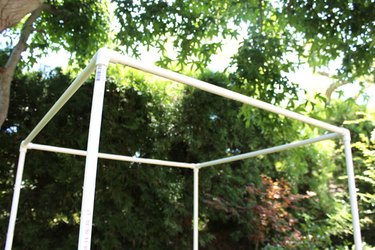
4. Complete the cube
Attach PVC corner pieces to the top of the 6-feet PVC pipes and connect the 3-feet pipes to them to form a tall cube.
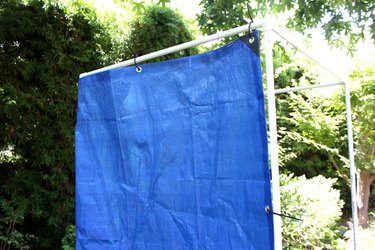
5. Hang the tarp
The shower enclosure is 6 feet tall. Turn the 6-feet by 8-feet vinyl tarp on its side so that it is 6 feet tall as well. Using the pre-drilled grommets, hang the tarp on the PVC pipes with cable zip ties. Attach the tarp to the vertical PVC pipe as well. For maximum privacy, overlap the two pieces of tarp so there are no openings.
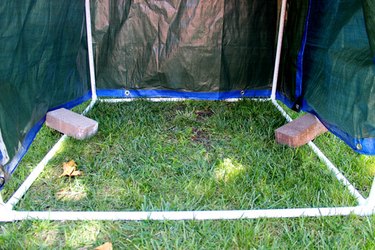
6. Support the PVC structure with bricks
Decide which side will be the opening of the shower enclosure. Do not connect the side grommets to the vertical post on this side so the tarp can be opened and closed. Place bricks or sand bags on the PVC pipes at the base to help keep the structure from blowing in the wind.
How to Make a Hanging Camp Shower Enclosure
Things You'll Need
Four 3 ft. sections of 1/2-in. PVC pipe
Four 1/2-in. PVC elbow pieces
Eye-hook screws
String
Metal washer
Two 6 ft. by 8 ft. vinyl tarp
Cable zip ties
1. Connect the PVC pipes
For a hanging shower enclosure, connect four 3 feet sections of PVC pipe using PVC elbows. They do not need to be corner pieces because you will not be connecting vertical pieces.
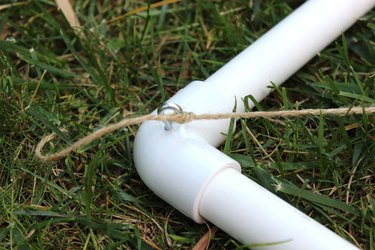
2. Tie string to eye-hook screws
Attach eye-hook screws to each of the four elbow pieces, and tie string to the hooks, going diagonally from corner to corner. Without the eye-hook screws, the string can slide off from the elbows.
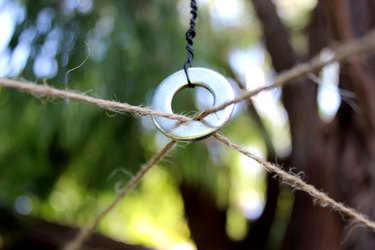
3. Hang with a metal washer
At the intersection of the two strings, attach a metal washer. Tie wire around the top of the washer to hang from a tree branch.
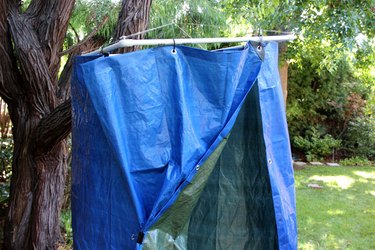
4. Hang the tarp on the PVC pipe
As with the free-standing shower enclosure, hang the tarp from the PVC pipe with zip cable ties. Overlap two tarps to provide extra privacy.
Tip
The ground in the shower area can get slippery when wet, so place a shower mat in the enclosure.
Use a large binder clip to close the tarp from the inside of the shower enclosure.