Things You'll Need
Wood plank
Measuring tape
Pencil
Saw
Rasp
Clamps
Large pot
Water
Curved wood form
Sandpaper

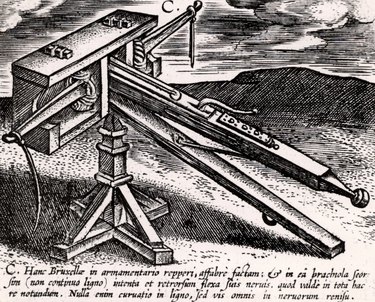
A crossbow is a type of bow that was invented in the Middle Ages. Its advantage over other types of bows was its power and ease of use: crossbowmen were typically recruited peasants, and crossbow arrows could easily pierce a knight's armor. Because you don't need power tools or metalworking skills to make a crossbow, it is an appealing project for weapons enthusiasts. The limb on the crossbow is the part that is drawn back and attaches to the stock. This part is formed like -- and functions similarly to -- an ordinary bow.
Step 1
Choose a piece of wood. Yew is the preferred wood for high-quality bows, but isn't very common in a lumberyard. Ash, hickory or red oak are good choices, and any sturdy wood will do. Choose a piece of wood that feels dense, or heavy for its size. Select wood that isn't warped, has no knots and has straight grain. These are characteristics of strong wood. The size of the piece you need depends upon the size and type of crossbow you are making. The limb should be around the same length as the stock.
Video of the Day
Step 2
Lay the board flat on a sturdy surface, with the wide sides horizontal with the surface. Find the center of the piece and mark it with a pencil.
Step 3
Cut the board so that each end is slightly tapered. The widest part is in the middle and the thinnest parts are at each end. Measure carefully or use a pattern so that each end of the board is symmetrical both from side to side and from end to end. Smooth out your cuts with a rasp.
Step 4
Clamp the board to a sturdy surface with the clamps in the middle. The board must be flat. Use the rasps to remove some material from each end of the board, changing the thickness of the board so that the ends are thinner than the middle. The bow needs to be able to bend, but must also be sturdy. This is achieved by making the middle thick and the ends thinner so that they are more easily bent.
Step 5
Boil some water in the pot and immerse one half of the board in the pot. Let the wood boil for a few hours, longer for a thick bow and shorter for a small bow.
Step 6
Remove the board from the boiling water, taking care to not burn your hands. Clamp one end of the board to your form and slowly bend it around, stopping in the middle of the board. Clamp in place and let the wood dry, then repeat with the other side by boiling and shaping it. The simplest form to use for this is a piece of wood cut into a curve, but any sturdy curved object that you can clamp the board to is suitable.
Step 7
Sand the board.
Step 8
Cut notches into the ends of the limb with a file for the bowstring. There are other ways to do this. For instance, you can add curved metal pieces to each end to hold the string.
Tip
You can reinforce the crossbow with a piece of fiberglass if desired. Many bows and crossbows have a small piece of wood added to the middle of the bow for sturdiness.
Warning
Be careful while you work and test the limb for strength before using the crossbow. The limb is the part most likely to break during use, and it can cause harm to the user if it does.
Video of the Day