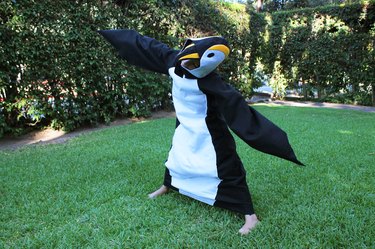
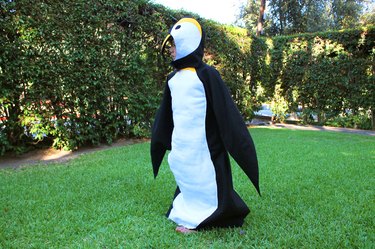
Make your own DIY penguin costume for a child of any size with a few yards of felt, some wire and a sewing machine. A printable pattern is included to provide you with the pattern pieces needed to put together this cute creature. Almost anyone can do it, with only a few basic sewing skills needed like sewing around a curve. It's so easy that you may have to make a penguin family.
Video of the Day
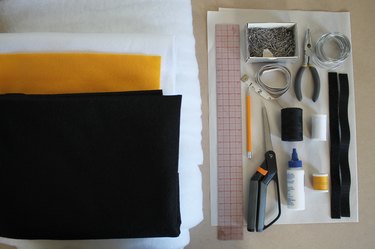
Things You'll Need
Tape measure
Pattern paper
Ruler
Scissors
2 1/2 yards of black felt or fleece
1 1/2 yards of white felt or fleece
2 sheets of yellow felt or fleece
Pins
Felt glue
All-purpose sewing thread in black, white and yellow
Sewing machine with an all purpose needle
16-gauge wire
Duct tape
Zipper foot (optional)
Iron
1 1/2 yards of batting
Hook-and-loop tape for sewing
Step 1: Measure and Cut
Place the measuring tape around the chest of the person who will wear the costume with arms up to get the chest measurement. Add 2 to 8 inches ease to this number depending on the size of the person or the desired amount of a loose fitting costume. For example, a small toddler may need 2 inches of extra room in the costume, while a 7-year-old may want 8 inches of ease. Divide this total number by 4 to get the "pattern width" measurement.
Video of the Day
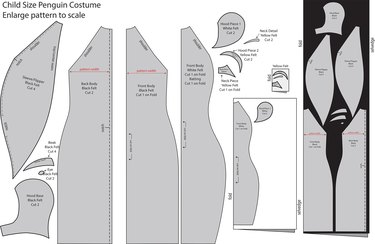
Enlarge the penguin pattern provided to scale, until the pattern width measurement is the same as the pattern width at the red line on the provided pattern. Compare the length of the body pattern piece to the length of the child from the neck to the floor, and shorten or lengthen as needed.
Example: If the chest measurement is 24 inches and 4 inches of ease is added, the pattern width measurement is 7. The pattern would be enlarged to scale until the width of the front body is 7 inches at the red line.
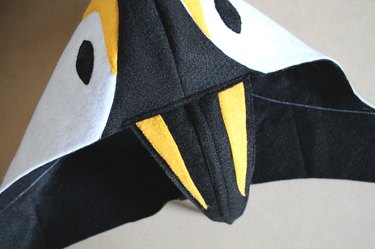
Step 2: Prepare the Hood
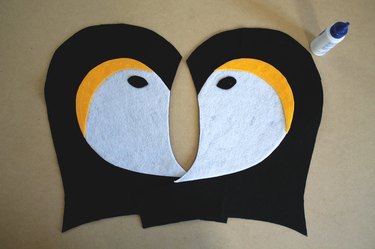
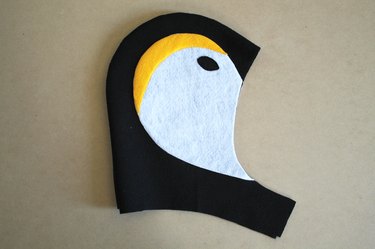
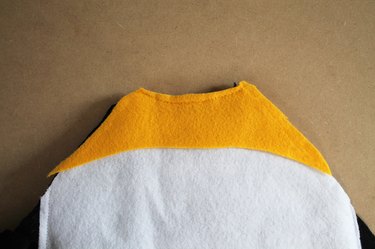
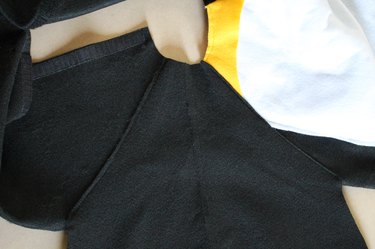
Lay the left and right side of the black felt hood flat on a table with right sides up. The right side of the fabric is the side that will be seen on the outside of the costume. Arrange the white and yellow detail pieces to the desired location using the image as a guide.
Add the eye and compare the two sides to achieve a symmetrical design. Place a small amount of felt glue on the back side of each detail piece, and attach the felt pieces to the hood. Topstitch a straight stitch close to the edge of the detail pieces with color-coordinating thread.
Tip
A topstitch is when you sew on top of the fabric, through all layers. It is usually done at the edge of the fabric or close to a seam. Topstitching can also be used to create a design on top of the fabric.
Step 3: Sew the Beak
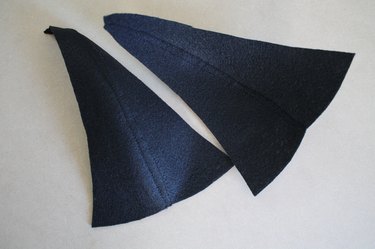
Lay one beak piece over the other, overlapping at the center 1/4 inch. Right sides should be facing up. Topstitch the two pieces together along the raw edge with a straight stitch. Flip the beak over and topstitch along the raw edge on the underside. Repeat this step so that you have two beak pieces (a top and bottom).
Step 4: Add Wire to the Beak
Cut a piece of wire the same length as the beak along the center front seam. Fold the ends of the wire under 1/2 inch and wrap the ends in duct tape to protect the fabric.
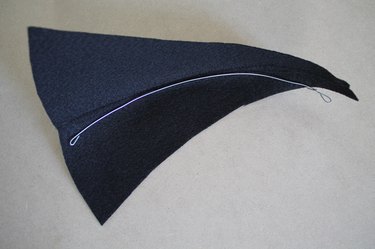
Place the top and bottom beak pieces on top of each other and align them at the center seam. Sew both beaks together along the center seam, overlapping the topstitch you made in step 3. Place the wire in between the top and bottom beak pieces along the center seam. Sew the wire into the beak by sewing a straight stitch close to the wire.
Tip
If you have a zipper foot attachment for your sewing machine, use it to get the sewing needle closer to the wire as you sew.

Step 5: Finish the Beak
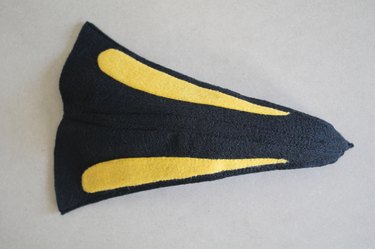
Place the yellow beak detail onto the top side of the beak, close to the bottom edge as shown. Topstitch the yellow piece onto the black beak. Topstitch around the outer edges of the beak, securing both layers together.
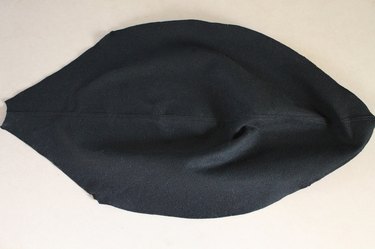
Step 6: Sew the Hood
Place the two hood pieces right sides together. Sew along the top, 1/2 inch from the edge. Cut notches into the seam allowance where the seam curves.
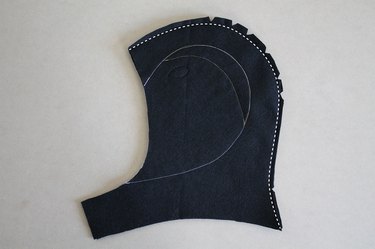
Turn the hood right side out and iron the center seam flat.
Step 7: Add a Closure
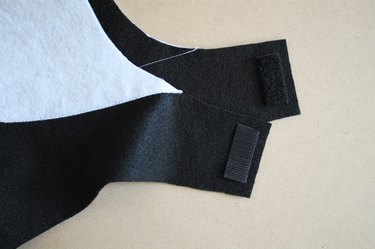
Cut a piece of hook-and-loop tape approximately 1 1/2 inches long. Place the soft side of the tape on the underside of one of the hood's chin straps. Place the rough side of the hook-and-loop tape on the top side of the other chin strap. Align the two chin straps to ensure proper placement of the hook-and-loop tape.
Sew the hook-and-loop tape onto the chin straps by sewing a straight stitch close to the edge of the tape on all four sides.
Step 8: Attach the Beak
Place the beak under the hood at center front as shown. Topstitch the beak to the front of the hood 1/4 inch from the edge of the hood.
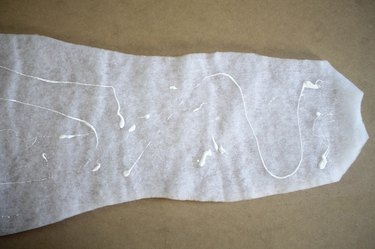
Step 9: Glue the Batting
Add felt glue to one side of the front body batting piece.
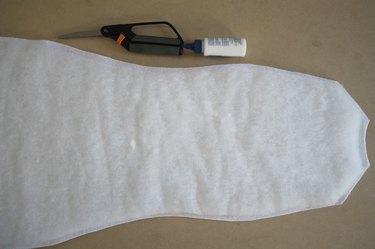
Step 10: Prepare the Belly
Place the batting glue-side down onto the back of the white felt front body piece. Trim the edges of the batting approximately 1/4 inch from the edge so that the batting is slightly smaller than the white felt piece.
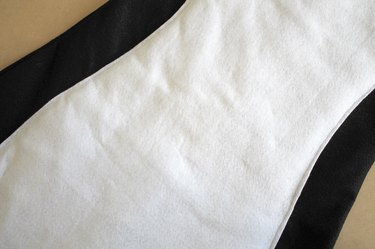
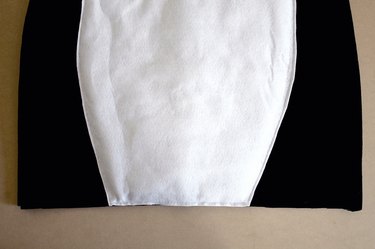
Step 11: Topstitch the White Belly
Add glue to the batting again and place the white felt and batting onto the front of the black felt front body piece. Topstitch the white felt onto the black felt with a straight stitch 1/4 inch from the edge using white thread.
Step 12: Sew the Yellow Neck Detail
Place the yellow felt neckline detail piece on top of the white felt body at the neckline. Topstitch through all layers at the neckline with a straight stitch 1/4 inch from the edge using yellow thread.
Step 13: Sew the Center Back
Place the two back body pieces right sides together. Sew the center back seam below the notch with a straight stitch 1/2 inch from the edge of the fabric. Cut a piece of hook-and-loop tape the same length as the opening at the center back above the notch.
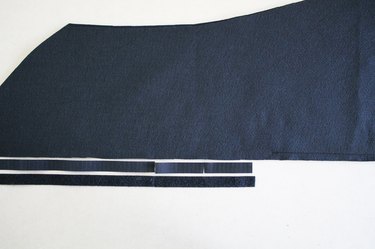
Step 14: Add a Closure
Turn one edge of the felt under 1/4 inch and place the soft side of the hook-and-loop tape on top, aligned with the edge of the fold. Place the rough side of the hook-and-loop tape at the edge of the seam allowance on the right side of the fabric of the opposite back piece. Test the closure to check alignment and then topstitch the tape onto the felt with a straight stitch along all four edges of the tape.
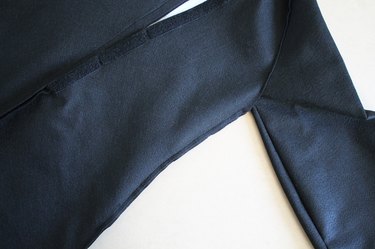
Step 15: Sew the Sleeve
Place the front and back piece of the sleeve flat on a table. Overlap the two pieces at the top/center edge 1/4 inch. Right sides should be facing up. Topstitch the two pieces together with a straight stitch along the raw edge of the top layer of fabric. Turn the sleeve over and topstitch again over the raw edge of the fabric on the underside of the sleeve.
Step 16: Sew the Shoulder
Lay the front and back body pieces flat so that the front and back necklines are facing each other. Place the sleeve on top of the front and back piece and align at the shoulder seam as shown.
Topstitch the sleeve onto the body at the shoulder seams with a straight stitch 1/4 inch from the raw edge of the fabric.
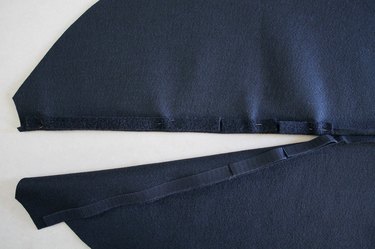
Step 17: Sew the Side Seam
Place the right sides of the front and back body together, matching up the side seams. Sew a straight stitch 1/2 inch from the edge of the side seams along the body of the penguin. Stop at the armhole and backstitch to secure the seam.
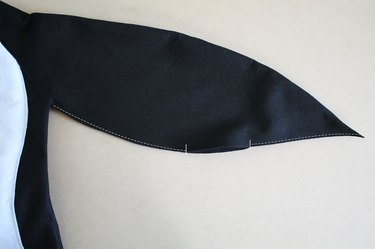
Step 18: Sew the Underarm
Turn the costume right-side out. Place the sleeves together and lay flat. Topstitch along the under arm of the sleeve with a straight stitch 1/4 inch from the raw edge. Stop and backstitch at the notches, leaving the space between the two notches open for the hand.
Step 19: Hem the Penguin Outfit
Topstitch the white felt piece at the bottom hem to the front body piece with a straight stitch 1/4 inch from the edge.
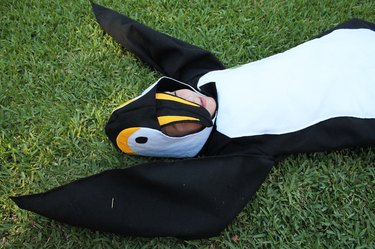
Put the body and the hood together to complete the penguin costume.