You don't have to look hard to find a marble detail these days. From popular Carrera on kitchen counters to stationery on well-curated desks to nail polish, marble is the type of design that makes anything look good.
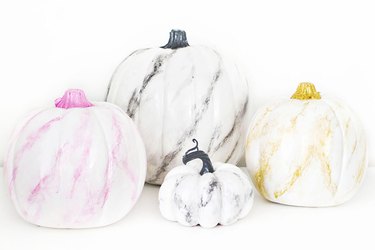
And if you're thinking that the same ol' pumpkin carving rather boring — or that the orange hue simply doesn't match your aesthetic — then go ahead and marble a pumpkin.
Video of the Day
Video of the Day
After painting your pumpkins a bright white, use a feather to blur and scatter "marble" lines that suit your preferences. When you're finished with this easy DIY tutorial, you'll have Halloween decorations that manage to give two ubiquitous items, pumpkins and marble, a fresh look.
Things You'll Need
Several pumpkins
White paint
Black paint
Paintbrushes of varying sizes
Stiff feather
Water
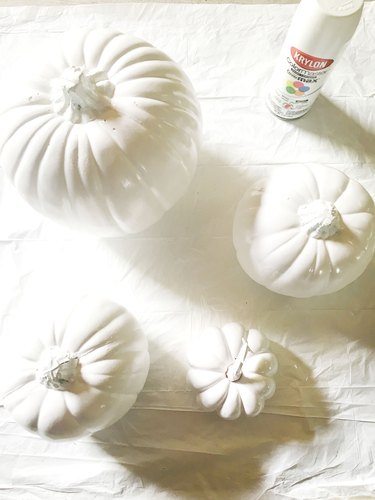
Paint Your Pumpkins White
You can use real or plastic pumpkins for this DIY project, depending on whether you'd like to keep them around for next year. Whichever option you choose, start by giving your pumpkins a coating of white paint. This project used a glossy white spray paint, but any paint works.
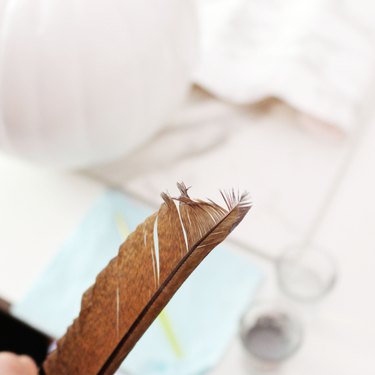
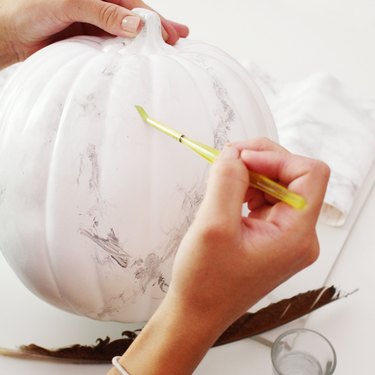
Use a Stiff Feather to Add a Marble Effect
A stiff feather really gives the right effect that a paintbrush just cannot do — take one and trim it before adding a color. Take your marbling color and mix a small amount with lukewarm water (you don't need much). As a reference, the ratio of paint to water should be 2:1. Then, add 1 part white paint to get a much lighter color.
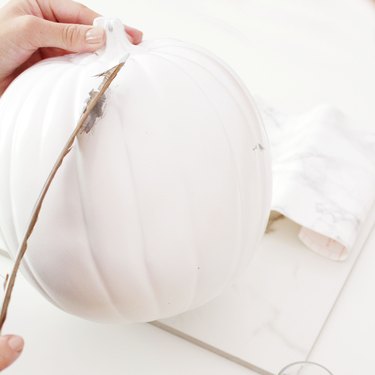
Dip the feather slightly into the paint and rub it along your pumpkin at varying diagonal angles. Rub the lower parts of your feather along the initial design to give it a frayed look.
Tip
You can use a piece of marble tile, or look up pictures online, as a reference.
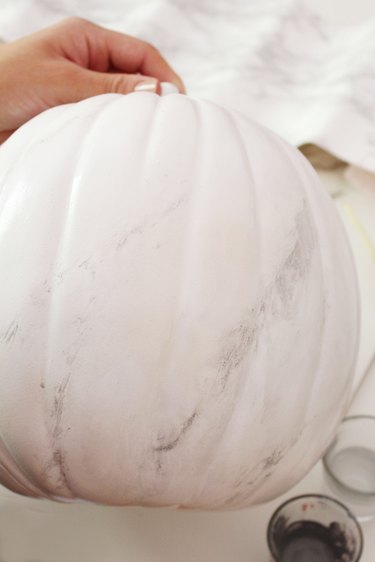
Spread the Lines with Water
Now, take a small paintbrush and dip it in water. Use this brush to spread out your marble lines. You want a blurred, imperfect look. This process is really forgiving, so don't worry if you spread out your designs too much. You can always add more paint or more water to change any marks you don't like.
Repeat the process on all of the lines to achieve the right look.
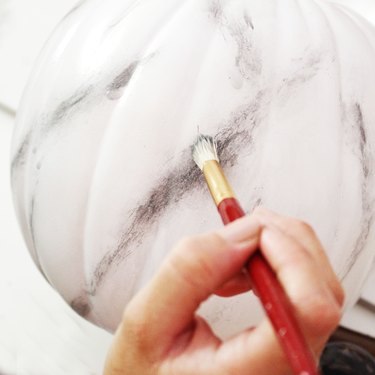
Add More Precise Veining
For the second layer of marbling, add a little black to your paint to slightly darken it. Repeat the process of feathering veins in the same places as your first lines — you only need the feather and a small amount of paint. After spreading the paint on, really rub the lower part of your feather into it to spread it out. The lines should still be fairly blurry.
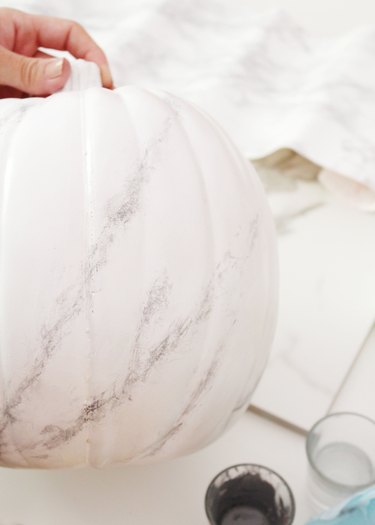
For the third layer, darken your paint even further and then feather it on. This time, use a dry paintbrush to spread out the paint. This layer will be more defined than the former two but still rubbed in.
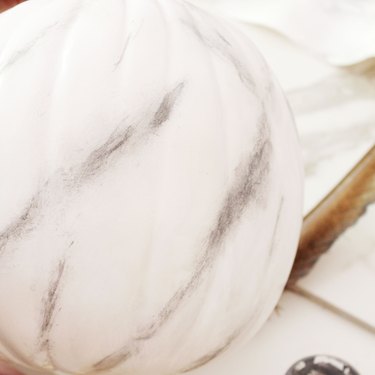
Blur the Veins and Add Finishing Touches
To achieve the blurred result shown in this project, dip a paintbrush in water. Try not to go much farther than the surface of the water. Dab the brush randomly over the veining. Let the drips of water blur the paint, then rub down every part of the pumpkin.
You can choose to add a little more definition by painting a small amount of your darkest color onto the veins. When you're satisfied, paint the pumpkin stem in the color of your marbling. Use a toothpick to add fine touches you can't live without.
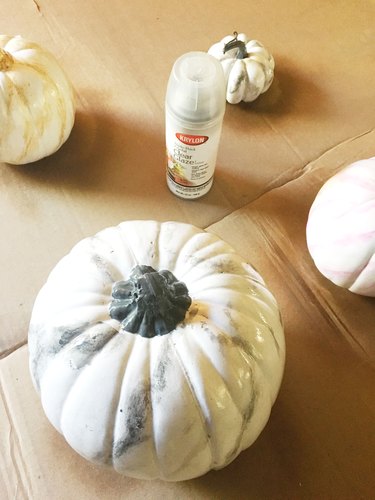
Apply a Clear Glaze
Because marble is so shiny, give your pumpkin a final clear glaze coating to emulate that design. It will also make it more durable.
Display Your Marble Pumpkins
This project is easy to pull off because the paint is so forgiving — feel free to be really creative with your designs.
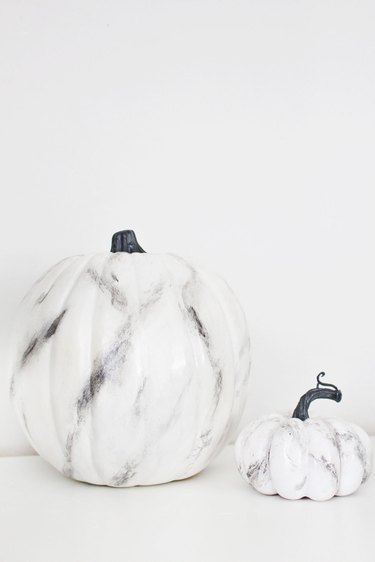

This simple DIY pumpkin idea is a quick Halloween craft that could really elevate your fall home decor, so don't wait until all the good gourds are taken!