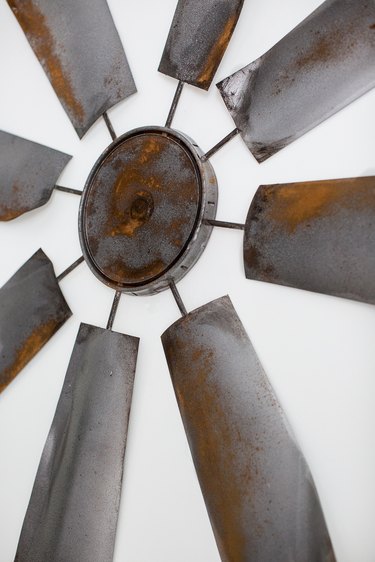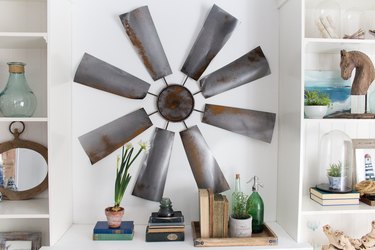
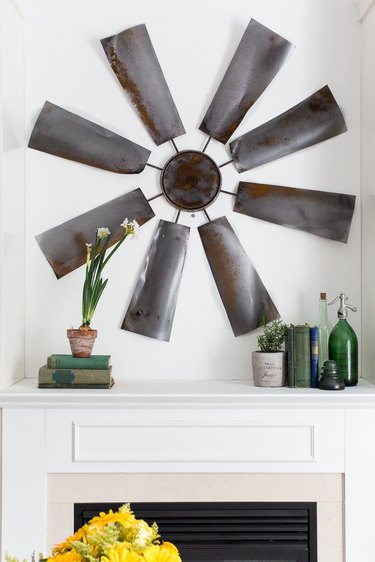
One of the most effective ways to bring character to your home is to incorporate unique and meaningful pieces, and there's nothing more meaningful than an item you make with your own hands. If your tastes run toward the rustic and you enjoy farmhouse-style decor, this DIY windmill wall hanging made from aluminum is for you. Not only does it work well as a focal point on any wall but it's easy to make and affordable as well.
Video of the Day
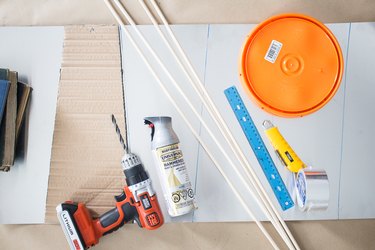
Things You'll Need
Aluminum sheet
Permanent marker
Thick cardboard
Four 5/16-in. dowels
Aluminum foil tape or duct tape
8L lid
Spray paint
Drill
Utility knife
Ruler
Heavy items to hold down aluminum sheet
Cinnamon powder
Hot glue
Safety gloves
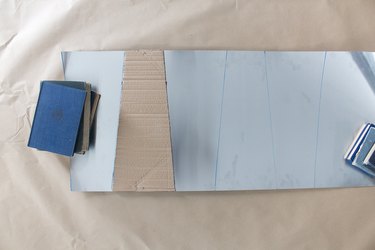
1. Trace the template
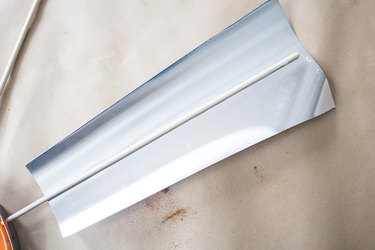
Unroll the aluminum sheet and weigh it down with heavy items, like books or cans, on each end to hold it in place. Cut a piece of thick cardboard to match the blade template. Place it on the aluminum sheet and trace around it using a permanent marker.
Video of the Day
Repeat this process 8 times to trace all of the blades. Alternate the top and bottom of the template to ensure you get the most use of the aluminum sheet.
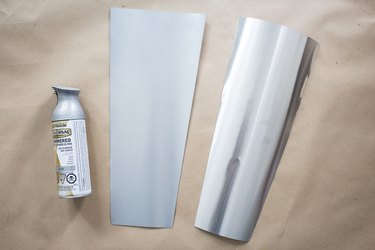
2. Score and separate the blades
Place a ruler on each drawn line and with a utility knife, carefully score the metal a couple of times. Continue this process until you have scored all eight blades.
Gently bend the aluminum sheet back and forth at each scored line until the blade breaks away from the sheet. Continue this process for all of the blades.

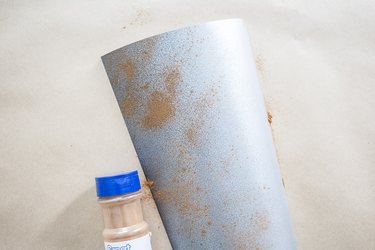
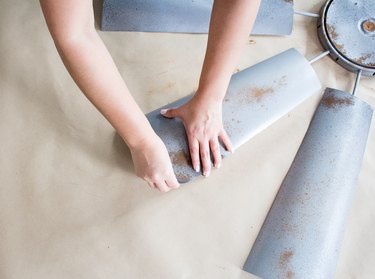
3. Spray paint the blades
Place all eight blades in a well-ventilated area and spray paint them. Although this step is not entirely necessary, the spray paint helps to achieve the aged look we're going for by dulling the shine from the aluminum.
This photo shows the difference between a spray painted blade (left) and one that is not spray painted (right).
4. Create the look of rust
While the spray paint is still wet, generously sprinkle cinnamon on the areas where you wish to simulate rust. This is another optional step, but it enhances the rustic appearance.
Once you are happy with the rustlike appearance, give the blade another quick light spray of paint. This will sandwich the cinnamon between the two layers of paint, ensuring that it's stuck in place.
Set the blades aside and allow them to dry completely.
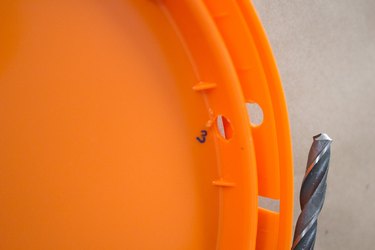
5. Mark the lid
Flip over the lid and on the underside, measure and mark eight points. These indicate the placement of the dowels.
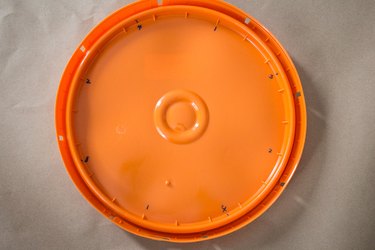
6. Drill holes in the lid
Drill a hole in each marked spot.
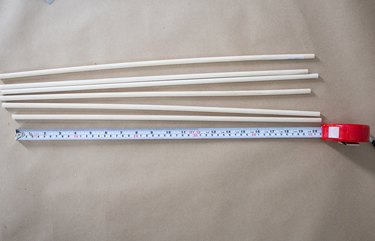
7. Cut the dowels
Cut the dowels to size. (These measured 20 inches in length.)
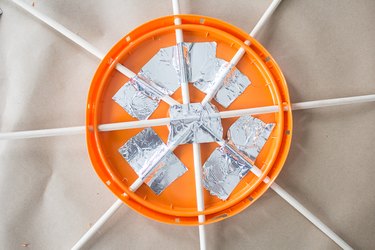
8. Insert the dowels
Feed each dowel through each hole.

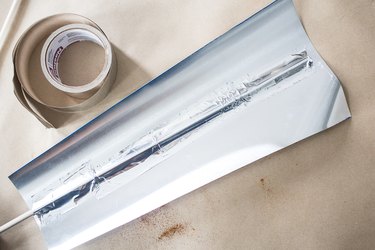
9. Secure the dowels
Secure the dowels in place with foil or duct tape.
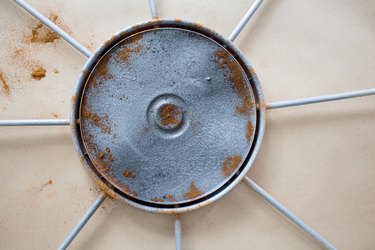
10. Paint and rust the lid
Place your assembled lid in a well-ventilated area. Spray paint the lid and create the look of rust, following steps 3 and 4 above. Allow it to completely dry.
11. Glue the dowels
Using a generous amount of hot glue, glue the dowel to the underside of each blade.
12. Secure the dowels
Secure the dowel to each blade with foil or duct tape for added security.
13. Bend the blades
If desired, you can gently bend the edges of the blades for a more aged effect.
14. Add more embellishments
For added realism and dimension, use brown and black acrylic paint to paint the dowels and the areas of the blades where you want to enhance the look of aged metal.

Hang your brand-new creation and admire your DIY wall art!