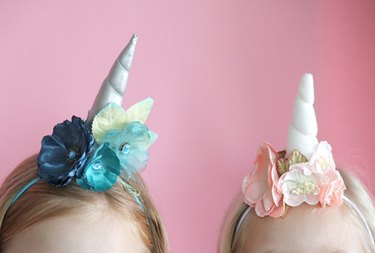
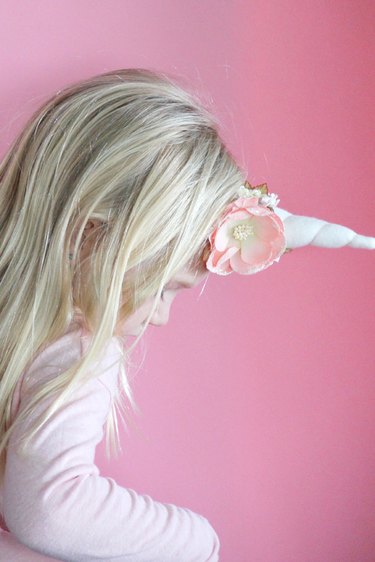
As the saying goes, "Always be yourself, unless you can be a unicorn. Then always be a unicorn." We couldn't agree more. With this DIY unicorn headband, you can finally let your true self run free. Download the free unicorn horn sewing pattern and add some whimsy to your next craft session. These headbands are a perfect addition to a Halloween unicorn costume or simply for little ones to wear while playing make-believe. You'll be amazed at how scrap fabric and a glue gun can create such magic.
Video of the Day
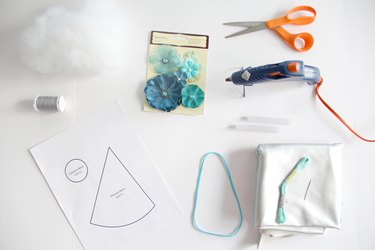
Things You'll Need
Free printable unicorn horn pattern
Scrap fabric
Coordinating thread
Scissors
Polyester fiberfill
Embroidery floss
Embroidery needle
Hot glue gun
Elastic no-slip headband
Craft flowers for horn base (optional)
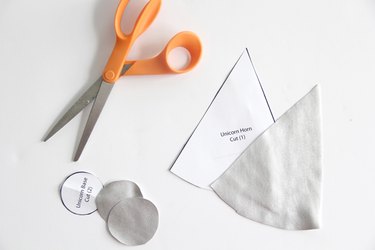
1. Cut out the pattern pieces
Print and cut out the pattern pieces from paper, cutting along the black pattern lines. Lay the paper pattern flat on top of the scrap fabric, and cut around it. You will cut 1 horn and 2 circle bases.
Video of the Day
Tip
The unicorn horn sewing pattern includes a 1/4-inch seam allowance.
2. Sew the unicorn horn
Fold the unicorn horn in half, right sides together, matching up the side seams. Pin the side seam from the tip of the unicorn horn down to the base. Sew using a 1/4-inch seam allowance.
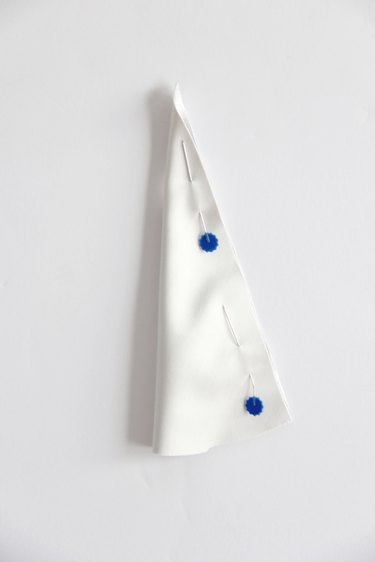
Trim the seam allowance to 1/8-inch away from the sewn line. If needed, cut the tip of unicorn horn, making sure not to cut through the sewn lines.

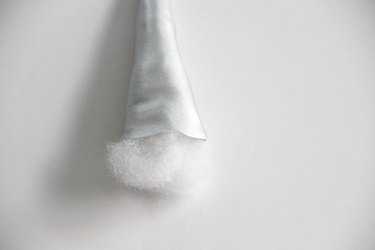
3. Add polyester fiberfill to the horn
Turn the unicorn horn right side out and use a blunt pointed object or your finger to push the unicorn tip right side out. Gently stuff the horn with polyester fiberfill until the horn is firm, yet squishy. Remove any excess polyester fiberfill from the bottom of the horn.
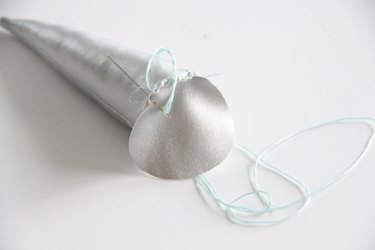
4. Sew the base to the unicorn horn
Place one circle base on the bottom of the unicorn horn, so that the right side of the base fabric is facing out. Using three strands of embroidery thread and an embroidery needle, whipstitch around the circle base, attaching it to the base of the unicorn horn. Continue all the way around the circle until the horn is completely closed.
Tip
A whipstitch is a quick method of hand sewing. Learn how to make a whipstitch using this tutorial.
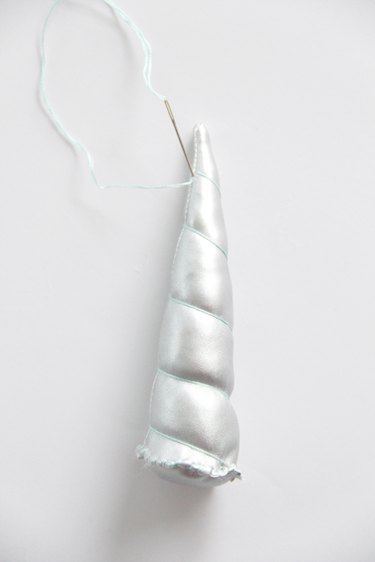
5. Create the swirled horn
With the excess embroidery thread, wrap the thread upward around the horn starting from the circle base until you reach the tip. Once you reach the top, simply insert the needle into the back seam and bring it down to the bottom. Tie a knot in the thread to finish, and cut loose ends.
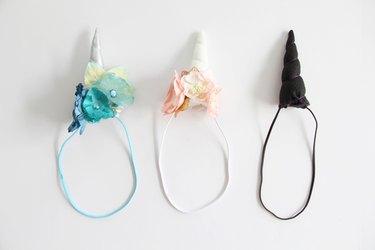
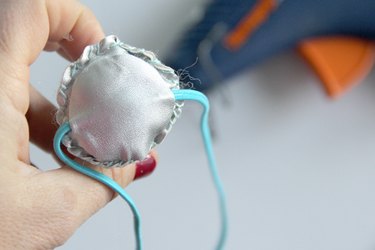
6. Attach the unicorn horn to the headband
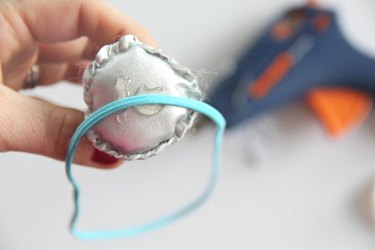
Apply hot glue to the base of your unicorn horn, and quickly attach the smooth side (the not-grippy side) of your elastic headband to the hot glue. Trim approximately 1/4 inch off around the entire circumference of your second circle base. Add a little more hot glue directly over your unicorn horn base and headband, and apply the second circle base (with the fabric side facing out) and press gently but firmly. Allow the glue to dry.
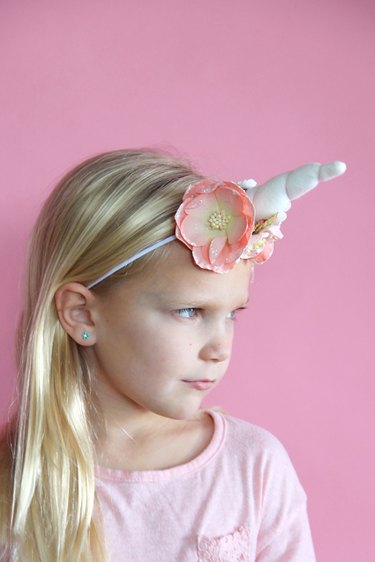
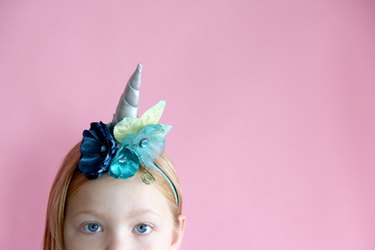
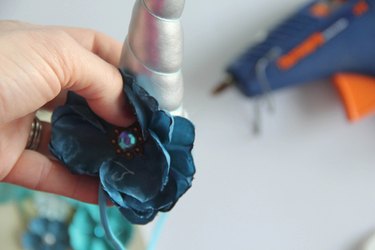
7. Add flowers to the unicorn horn base
For a little extra whimsy, add craft flowers to the base. Simply apply hot glue directly to the horn, where you want the flower to be. Press the back of the flower firmly but gently, and allow to dry.
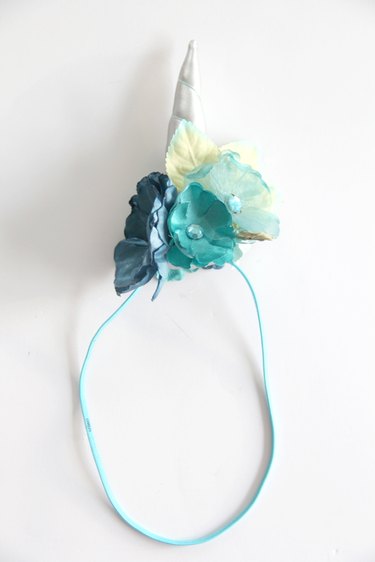
8. Ready to wear
To wear the unicorn headband, slip the no-grip headband around your neck, pulling all of your hair through the elastic. Then pull the elastic up and over the ears, placing the horn where you want on your forehead or on top of your head.