Things You'll Need
Lightweight cardboard
Pencil
Scissors
Craft glue
Washable marker
Duct tape
Felt
Ribbon
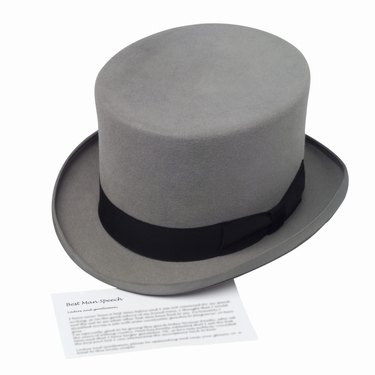
Top hats add a touch of class to formal attire, but can also be worn casually or even with costumes. Paired with a crisp tuxedo a top hat appears expensive, but can actually be made at home out of felt and cardboard. If you have a formal occasion to attend and want to top your attire off with a snazzy hat, cut your cost by making one at home.
Creating the Cardboard Hat
Step 1
Choose a height for your hat. A regular top hat will stand about five inches high. For a taller, Abe Lincoln style hat, you'll want the sides to be seven inches.
Video of the Day
Step 2
Measure and cut a piece of cardboard that is 30 inches long and either five or seven inches high, depending on your preference.
Step 3
Wrap the piece of cardboard around your head and make a mark on the long end where the hat feels most comfortable.
Step 4
Add one inch to your measurement and cut off the excess cardboard.
Step 5
Glue the ends of the cardboard, overlapping one inch, to create a cylinder.
Step 6
Set your cylinder on another piece of cardboard and trace around the outside.
Step 7
Cut out the circle.
Step 8
Cut out eight strips of duct tape that are one inch wide and three inches long.
Step 9
Set the top of the hat on the top of the cylinder and attach it with the tape strips.
Step 10
Place the hat on your head, allowing it to form to the shape of your head. Quickly remove the hat and set it down on another piece of cardboard.
Step 11
Trace around the cylinder once again.
Step 12
Add 2 1/2 inches all around the circle you drew and cut out the piece of cardboard. Then, cut out the inside circle. This will leave you with the brim of your hat.
Step 13
Attach the brim to the cylinder with six pieces of duct tape on both the inside and outside of the hat.
Adding the Felt
Step 1
Trace the brim of the hat onto a piece of felt twice with a washable marker and cut out both pieces.
Step 2
Attach the two pieces of felt to the top and bottom of the brim with craft glue. Allow to dry for 15 minutes.
Step 3
Turn the cylinder of the hat upside down and trace the top circle onto a piece of felt.
Step 4
Add 1/8 inch all around the circle and cut it out.
Step 5
Attach the felt circle to the top of the hat with craft glue and press firmly. Allow to dry for 15 minutes.
Step 6
Cut out a piece of felt to wrap around the sides of the hat, either seven or ten inches high, and 30 inches long. Wrap the felt around the hat and make a mark where it needs to be cut.
Step 7
Cut the felt to the appropriate length and then glue it to the sides of the hat. Make sure the ends slightly overlap.
Step 8
Measure a ribbon around the base of the hat and make a mark where the ends overlap.
Step 9
Cut the ribbon and glue it to the base of the hat to hide any space between the cylinder and brim.
Warning
Avoid using poster board as it is too flimsy and will not retain its shape.
Video of the Day