Things You'll Need
Measuring tape
Utility knife
2-by-4-inch foam boards
Jig saw
2-by-4-inch or 2-by-6-inch hardwood boards
1/2-inch plywood
Nail gun
Packing paper
Cardboard
1-inch wood screws
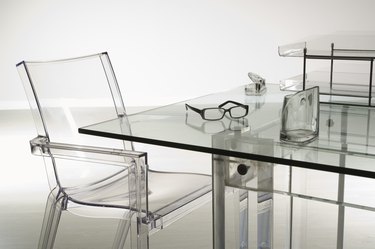
When it comes to moving or shipping glass, you need to be extremely cautious. Even if you use care in packing something fragile like a glass table top, accidents can happen. The best way to protect your glass table top is to build a crate for it. A crate will protect your table top from other objects that might bump against it and will also keep it cushioned on the inside to prevent breakage and cracks in the moving process.
Step 1
Measure the thickness of your glass table top using a measuring tape. If the table top is less than 3 inches thick you will use 2-by-4-inch boards to construct the frame for your crate. Thicker table tops may require 2-by-6-inch boards.
Video of the Day
Step 2
Use a utility knife to cut two pieces of 2-by-4-inch foam board to the length of the table top and two pieces to the width of the table top. You may want to add about a half inch to the length and width measurements to ensure that the table top fits. Arrange the pieces of foam in a square or rectangular shape by laying down the two length pieces so they are parallel then use the two width pieces to bridge the space between the ends.
Step 3
Measure the length of the foam frame and use a jig saw to cut two pieces of 2-by-4-inch or 2-by-6-inch hardwood using that measurement. Measure the width and cut an additional two pieces of 2-by-4-inch or 2-by-6-inch wood using that measurement. Arrange the pieces of wood in a square or rectangular frame so the sides of the wood are flush with the sides of the foam boards.
Step 4
Secure the four pieces of the wooden frame using nails from a nail gun. Drive the nails through the outside of the width pieces of the frame into the length pieces.
Step 5
Cut two sheets of 1/2-inch plywood using the length and width measurements of the completed wood frame.
Step 6
Lay the wood-and-foam frame flat on the ground and place one of the plywood sheets on top of it, aligning the edges. Use the nail gun to drive nails through the plywood into the wooden frame to secure it in place. Flip the frame over so the plywood lays flat on the ground.
Step 7
Wrap the glass table top in packing paper then sandwich it between two pieces of cardboard cut to the exact dimensions of the table top. Place the table top inside the wood-and-foam frame so the bottom layer of cardboard lies flat against the sheet of plywood.
Step 8
Fill any space between the top layer of cardboard and the top of the wood-and-foam frame with additional sheets of cardboard or foam. This will keep the table top from moving inside the frame which will reduce the likelihood of it breaking during the moving process.
Step 9
Lay the remaining sheet of plywood on top of the wood-and-foam frame and align the edges.
Step 10
Insert 1-inch wood screws through the top of the plywood into the wooden frame to secure the lid in place. Use one screw in each corner and additional screws spaced every 4 to 6 inches in between. After the move you will be able to remove the screws, take off the plywood lid and lift the glass table top out of the crate.
Video of the Day