S'mores Millionaire Bars Recipe: Layer-by-Layer Guide
By the end of this guide, you'll be able to build a s'mores millionaire bars recipe with clean, distinct layers that slice without collapsing and hold their shape from pan to plate. That outcome depends on three things: cooking caramel to the right temperature, freezing between incompatible layers, and chilling the slab fully before cutting. Get those right and the rest follows.
S'mores millionaire bars are a hybrid of two indulgent desserts. Classic millionaire's shortbread a British bar built on shortbread, soft caramel, and chocolate ganache (Scotch & Scones, earlier this year) gets remixed with campfire s'more flavors: graham cracker base, chocolate center, and toasted marshmallow. Delish describes the result as the best parts of a cookie and a s'more combined into a less messy handheld form (this week). That's accurate, but only if the layers hold.
Prerequisites: Candy thermometer, 8x8-inch baking pan, parchment paper, electric mixer. Build B additionally requires a kitchen torch (preferred) or broiler access.
Choose your build based on texture, timing, and presentation
Video of the Day
Two versions exist, and the right choice depends on when you're serving and what you want the experience to look like.
| Build A | Build B | |
|---|---|---|
| Structure | Shortbread → caramel → marshmallow buttercream → chocolate ganache → sea salt | Shortbread (top + bottom) → chocolate fudge → torched marshmallow creme |
| Best for | Gifting, transport, make-ahead trays | Dinner party, plated dessert, tableside finish |
| Slicing | Cleanest all layers set before serving | Clean after chilling, but pipe and torch right before serving |
| Closest to classic | Yes follows the s'mores caramel shortbread bars format most closely | Diverges more; closer to a fudge bar with torched topping |
| Marshmallow | Encased in ganache, no last-minute work | Piped and torched fresh, requires timing |
| Make-ahead window | Up to 3 days fully assembled | Up to 3 days or 2 months frozen (without marshmallow creme) |
If this is your first time making how to make s'mores millionaire bars work at home, start with Build A. The marshmallow is fully encased, nothing requires last-minute torchwork, and the bars travel. Build B is worth the extra step when the torched marshmallow finish is part of the occasion.
Video of the Day
S'mores millionaire bars recipe: Build A step-by-step
This is the full method for the stable, transport-ready bar. Each step connects to the next skipping the chilling or freezing stages is how layers bleed and bars collapse.
Step 1: Bake the graham cracker shortbread base.
Line your 8x8-inch pan with two pieces of parchment paper laid perpendicular, with overhang on all four sides. That overhang is how you lift the finished slab out cleanly for cutting (Scotch & Scones, earlier this year). Mix crushed graham crackers into your shortbread dough, press it evenly into the pan, and dock the surface all over with a fork. Bake at 350°F until lightly golden, about 20 minutes (Chocoholic Anonymous, 2024). Cool completely before adding the caramel adding warm filling to hot shortbread softens and displaces the base.
Step 2: Cook the caramel to temperature.
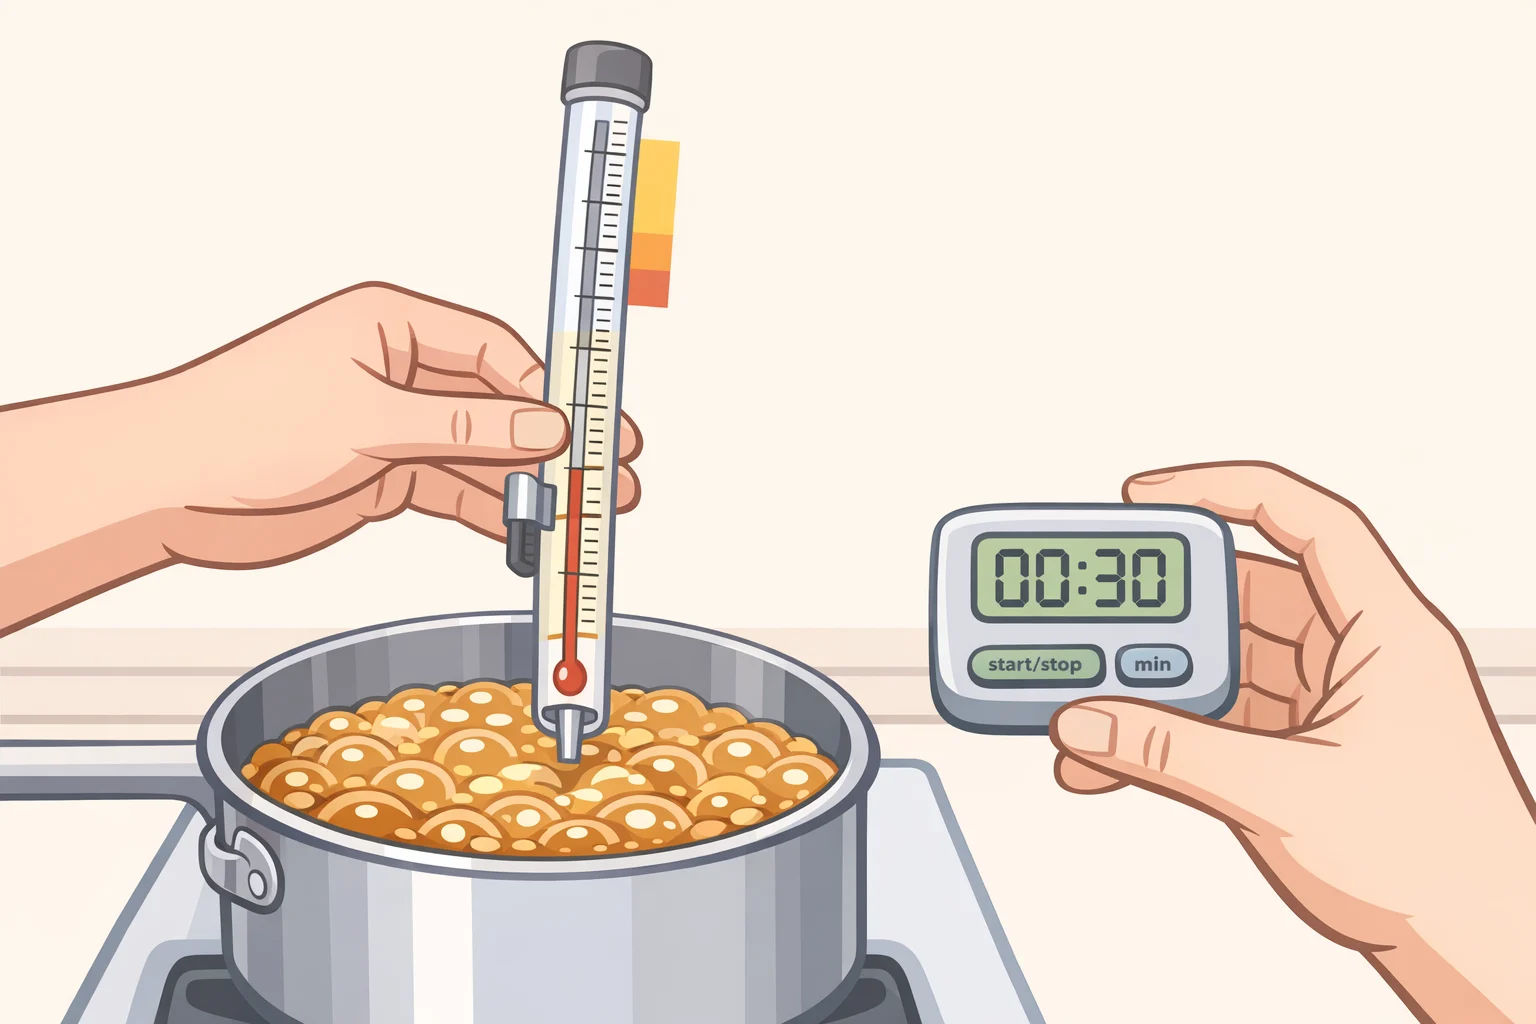
This is the step most batches get wrong. Target 238°F, the soft-ball stage at that point the caramel will be amber, thick, and pulling away from the pan sides, and the sugar syrup will have enough structure to set soft rather than stay liquid (Scotch & Scones, earlier this year). Expect about 20 minutes of active stirring. Use the thermometer as your primary indicator, not elapsed time or color alone. Once it hits temperature, pull from heat and let it cool to 200°F before pouring roughly 5 minutes. Pouring caramel still at full boil onto the shortbread risks softening or displacing the base.
⚠️ Caramel that doesn't reach soft-ball stage may not set properly under the weight of subsequent layers. If the caramel pours thin and stays glossy after cooling, it likely didn't reach temperature and the batch may need to be restarted.
Step 3: Pour caramel and chill until fully set.
Pour the cooled caramel over the shortbread in an even layer. Let it rest 15 minutes at room temperature, then refrigerate until completely firm at least 1 hour, longer is better. Press lightly with a fingertip to check: if the surface gives, keep chilling.
Step 4: Spread marshmallow buttercream, then freeze before adding ganache.
Spread the marshmallow buttercream evenly over the chilled caramel. Then freeze that layer for a minimum of 15 minutes the surface should be firm and matte before ganache goes on. Freeze the buttercream before the ganache. Otherwise the layers smear together and the visual separation disappears (Delish, this week).
For the ganache, use a butter-based formula rather than a heavy cream ganache. Butter softens the chocolate enough to cut cleanly without shattering (Scotch & Scones, earlier this year). Pour the ganache over the frozen buttercream and spread with an offset spatula. Finish with a pinch of flaky sea salt.
Step 5: Final chill, then cut.
Refrigerate the fully assembled slab for at least 4 hours overnight is better (Well Made by Kiley, last month). Lift out using the parchment overhang, place on a cutting board, and use a sharp chef's knife wiped clean between each cut. Cold bars cut; warm bars drag and compress. Pull from the fridge, cut immediately.
Build B step-by-step: the torched marshmallow version
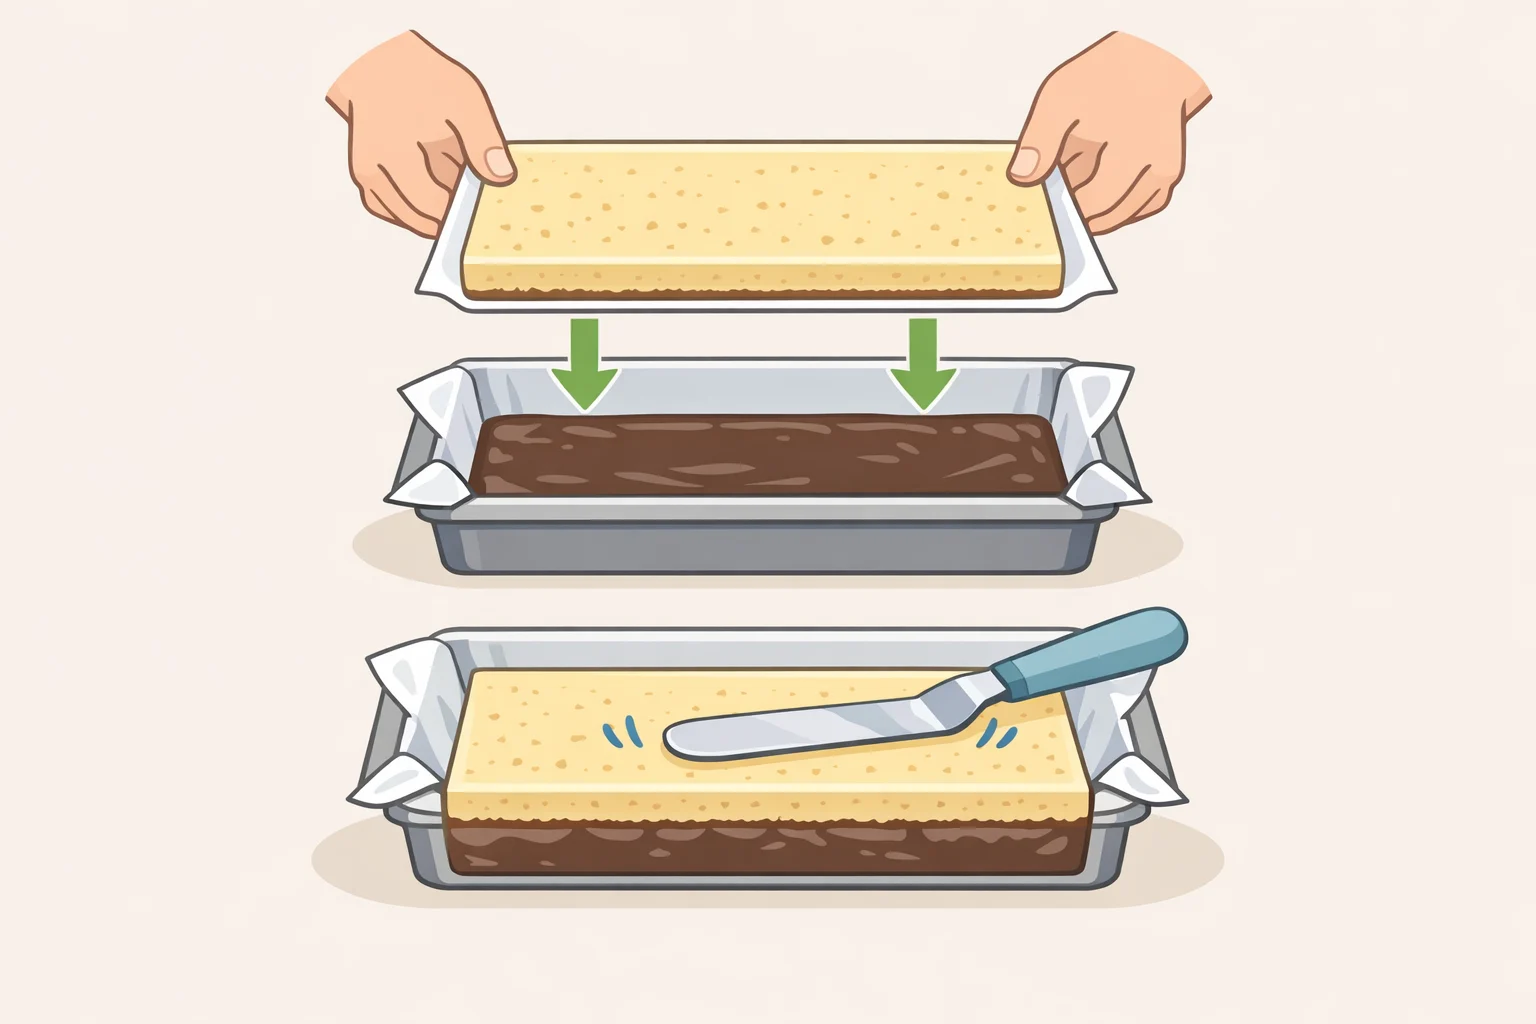
Build B diverges from Build A after the shortbread. The structure: graham cracker shortbread (two layers, top and bottom) → chocolate fudge → torched marshmallow creme. The marshmallow goes on last, right before serving.
Step 1: Bake the graham cracker shortbread base and prepare the top layer.
Same pan setup as Build A. Before pressing dough into the pan, divide it into two equal portions. Press the first half into the lined pan and bake as above. Spread the second half onto a parchment square traced to the pan's 8x8-inch dimensions and freeze it while you proceed. A frozen shortbread layer transfers onto the fudge as a solid slab; room-temperature dough crumbles when you try to lay it flat (Well Made by Kiley, last month). Keep it in the freezer until you need it.
Step 2: Make the chocolate fudge filling.
A combination of semi-sweet and milk chocolate produces a filling that reads as rich chocolate without overpowering the marshmallow layer (Well Made by Kiley, last month). Melt, stir until smooth, and pour over the cooled shortbread base.
Make-ahead note: the fudge can be made up to 3 days ahead and refrigerated in an airtight container (Well Made by Kiley, last month).
Step 3: Place the frozen top shortbread layer and chill.
Retrieve the frozen shortbread from the freezer and lay it directly onto the poured fudge, pressing lightly to level. Refrigerate for at least 4 hours or overnight the bars need to be completely firm before cutting and topping (Well Made by Kiley, last month).
Step 4: Make the marshmallow creme and torch. Do this close to serving time.
Whisk egg whites, sugar, cream of tartar, and a pinch of salt in a heatproof bowl over a double boiler until the mixture reaches 160°F that temperature pasteurizes the egg whites and produces a stable, pipeable creme (Well Made by Kiley, last month). Off heat, beat on high for 5-7 minutes until the creme holds stiff, glossy peaks that don't slump. If it looks thick but droops when piped, keep beating.
Cut the chilled slab into bars first, then pipe marshmallow creme onto each. Torch immediately. A kitchen torch gives the most control; a broiler works but requires 1-2 minutes maximum with constant attention it goes from golden to burned in seconds (Well Made by Kiley, last month). Serve right away. Assembled Build B bars with marshmallow topping keep up to 3 days refrigerated, but the torched finish is best fresh.
Make-ahead planning and storage
Both builds suit advance preparation. The difference is where you draw the line.
For Build A: a practical working window is 3 days refrigerated before serving. The classic millionaire's shortbread base without the marshmallow component keeps up to 7 days (Scotch & Scones, earlier this year), but the buttercream and ganache shorten that window considerably.
Build B bars, without the marshmallow creme applied, can be refrigerated up to 3 days or frozen up to 2 months (Well Made by Kiley, last month). Thaw overnight in the refrigerator, rest at room temperature 10-15 minutes, then pipe and torch fresh creme right before serving.
A three-day staged build works well for either version: bake shortbread on day one, add and chill the filling on day two, complete the chocolate layer and final chill on day three (Scotch & Scones, earlier this year). The active time across all three days totals roughly 45 minutes; the rest is hands-off.
Scaling up for a large batch: Chocoholic Anonymous uses a 9x13-inch pan for a related graham cracker millionaire bar recipe that yields 48 pieces or 96 bite-size triangles when halved diagonally (2024). That pan size applies to a different build from the one in this guide; treat it as a separate adaptation reference rather than a straight scale-up. Bake times, layer thickness, and ratios will all differ from the 8x8 default here, so test it as a standalone batch before committing to event prep.
Troubleshooting: four failures and their fixes
Caramel that never sets. Visible sign: caramel stays glossy and soft after an hour of refrigeration, indents easily under pressure. Cause: may not have reached soft-ball stage. Fix going forward: use the thermometer as your primary indicator. If you're already past this point and the layer hasn't firmed up, the batch likely needs to be restarted.
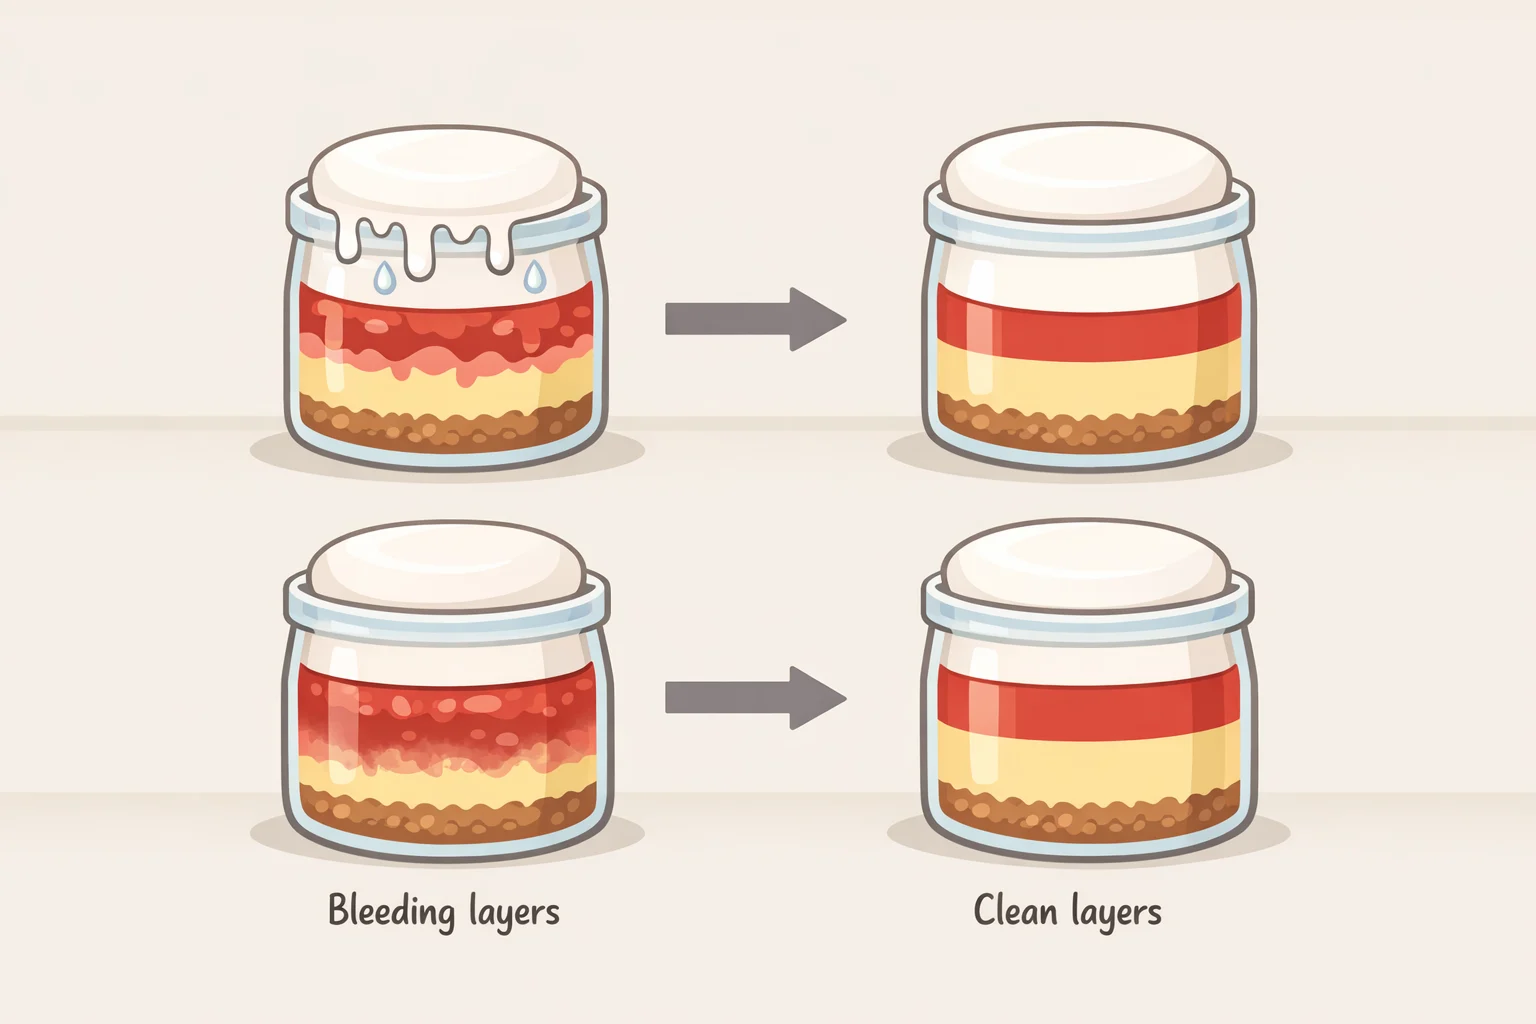
Bleeding layers in Build A. Visible sign: ganache and buttercream merge into a murky band with no clean separation. Cause: ganache was poured onto soft or tacky buttercream. Fix: freeze the buttercream until the surface is firm and matte not just cool before the ganache goes on. The 15-minute minimum is a floor (Delish, this week).
Crumbled top shortbread in Build B. Visible sign: the second shortbread layer cracks or breaks when placed onto the fudge. Cause: dough wasn't frozen solid before transfer. Fix: freeze the top shortbread layer until it moves as a rigid slab. If it bent or crumbled during placement, press it gently back into shape and chill the fudge will hold it in place once set (Well Made by Kiley, last month).
Marshmallow creme that weeps or collapses in Build B. Visible sign: piped creme slumps immediately and pools around the bar rather than holding its shape. Cause: egg whites weren't heated to 160°F, or weren't beaten long enough to reach stiff peaks. Keep beating a creme that looks thick but droops hasn't built enough structure. Add to bars only when peaks hold firmly, and torch immediately after piping (Well Made by Kiley, last month).