How to Paint Denim Overalls: Layout, Design, and Patches
If you want to know how to paint denim overalls without ending up with a visually crowded result, the answer starts with three decisions made before any paint is mixed: where the focal image goes, where text lives, and what stays blank for signatures. Get those right and the execution is largely a matter of following sequence.
This guide covers the full process: sketching a layout, taping off the design area, mixing acrylic paint with fabric medium, and painting in the correct order. There's also a short section on iron-on patches for anyone dealing with damage or wanting a no-paint option. The painting steps draw on a DIY painted overalls tutorial built around beginner-friendly shapes. That's the standard throughout: achievable, not a test of artistic ability.
Senior overalls, the graduation tradition of covering denim in painted art, class years, and friend signatures, are one common version of this project. The steps apply to any custom painted overalls, senior or otherwise.
What you'll need before starting:
- Clean, dry denim overalls
- Acrylic paints: white, black, blue, green, yellow (add magenta for peach or blush tones)
- Fabric medium
- Scotch tape
- Brushes: large mop, small mop, liner, and the thinnest detail brush you own
- Light pencil for layout sketching
- Iron-on patches, protective cloth, and a hot iron (for the optional patch section only)
Step 1: Map the layout before picking up a brush
Video of the Day
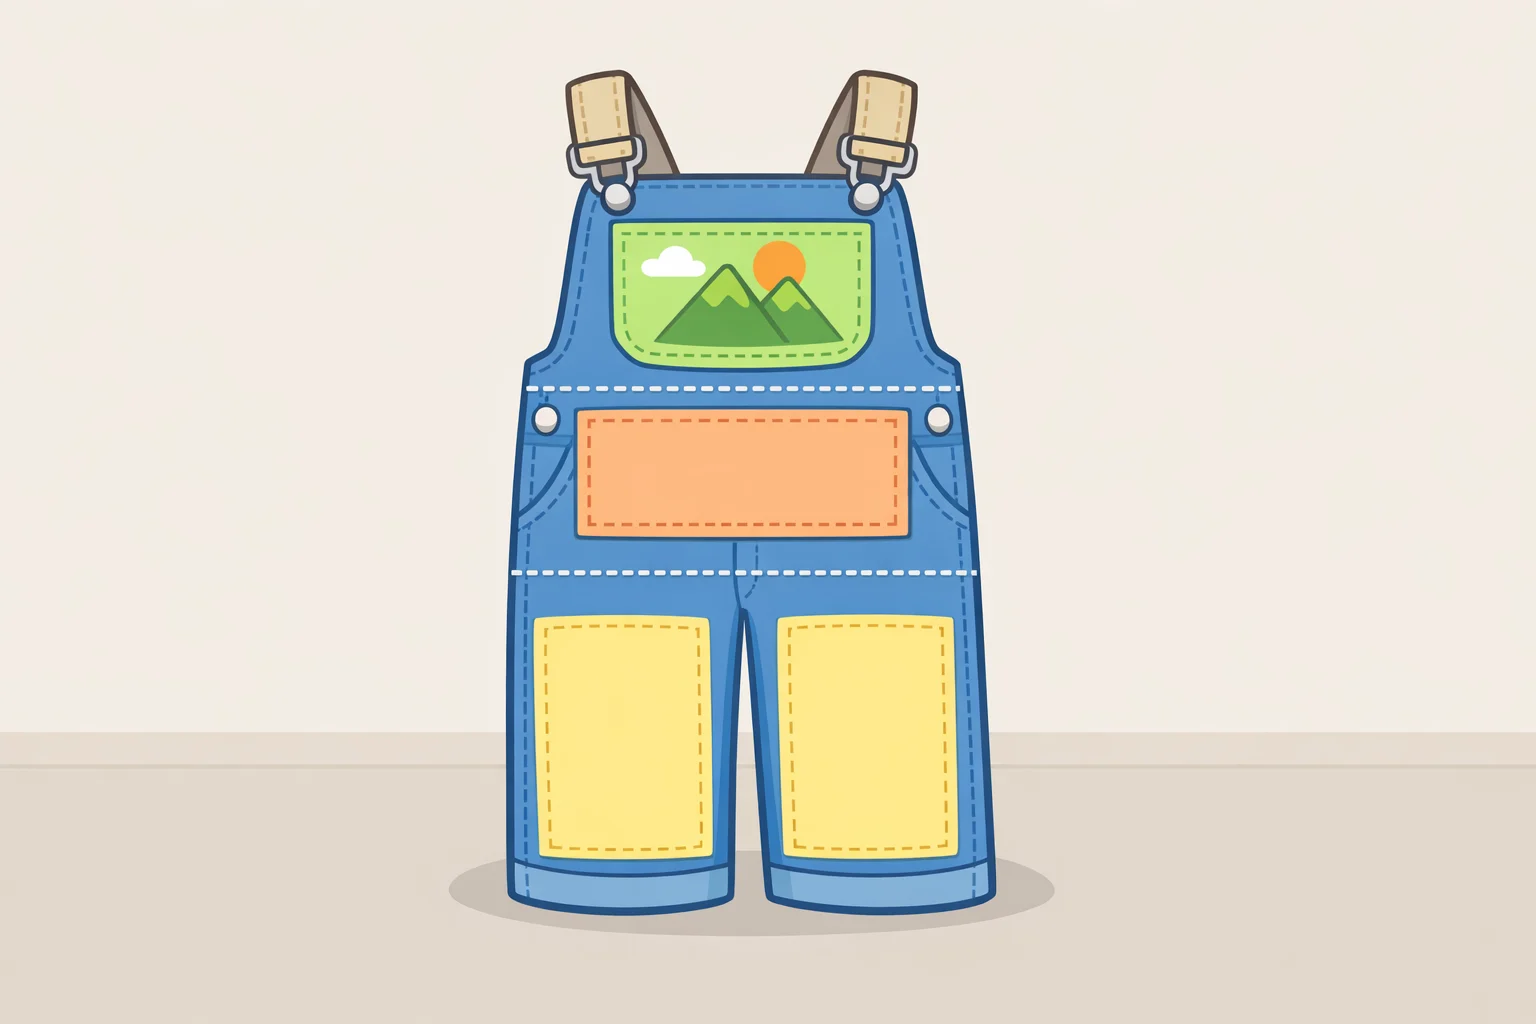
The most important decision on a painted overalls project happens before any paint is mixed. Overalls have usable zones: the bib pocket, the bib panel surrounding it, the front leg panels, and the back pockets. Assign each zone a role before painting. That's what separates a garment that looks designed from one that looks covered.
A practical layout uses exactly three zones. One focal image. One text area. One space reserved for signatures. That's enough.
A decision framework, in priority order:
- Focal image on the bib pocket one clear motif rather than several competing shapes
- Graduation year or name on the bib panel or a back pocket text needs its own zone to stay legible
- Signature space on one or both leg panels leave it completely blank and add it last, after a signing event
- Supporting patches or accents optional; only if space remains and they share at least one color with the main design
If zones one and two feel full, stop there. A bib design and a year in a back pocket is a complete look. Cramming in more doesn't improve it.
Sketch the layout in light pencil before taping anything. Keep lines faint. Pencil on denim doesn't fully disappear, so marks outside painted areas will remain visible on the finished garment. Before committing paint to the main panels, test your acrylic-plus-fabric-medium mix on a hidden seam or hem. It confirms the ratio is right and the color reads the way you expect.
Video of the Day
Step 2: Tape the design area
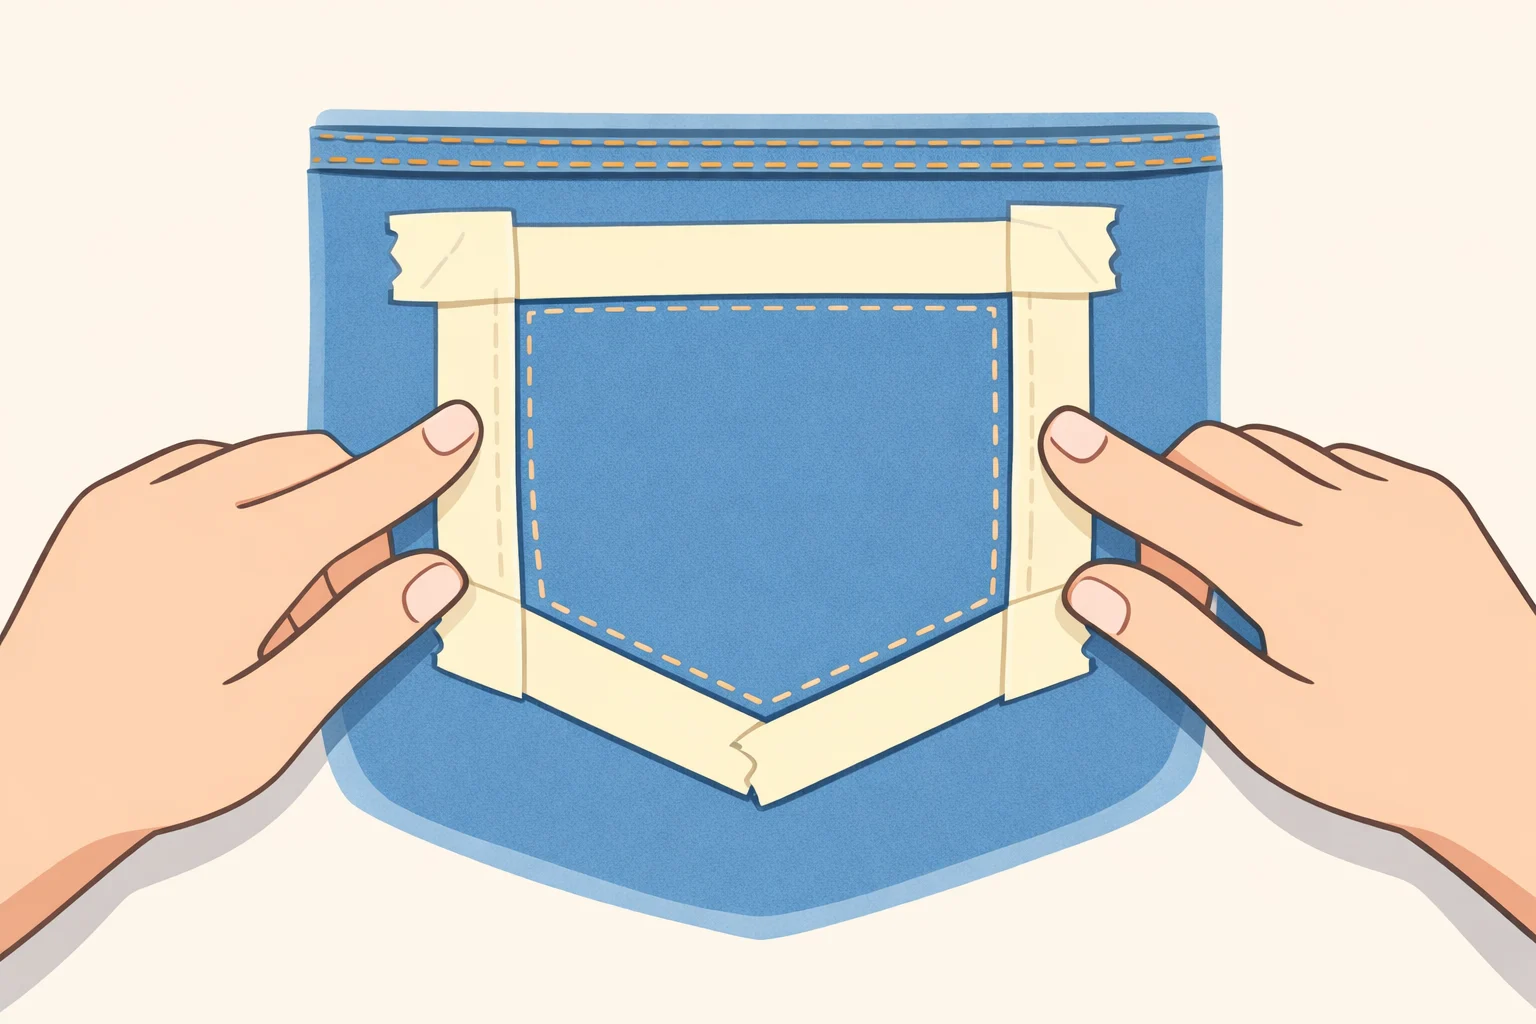
Tape the perimeter of the bib pocket, or whichever zone you're painting first, before mixing any paint. The acrylic-on-denim tutorial is direct on this: tape gives the pocket a hard edge and produces the crisp borders that make a simple design look deliberate. Once the tape is down, press every edge firmly with fingernail pressure along the full length. Loose edges let paint seep underneath and undo the border entirely.
Denim's woven texture makes smooth freehand lines genuinely difficult, as the same tutorial notes. Tape solves that problem regardless of hand steadiness.
If your overalls have any synthetic content, test a small tape section on an inconspicuous area first to confirm it adheres flat before taping the full design zone.
Step 3: How to paint overalls with fabric medium
Mix equal parts fabric medium into each acrylic color before painting. The tutorial specifies this ratio, and it applies to every color, every time you load the palette.
Acrylic dries fast. If a color stiffens mid-session, add fresh paint and fresh medium rather than trying to revive what's already there. The tutorial demonstrates this with black paint that dries out partway through; a fresh mix is the fix.
Palette setup: lay out background colors (white, black, blue, green, yellow) in one area. Keep motif colors (magenta, extra yellow, white for peach or blush tones) separate. Mix shades on the palette before they go on the fabric. Wet-on-wet mixing directly on denim muddies the result.
Step 4: Paint in sequence background first, then shapes, then details
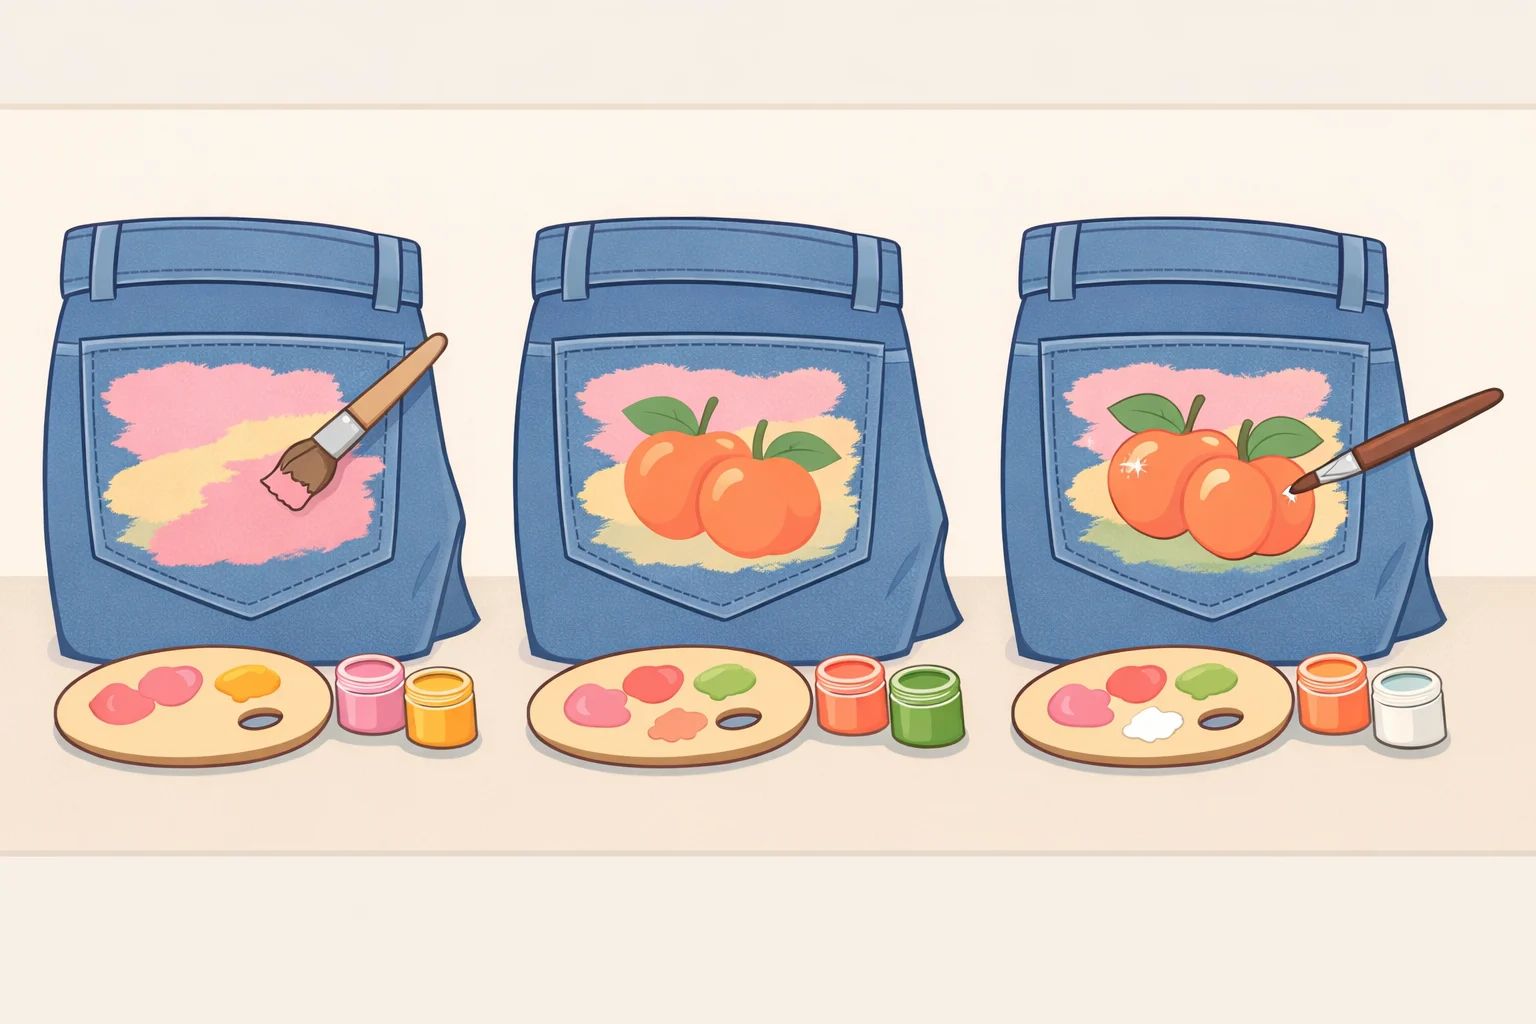
The right order is background first, then main shapes, then shading and highlights, then fine-line detail. Each layer needs a stable surface under it. The tutorial stages the process in exactly this order; the specific motifs (peaches and daisies) are examples, but the sequence transfers to any design with similar structure.
Background: Load the large mop brush and apply background colors using a dabbing motion, not brushstrokes. Colors touching on the palette are fine; they blend together. Dabbing produces a more natural, organic surface, as the tutorial notes, and works with denim's texture rather than against it.
Main shapes: Keep forms rounded and forgiving. The tutorial describes peach shapes as "blobs" and leaves daisy petal count as a free choice. Both are deliberate decisions that lower the skill barrier. Use the small mop brush for the base coat of each shape, starting with the lightest tone. Layer progressively darker tones for shadow, then add highlights in yellow and white on top.
Foliage: Switch to a liner brush. Paint leaf clusters of four to five leaves each, connected by a stem. Mix a little more yellow into the light green for highlights; mix a little black in for shadow. Leaf veins use the thinnest brush you have: one line down the center, a few branches off each side. The tutorial treats foliage detail as optional but notes it helps pull the picture together.
Knowing when to stop: Once the main motifs and daisies are finished, the tutorial states explicitly that everything beyond peach stems is optional. The design holds without it. When the shapes read clearly and the colors are balanced, the work is done. Overworking a simple design is easier than underworking it.
Fine-line details and text: Switch to the thinnest liner brush. Trace any penciled guidelines for names, years, or other text. Denim's texture will interrupt very fine lines; some irregularity comes with the material and is expected.
Let each layer dry fully to the touch before adding the next. When the painting is complete and fully dry, peel the tape back slowly at a low angle.
Optional: iron-on patches for repairs or as a no-paint alternative
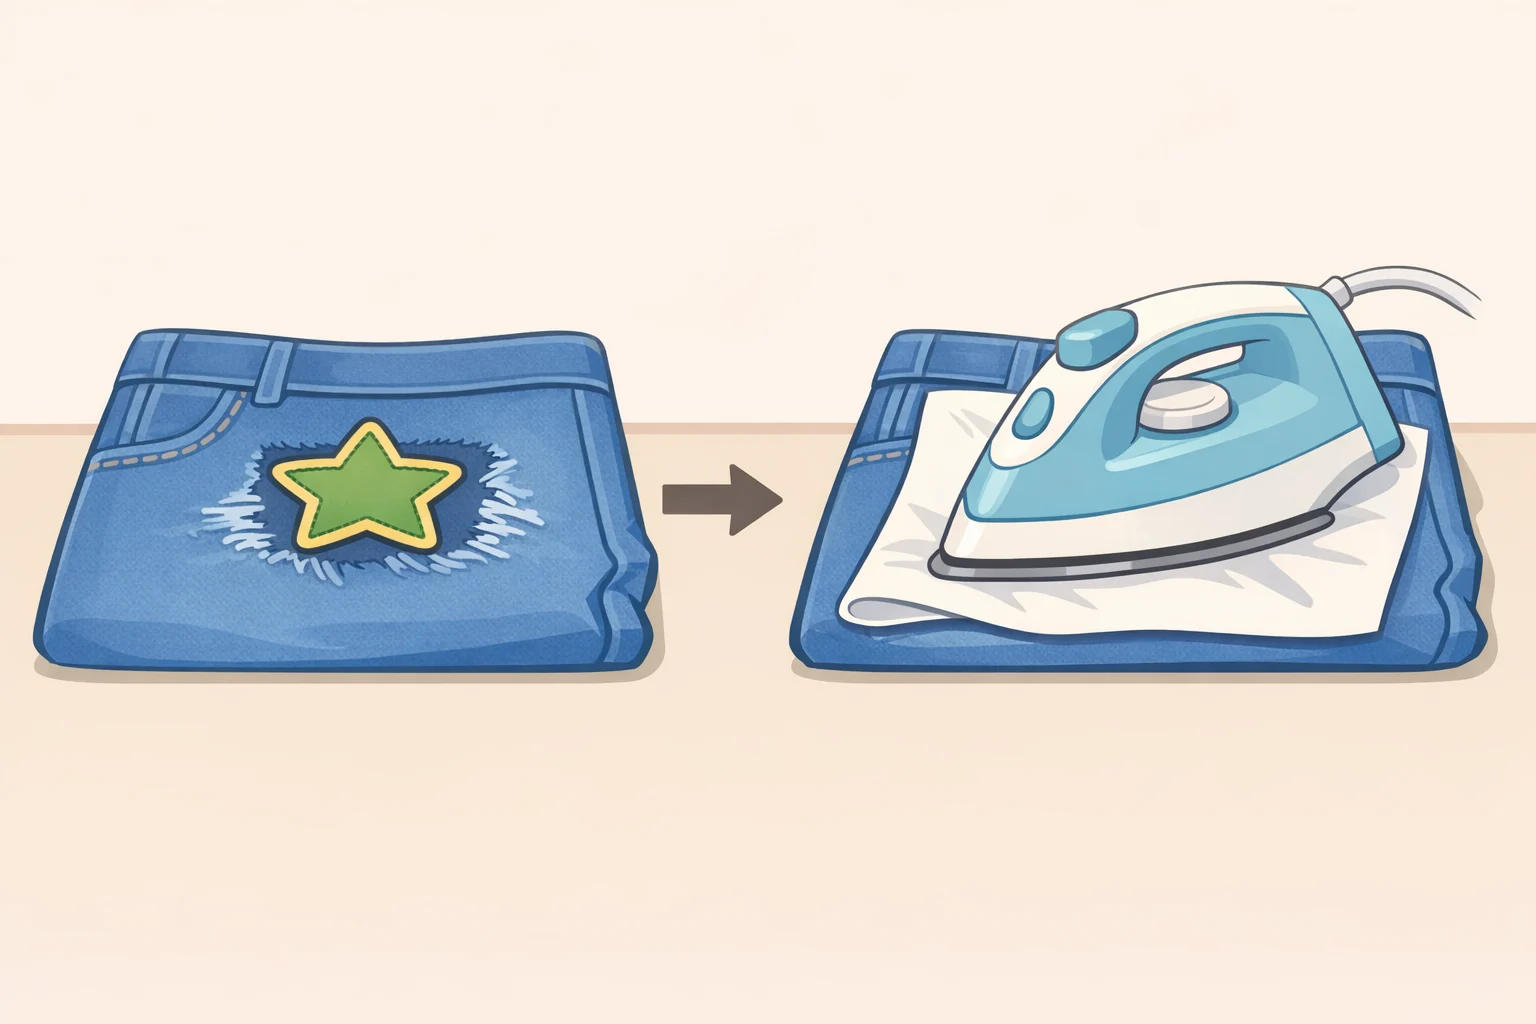
Skip this section if the overalls are in good shape and painting is the plan. This is for overalls with a pull, a stain, or a worn spot that paint won't cleanly cover, or for anyone who wants to skip painting entirely.
A patch tutorial demonstrates the process: position the patch over the damaged area, lay a protective cloth over it, then press with a very hot iron until the adhesive bonds. The tutorial uses a donut patch to cover a small pull and a coffee patch to cover a stain cosmetic fixes that read as decoration rather than repair.
Three things to get right:
- Position before ironing. Once the adhesive sets, moving the patch means reheating it, which weakens the bond.
- The protective cloth is not optional. Direct iron contact damages most decorative patch surfaces.
- Check the care label first. Confirm the fabric composition before applying high heat, particularly with any synthetic-blend overalls.
Patches on leg panels can share a color with the bib painting to visually connect the two elements. They can also stand alone as the sole decoration on a pair that never gets painted at all.
What a finished design needs
One focal image on the bib. One text element in its own zone. One signature space left blank. Two or three colors pulled consistently across the full garment.
Start by painting the bib pocket only, then let it dry completely before continuing. If the scale works and the colors read the way you expected, proceed to the other zones. If something feels off at the pocket stage, the adjustment costs an hour, not an entire project. The layout decision made before tape goes down and before paint is mixed is where the result is either set up or undermined. Everything after that is execution.