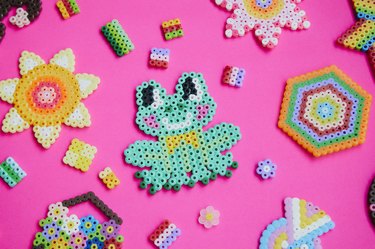
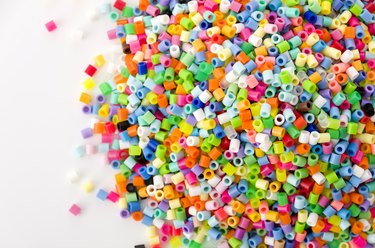
Perler beads (aka fuse beads, Hama beads or melty beads) made their debut in the 1980s, but they've re-entered the crafting spotlight in recent years. You probably recognize these beads—they are tubelike, feature a large hole in the center and are made from bright plastic. Beads are often placed onto spiky pegboards to create fun designs and patterns, then ironed to fuse (or melt) them together.
The result is a solid image that appears pixelated, similar to diamond art and cross-stitch. Perler beads are used to make key chains, ornaments, bookmarks, fridge magnets and just about anything in between. And while they're a hit with kids, they're also popular among creative crafters and artists who use Perlers to make everything from tissue boxes to wearable dresses.
Video of the Day
Video of the Day
If you're looking for a crash course in all things Perler, we've got you covered. Ahead, we'll dive deeper into this craft, sharing more about supplies you'll need to get started and tips for fusing beads into your dreamiest designs.
Part 1: Perler Bead Craft Supplies: What You'll Need
Whether you plan to pick up your own supplies or purchase a fuse bead art kit, it helps to have a good idea of what's required for a project before diving in. The good news? Perler bead crafts don't require many extra supplies. Still, there are a few must-haves for your pixelated works of art.
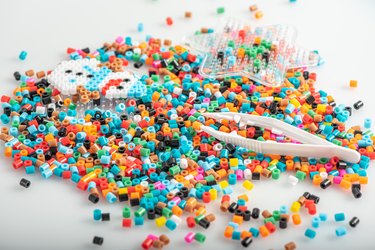
1. Fuse beads
Fuse beads are, unsurprisingly, the most important craft supply you'll need for this trend. Beads are available in a variety of colors and can often be purchased in rainbow or single-color packs. If you choose to create a Perler bead project with a craft kit, the kit should include beads in all necessary colors.
2. Pegboards
In addition to fuse beads, pegboards are a must for Perler projects. While you can technically create fuse bead projects without them, Perler bead pegboards feature tiny spikes that slip through the center of beads and hold them in place, making it easier to get a nice, even fuse while ironing. Pegboards also come in various shapes, which can help guide you and inspire designs.
3. Parchment paper
To fuse beads, you'll need a layer between the plastic beads and iron to protect your project from overheating and your iron from melted plastic. The best barrier is parchment paper, typically used for baking. This paper won't stick to the iron or beads, making it an ideal option for sealing work.
4. Iron
If you plan to set your beaded creations with an iron, you'll need one that can reach a medium setting. A regular clothing iron will typically do the trick, but if you want something specifically tailored to your craft arsenal, a miniature one like the Honoson Mini Heat Press (which comes with an adorable watermelon trivet) is a popular choice.
5. Tweezers
Fuse beads are on the small side, which means they're a bit tricky to pick up and place. To make this process easier, consider adding a pair of tweezers to your craft supply list. Any tweezers will do—including old eyebrow tweezers—but if you want something designed specifically with beads in mind, the Perler Beads Bead Tweezers are excellent.
Part 2: Where to Find Perler Bead Patterns
Following a Perler bead pattern or design can make Perler beading a little less daunting. In craft kits—such as the Perler Fuse Bead Activity Kit Cupcakes & Butterflies—pegboards are often designed in specific shapes (including hearts, stars or even something more intricate, such as a person), making the design process easier. Some beginner craft kits also come with simple Perler bead patterns.
Tip
If you wish to make a custom design but don’t know how to start, you can use a free app like Beadifier to turn photos into a custom fuse bead pattern. From dog portraits to still lifes, this provides you with even more ways to get creative.
For more variety, we often turn to Etsy, which is our favorite place to shop for patterns in general—whether it's for sewing, crocheting, knitting or creating Perler bead magic. From adorable fruits and veggies to Disney princesses to Peppa Pig, there are lots of fun pattern printables and templates to choose from. In addition to flat bead patterns, Etsy also has incredible three-dimensional Perler bead patterns, such as this tiger tissue box or these trendy mushrooms.
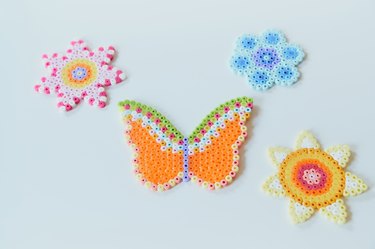
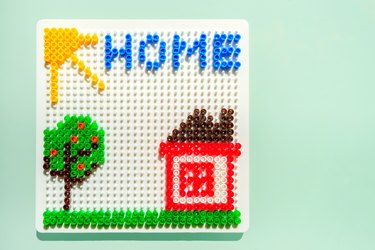
4 Perler Bead Craft Ideas
There are countless Perler bead project options, including key chains, bookmarks, necklaces, tissue boxes and pixelated works of art. You can even make 3D sculptures with beads! Whether you are looking for a fun DIY gift idea or want to create trendy home decor, you can do so with plastic beads, a pegboard and an iron. Here are some of our favorite fuse bead craft kits to help you get started.
1. Perler Multi Mix Assorted Fuse Bead Bucket; $14.70 at Amazon
If you want to stretch those creative muscles and try your hand at a variety of projects, the Multi Mix Assorted Fuse Bead Bucket from Perler provides versatility in designs and Perler bead ideas. This kit comes with 6,000 plastic beads in assorted colors, plus five pegboards (including squares) that allow you to make everything from fridge magnets to coasters.
2. Fuse Beads Sweet Treats Kit; $24.99 at Amazon
This kit includes everything you need—including square pegboards, tweezers, Perler beads and templates—to create adorable designs inspired by sweet treats that can then be used as pendants for a variety of projects.
3. Nekonekoya Famous Paintings 3D Perler Bead Pattern Tutorial; $15.74 at Etsy
For a more adult-friendly Perler bead craft, consider this tutorial, which demonstrates how to create three designs based on Under the Wave off Kanagawa by Katsushika Hokusai, The Starry Night by Vincent van Gogh and A Thousand Li of Rivers and Mountains by Wang Ximeng. The digital download provides step-by-step instructions for making these 3D masterpieces.
4. Perler Beads & Pattern Kit Floral Fox; $9.99 at JOANN
This particular Perler bead kit illustrates how to create pixelated art in the form of an adorable fox with a flower crown. Perfect for those who already have some pegboards on hand, the kit includes a pattern and all coordinating colors to complete the work of art.
Part 3: How to Set Perler Beads with an Iron
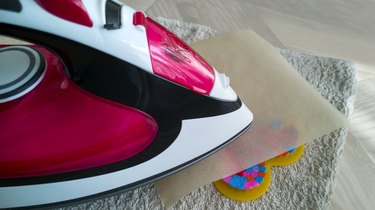
Without setting and fusing Perler beads, they won't stick together to create solid forms. The most common way to set Perler beads is to use parchment paper and an iron. Place parchment paper on top of your pegboard with beads in place—and don't skip this step! Parchment paper prevents plastic beads from sticking directly to the iron, which can ruin both the iron and the Perler bead project.
Place a heated iron atop parchment paper and move iron around in circular motions for 10 to 15 seconds. The iron setting for Perler beads is typically medium heat, but if you wish to be more cautious, try a lower setting—just keep in mind that it might take longer for the beads to fuse. Regardless of the iron's setting, it helps to check the fuse progress every few seconds as heat distribution and melt rate can vary depending on the iron.
Tip
If the iron has a steam setting, be careful not to use it. While steam ironing is great for garments, it could damage your plastic bead project.
Part 4: How to Set Perler Beads Without an Iron
To set Perler beads without an iron, place a sheet of parchment paper on a baking sheet, then add beads in your preferred design (not on top of a pegboard). Preheat oven to 300°F and place baking sheet in the oven. Allow beads to warm up for a few minutes and remove once they've melted together.
Tip
Time spent in the oven can vary, so it’s best to turn on your oven light and keep an eye on the project.
Now that you're up to speed on Perler bead basics, methods and project ideas, it's time for the fun part: making your own Perler bead projects! Whether you're creating something for yourself, whipping up a few gifts or simply embracing nostalgia, this colorful craft is a blast.