Crafting truth #482: Polymer clay is one of the best craft supplies to keep on hand because it's so amazingly versatile. From Etsy-inspired clay earrings to dollhouse accessories, polymer clay (i.e., oven-bake clay) is a real DIY dream. And we have a wearable project we think you'll heart: Love-themed polymer clay barrettes made with vibrant colors and sweet shapes just in time for Valentine's Day and beyond.
Never worked with polymer clay before? Have no fear! We'll walk you through creating DIY hair accessories that are perfect for yourself or a loved one. Best of all, once you've tackled this polymer clay project, you've opened the door to so many others. A whole world of creativity awaits, so grab your clay and get to making!
Video of the Day
Video of the Day
Things You'll Need
Polymer clay in red, light pink, hot pink, white, tan and purple (Fimo clay also works well)
Hot glue gun and sticks (you can also use super glue or E6000)
Ruler (optional)
An oven that reaches as low as 275°F
How to Make Polymer Clay Barrettes:
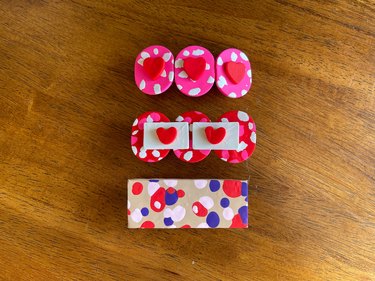
1. Select clay colors and cutters
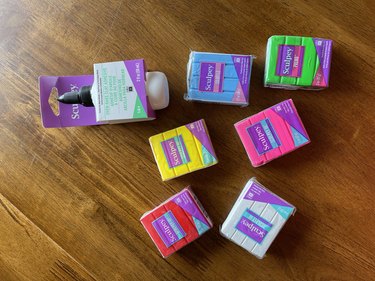
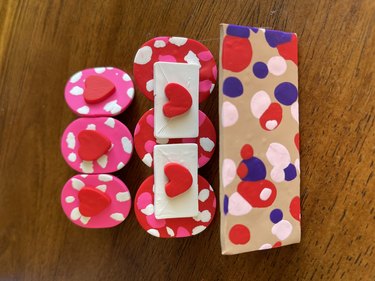
For this project, we created a terrazzo-inspired bar clip along with two other barrettes with Valentine's Day vibes, so reds and pinks stole the show. We used polymer clay cutters from the Sculpey Premo mini metal cutters and YXCLIFE mini cookie cutters sets along with mini circle clay cutters.
Wait! What's Terrazzo?
Not familiar with terrazzo? You've probably seen it more times than you realize. Terrazzo refers to a material, typically used for flooring, that contains specks and pieces of other materials. Think: a solid base dotted with pieces of marble, sparkly quartz or granite. One famous example is the Hollywood Walk of Fame, which consists of terrazzo tiles.
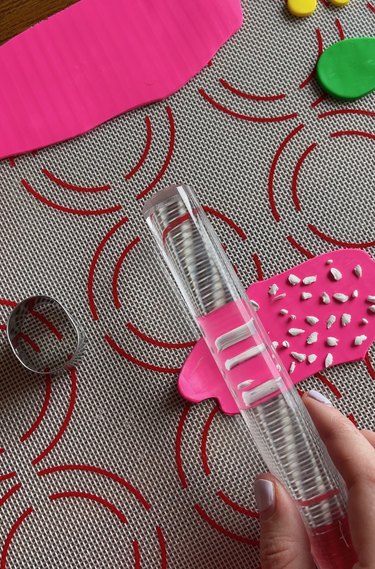
2. Roll out clay and cut designs
Start by breaking off a section of the clay brick using perforated lines to guide you. Then, use your fingers to mush the clay together and make it a little more workable before placing it inside the rolling machine (which works much like a pasta-making machine) to create a flat surface with even thickness. Place the cutter atop the clay and push down to slice—just like making cookies! Follow these steps for all clay shapes.
To create that terrazzo look, roll out a piece of pink clay and use your fingers to pick off tiny pieces of white clay. Sprinkle white pieces atop the pink clay slab at random and use an acrylic rolling pin to embed them into the surface. For a more colorful look, sprinkle white and pink clay flecks onto a red clay slab. With the terrazzo intact, reach for the oval cutter and cut three ovals from each slab.
For the Valentine's Day envelopes, use either a small rectangle cutter or a craft knife to cut the envelope shape from a plain white clay slab. Next, gently mark two diagonals at the top of each rectangle without cutting all the way through to create the illusion of an envelope flap. Cut out two mini hearts from the leftover red slab to place on the white envelopes (for the first barrette) and three medium red hearts to place in the center of the three ovals (for the second barrette).
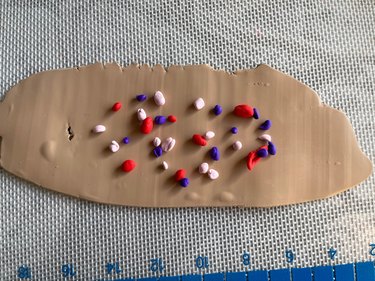
Repeat the terrazzo steps for the bar barrette by rolling out a tan clay slab and sprinkling light pink, red and purple on top. Then, roll the pieces into the slab so it becomes one piece. To cut, order a rectangle bar barrette cutter on Etsy or lay a ruler flat on top and use a craft knife to hand-slice a rectangle.
Tip
Cut out the clay pieces on a silicone baking mat so you can easily transfer them to a baking sheet without disturbing the raw clay pieces.
3. Glue clay pieces together
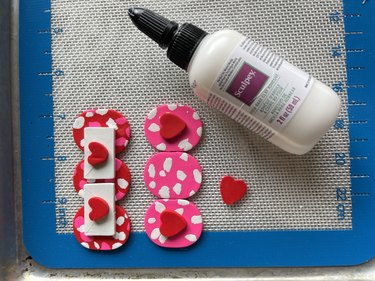
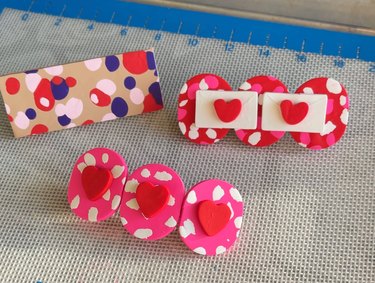
Before putting clay in the oven to cure, lay out red terrazzo ovals next to each other and use Sculpey Bake & Bond to glue white envelopes and hearts in the center. Do the same with the pink terrazzo and red mini hearts. The terrazzo bar can stay as is—this solid piece will get glued to a barrette clip after baking.
4. Bake polymer clay
To cure polymer clay, start by preheating the oven to 275°F. Then, place the silicone mat with the clay pieces on a baking sheet and cover with aluminum foil. This protects the top of the pieces from potential burn marks or discoloration if the oven temperature isn't accurate and gets a little too hot. Once the oven temperature reaches 275°F, place the covered baking sheet on the center rack and bake for 15 minutes.
When 15 minutes are up, remove the baking sheet from the oven and allow the polymer clay pieces to fully cool down on the sheet before continuing.
Tip
Gifting these barrettes to your favorite Galentines? Add them to a small, heart-shaped box with pink crinkle paper for an adorable Valentine’s Day Gift.
5. Glue polymer clay pieces to barrettes
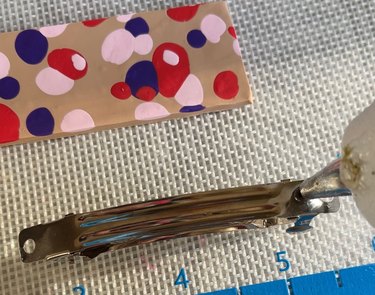
The final step is to glue pieces to French barrette blanks and complete the hair accessories. Since the red terrazzo ovals with white Valentine's envelopes are already pieced together with Sculpey Bake & Bond, this design should be one solid piece. To attach, add a line of glue to the center of the barrette and gently place it on the back of the design. The ovals with hearts in the center should remain three separate pieces. Starting at one end of a barrette, carefully glue each piece onto the metal. For the terrazzo bar, add glue to the barrette and place the bar on top to secure it.
That's all there is to it! We hope this bright, wearable barrette craft inspires you to dive headfirst into the many wonders of polymer clay.