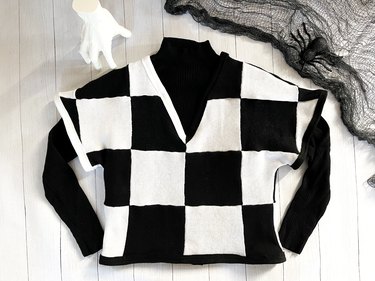
If bingeing (and re-bingeing) season 1 of Wednesday has infected your brain for this year's Halloween costume, you've come to the right place. This simple DIY shows you how to create Wednesday's signature black-and-white checked sweater by recycling a few old sweaters. Devious, no?
Any black and white sweaters from your closet or the thrift store will do. A bit of sewing is required, but crafting something handmade is way more Wednesday that ordering a costume online. Like Thing, let's snap-snap to it.
Video of the Day
Video of the Day
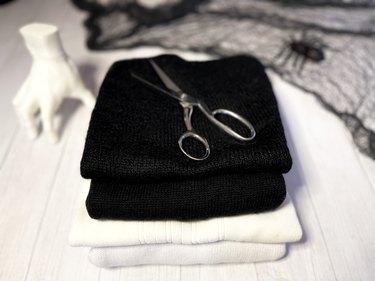
Things You'll Need
2 lightweight black sweaters
2 lightweight white sweaters
Sharp scissors
Straight pins
Sewing machine
Ballpoint sewing machine needle
Steam iron
Black and white knit trim
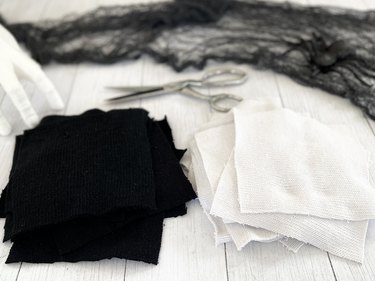
1. Cut the sweaters apart
To start, you'll need two plain black sweaters and two plain white sweaters that are similar in weight and type. Use sharp scissors to cut the sleeves off at the seams and then set them aside for later. Cut the sides and shoulders on each sweater, also at the seams.
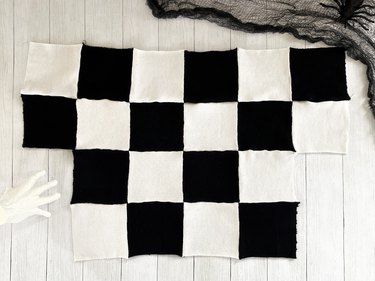
Open up each sweater and place it flat on a cutting surface. Cut 20 6 1/4-in. black sweater squares and 20 6 1/4-in. white sweater squares. If you're running low on fabric, don't stress; you can cut a square or two from the set-aside sleeves.
Tip
To minimize fraying, choose sweaters with tighter weaves. Loose-weave material will be harder to work with and can stretch and fray more easily.
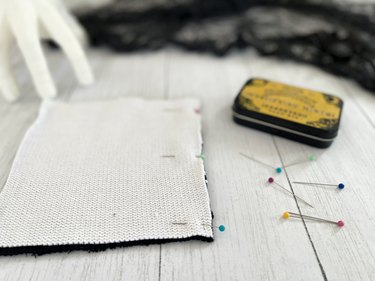
2. Sew the sweater squares
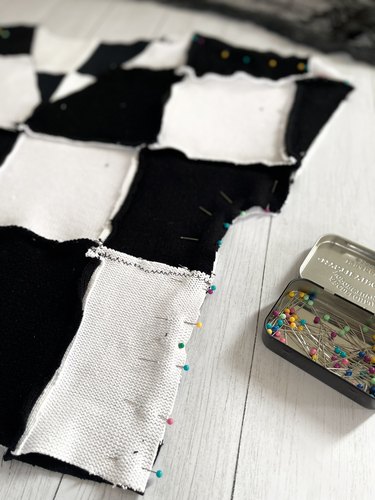
Place two sweater squares together with the right sides facing each other. Line up the edge and pin it in place. Sew a 1/4-in. seam using a ballpoint needle and a zigzag stitch.
Tip
A ballpoint needle has a rounded tip and allows the needle to pass through knit fabric by separating threads instead of tearing them. Using a regular needle will create skipped stitches or, even worse, fabric damage. Since knit fabric stretches, the zigzag stitch will allow the fabric to stretch without breaking stitches.
3. Press the seams
Steam is your friend for this project — your Enid, if you will. When you finish sewing each seam, press it flat with a steam iron. This will help keep the seams even and make it easier to match the squares later.

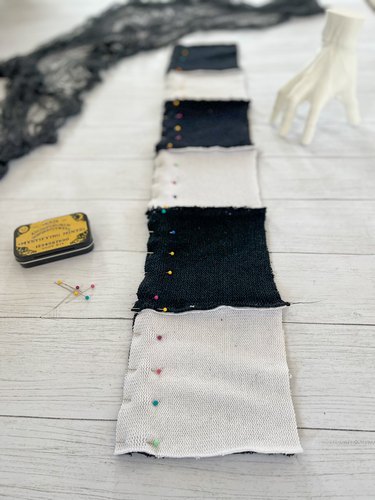
4. Sew squares into strips
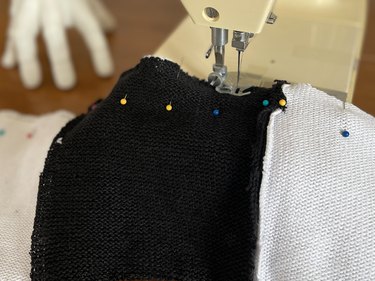
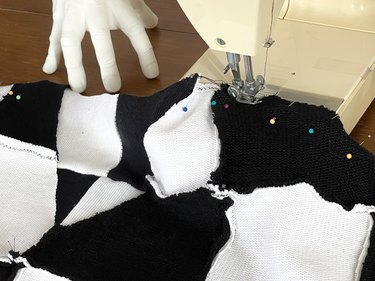
Create four strips by alternating black and white squares. Two strips will have six squares, and two will have four squares. Place the strips with the right sides facing each other and pin them in place. Be sure to line up each square with the square next to it so the seams match up. Sew together so the two long strips and the two shorter strips adjoin. When all four strips are sewn together, they'll form a T shape.
Repeat this process until you have two T-shaped patchwork square pieces. One will be used to make the front of your sweater, and the other will be used for the back.
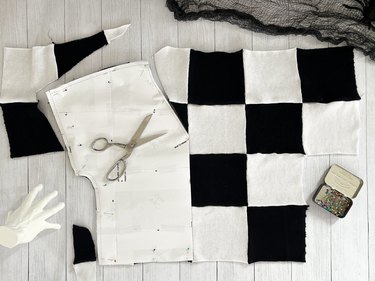
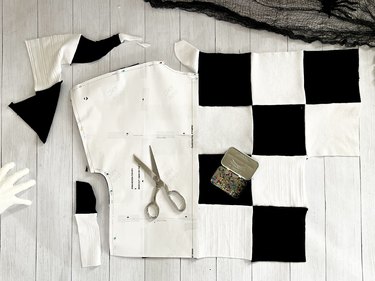
5. Pin and cut around pattern front
Place the front pattern piece on the left half of one of the T-shaped fabric pieces. Line up the center of the pattern with the center of the squares. Pin the pattern piece onto the fabric and cut along pattern lines, making sure to leave the center uncut. You'll cut the side, sleeve opening, shoulder and neckline.
Remove pins and flip the pattern over to the right side of your fabric. Again, line up the center and pin it in place. Cut around the sides, sleeve opening, shoulder, and neckline with an uncut center just as you did before. Remove the pins and the pattern — this will become the front of your Wednesday sweater!
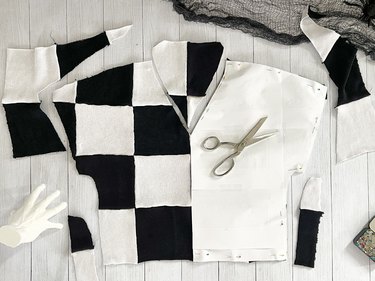
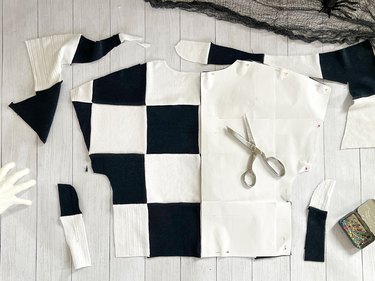
6. Pin and cut around pattern back
Pin the pattern back onto the left side of the second T-shaped fabric piece. Line up the center of the pattern with the center of the squares. Pin the pattern piece onto the fabric, cut along the pattern lines, again leaving the center uncut. As with the front of the sweater, you'll cut the side, sleeve opening, shoulder, and neckline.
Remove the pins, flip over the pattern to the right side of your fabric, line up the center, and pin it in place once again. Cut around the sides, sleeve opening, shoulder, and neckline before removing the pins and pattern. Now, you have the back of your sweater.
Tip
You can use any vest pattern here, but we chose a downloadable pattern from Style Arc. We modified it by cutting front and back pieces a bit shorter to match our squares and only using the front and back pattern sections.
7. Sew front and back pieces together
Place the front and back pieces together with the right sides facing each other. Line up the side and shoulder edges. Pin in place and sew the sides and shoulders with a 5/8-in. seam allowance.
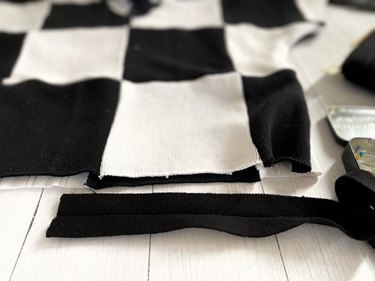
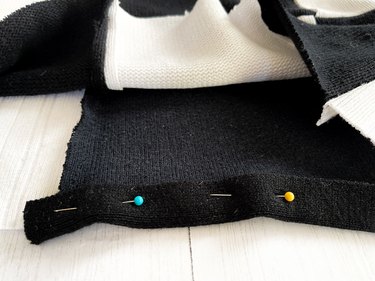
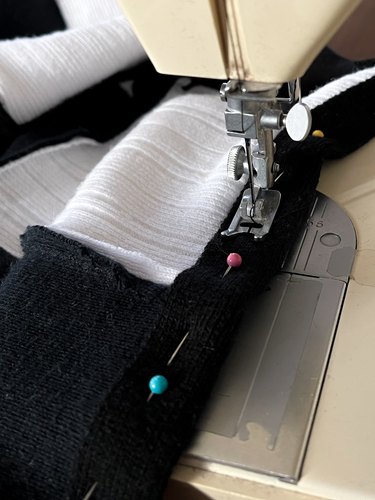
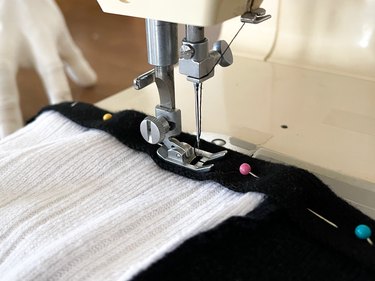
8. Attach knit trim around bottom raw edge
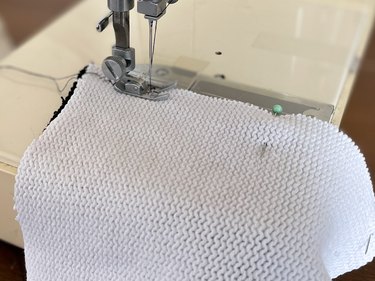
Sandwich the sweater's bottom raw edge into the black knit trim and pin it in place. Sew through all three layers using a zigzag stitch.
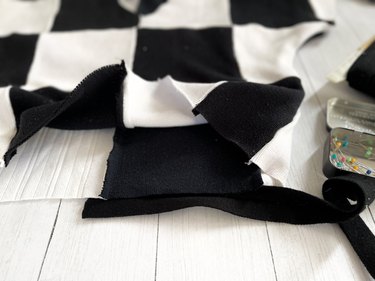
9. Add trim to sleeve edges
Attach black knit trim to the left sleeve opening and white knit trim to the right sleeve opening by sandwiching raw edges into the trim, pinning it in place and sewing with a zigzag stitch.
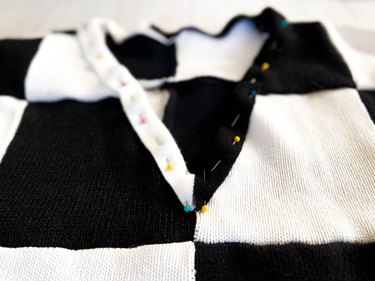
10. Attach trim to neckline
Cut the trim at a 45-degree angle and sandwich the left side of the neckline into the black knit edge and the right side of the neckline into the white knit trim. Pin in place and, once again, sew with a zigzag stitch.
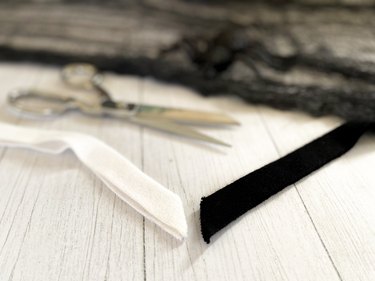
Tip
If you don't have knit trim, you can create your own by preserving a 2-inch strip from the bottom of each sweater. Fold it in half lengthwise and press to form your trim. When you attach it to the raw edges of your sweater, be sure to have the finished bottom edge on the outside.
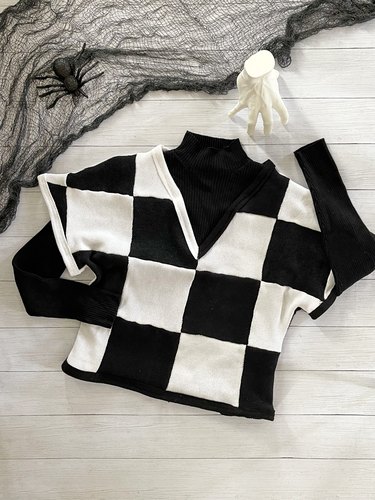
Now, throw on a long-sleeve turtleneck, knee-highs or tights, a black-and-white midi dress, this sweater, and a leather jacket for the perfect Wednesday Addams costume or day-to-day outfit. You'll fit right in at Nevermore Academy!