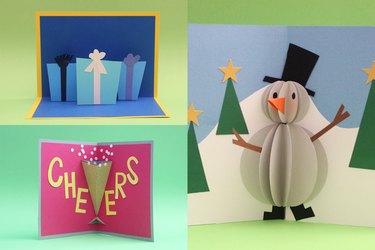
It's a truth universally acknowledged: Nothing beats a holiday card received in—gasp!—the mailbox. Even better? A pop-up card. These gems of the greeting card world are fun to open, with a surprising 3D element that adds to the holiday cheer. And although store-bought pop-up cards are expensive, it's easy to make your own DIY holiday cards with pop-up elements. In fact, this tutorial will show you exactly how. You'll learn three basic card ideas that you can adapt and customize with a variety of designs. With this holiday craft, you'll be creating the best Christmas, Hanukkah or general holiday cards for your loved ones. Even Santa will be impressed.
So let's get crafting!
Video of the Day
Video of the Day
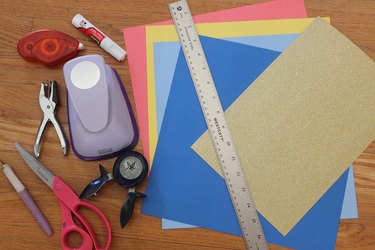
Things You'll Need
Card stock in different colors
Scissors
Scoring board (optional)
Hobby knife
Pen
Glue stick
Circle punches
Star punch
Idea 1: Holiday Gifts Pop-Up Card
The technique to make this card is very basic, and once you make this one little project, the variations are endless. This card design features square and rectangular three-dimensional platforms that allow you to glue any element onto them, making them pop up.

How to Make Holiday Gifts Pop-Up Card:
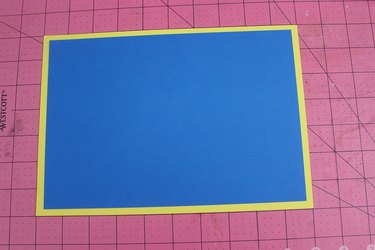
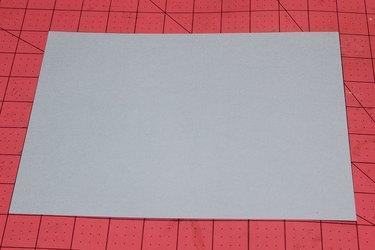
1. Cut card stock
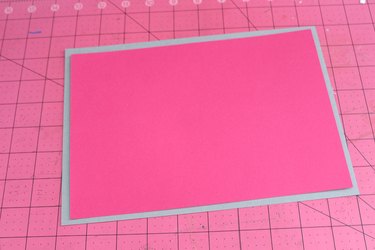
For this handmade holiday card, you'll need two pieces of card stock. To make a 5 x 7-in. card, cut out one piece that is 10 x 7 in., which will be your outside piece, and one that is 9.5 x 6.5 in., which will be on the inside.
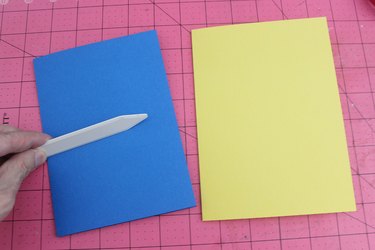
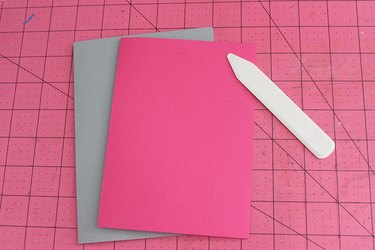
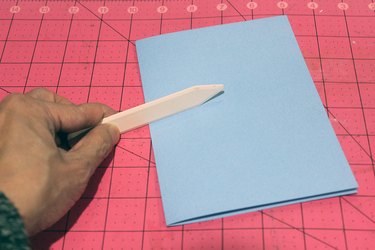
Fold both pieces in half, using a bone folder to create sharp folds. If you happen to have a scoring board, it will help you create distinct creases in the card stock, but a bone folder alone will work fine.
2. Create the pop-up mechanism
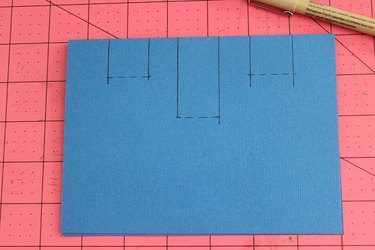
Position the smaller piece of folded card stock horizontally with the fold at the top. Along the top edge, trace one rectangle in the middle that is 1 x 2 in. On either side of that center rectangle, draw squares that are 1 x 1 in. Make the vertical lines solid and the horizontal lines dotted. Don't worry if your lines are messy here. They will not be visible on your finished greeting card.
Cut along the solid lines. You can use either scissors or a hobby knife. Then fold along the dotted lines.
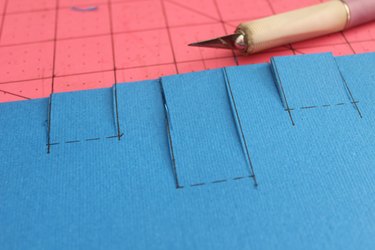
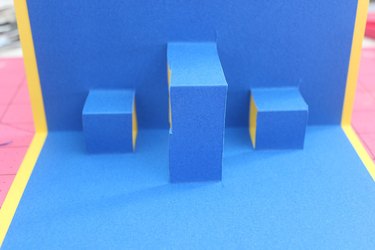
Open up the card, and push out the sections that you've cut. Boxes now appear, and it is on these boxes that you can attach decorative elements. The box in the middle is taller than the other two, so you can feature a larger element in the middle.

3. Glue inner card to outer card
Close the card with the pop-up elements, and apply adhesive to the outside of both sides of the card. A tape runner makes this task easy peasy.
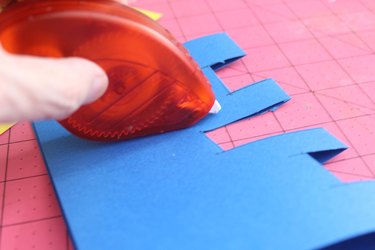
Align the center of this inside card to the center of the outside card and press firmly. When you open the card, the pop-up structure emerges.
4. Add decorative pop-up elements
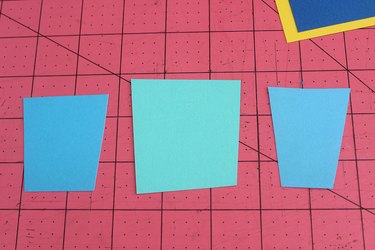
For this holiday card craft, we're making holiday packages that will pop up. Cut three package shapes out of card stock. I chose shades of blue so that this card can be used for Hanukkah. Make sure the large package in the middle does not extend past the bottom of the card when folded. Instead of perfect box shapes, I like to cut out boxes with slanted sides for more visual interest.
Then cut out some pieces of card stock for the ribbons and bows and glue them to the packages. Here a glue stick is easier to use than a tape runner.
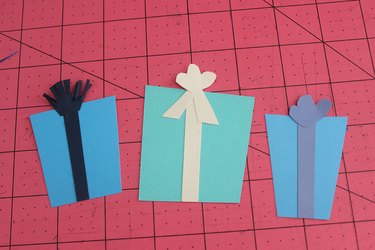
Glue the packages to the front of the pop-up mechanisms. I chose to not add any more embellishments to the inside of the card, but you can hand-print the words "Hanukkah," "Merry Christmas" or a similar holiday greeting.

Decorate the front of the card as you wish. I repeated the package motif. You can get fancy with washi tape, stickers, sequins or anything that inspires you.

Now you can see how adaptable this pop-up card idea is, as you can attach practically any element to the 3D boxes. You can even adhere an actual gift card to the middle box, for a creative presentation.
Idea 2: New Year's Pop-Up Card
New Year's cards are perfect for people who are too busy during December to get their cards sent well before the holidays. This festive card idea features a champagne flute with bubbles coming out of the glass. To make it, we'll use a variation of the 3D box pop-up mechanism, but instead of a square mechanism, it's triangular.

1. Cut card stock
As with the holiday gifts pop-up card, you'll need to cut out two pieces of card stock—one piece for the inside and one slightly larger piece for the outside.
Fold the two pieces and use a bone folder to get crisp folds.
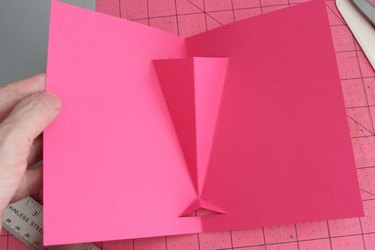
2. Create the pop-up mechanism
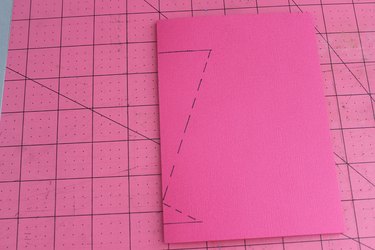
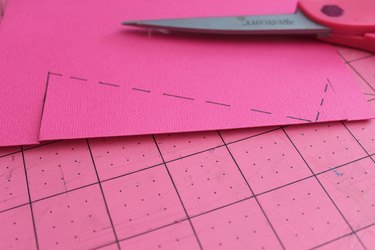
Position the smaller piece of card stock vertically, with the fold on the left. Draw a one-and-a-half-inch solid horizontal line toward the top and a one-inch solid horizontal line toward the bottom, perpendicular to the fold. Indicate a spot on the fold about three-quarters of an inch from the bottom line. Then draw a dotted line from the top and bottom lines to this spot, as you can see in the photo.
Cut along the solid lines.
Fold along the dotted lines.
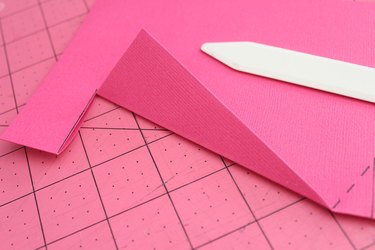
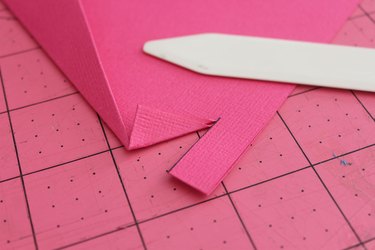
Open the card and push out the sections you've cut and folded. A champagne flute shape appears.
3. Add champagne panels
I chose a pink piece of card stock for the inside of the card, but we'll need a different color on the champagne flute. I had some glittery gold card stock that was perfect because it looked like bubbly champagne. Place the folded inside card with the triangular cutouts on top of the gold card stock and trace along the edges.
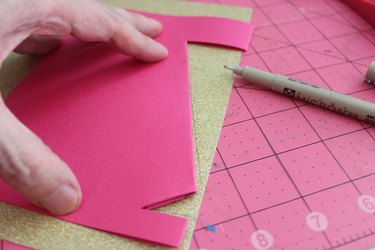
Cut out the triangular panels.

Then glue them to the triangular pop-up mechanism.
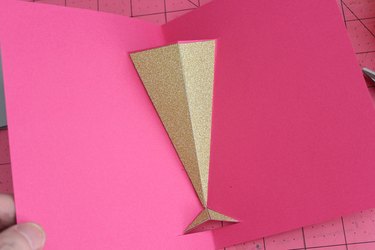
4. Glue inner card to outer card
Close the card, then apply adhesive to the outside of both sides of the card.
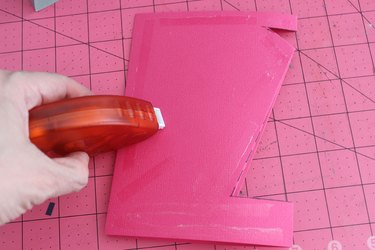
Align the center of this inside card to the center of the outside card and press firmly.

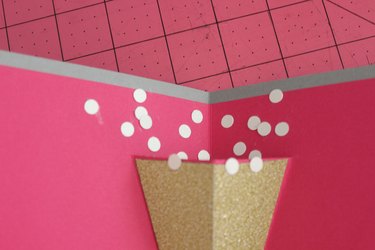
5. Add bubbles
Use a hole punch on white card stock to make a bunch of bubbles.

Glue them around the rim of the champagne flute. Have some bubbles float above the glass as well.
6. Decorate the inside
You can leave the card as is, but because there is so much room on either side of the champagne flute, it begs for some decoration. I cut out the word "Cheers" with my Cricut die-cutting machine, but accessorize however you'd like.

7. Decorate the front
I played off the champagne motif with a champagne bottle in the front. Get as creative as you want here, or make it simple by printing out something like "Happy New Year" or "Happy Holidays" and gluing it on.

8. Think of variations
This triangular pop-up mechanism is adaptable to many other designs. It can be a vase or a trophy. Flip the triangle upside down, and you can make a Christmas tree card or a Santa hat card. (Note that for the Christmas tree or Santa hat card, you won't need the little triangle pop-up mechanism used for the base of the champagne flute. Just cut one horizontal line at the top and fold the triangle.)
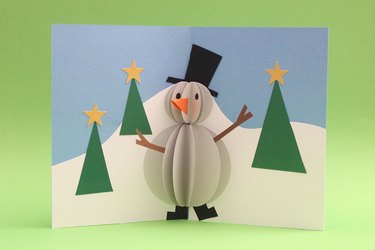
Idea 3: Snowman Pop-up Card
A circular globe pop-up mechanism is the trick for making this snowman card. It's a DIY Christmas card that definitely impresses.
1. Cut card stock
For this homemade Christmas card, you will need one piece of card stock cut to 10 x 7 in. I chose an icy blue color.
Fold it in half so you have a 5 x 7-in. card. Use the bone folder to make the fold nice and crisp.
2. Cut out circles
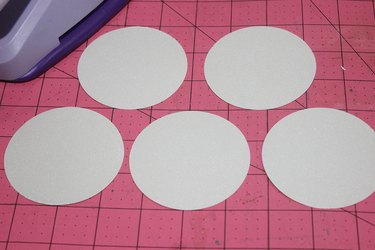
The snowman requires circles that are two sizes—smaller ones for the snowman's head and larger ones for the body. While you can trace circles and cut them out, it's much easier if you have circle punches for precise circle shapes cut in seconds. Circle punches in various sizes are available at crafts stores or on Amazon. Cut five to six large circles. I used a 3-in. circle punch on iridescent card stock.
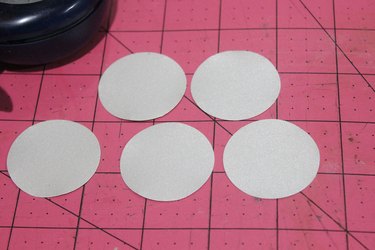
Cut five or six small circles. I used a 1.5-in. circle punch.
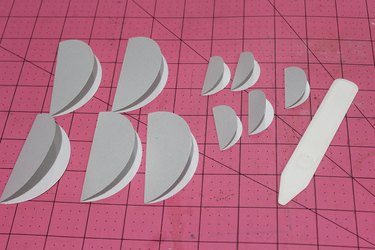
Fold each circle in half, using the bone folder once again to get the folds crisp.
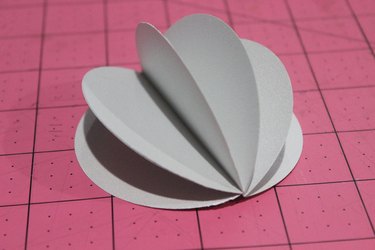
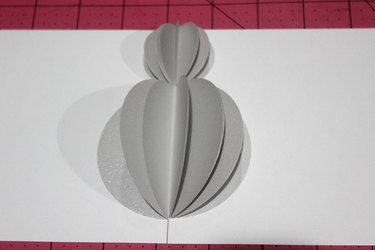
3. Form the half spheres
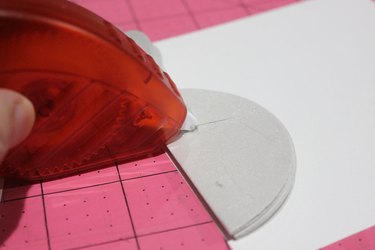
Let's start with the larger folded circles. Apply adhesive (either a glue stick or tape runner) to one side.
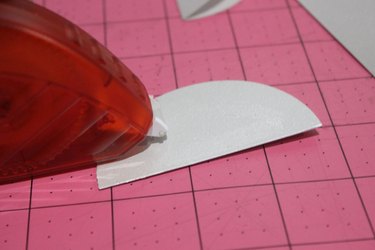
Press one side of a second folded circle to the glued side of the first circle.
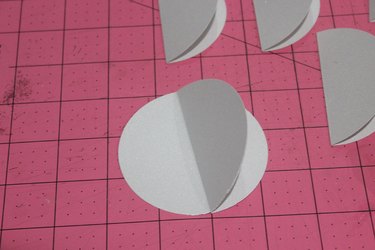
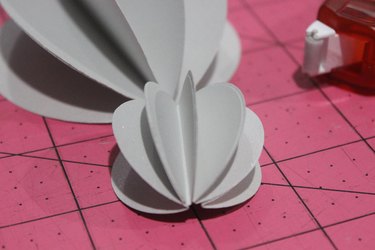
Continue gluing half circles to each other until you have five or six connected.
Do the same with the smaller circles.
4. Affix snowman to card stock
If we were to glue the two half spheres into the middle crease of the card, the thickness of the folded circles would prevent the card from folding flat. There's a card-making hack that helps here.
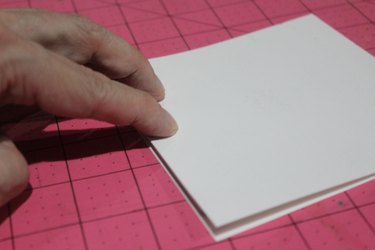
Cut two 5 x 5-in. pieces of white card stock.
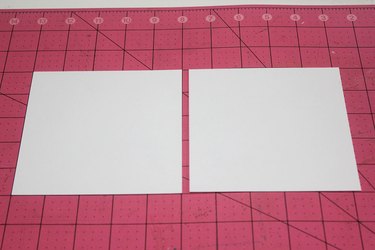
Glue the stacked large folded circles against the left edge of one of the 5 x 5 in. pieces.
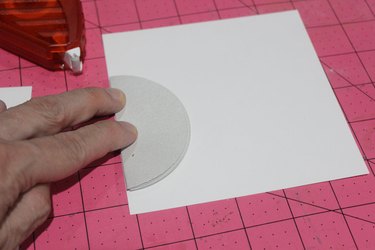
Glue the stacked small folded circles on top of the large circles.
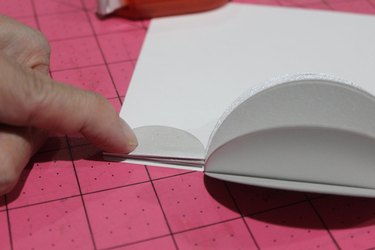
Apply glue to the top of the stacked circles.
Adhere the second 5 x 5-in. piece of white card stock on top of them.
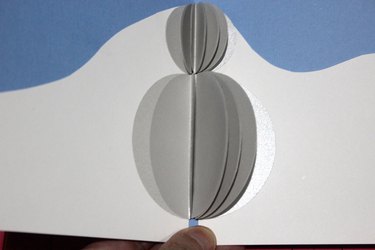
When you open the two pieces of white card stock, the snowman will pop up. There is also now a small gap between the two pieces of card stock to accommodate the thickness of the circles.
Cut out a snowy background from the white cardstock.
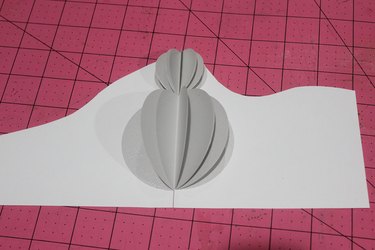
Apply adhesive to the back of the white card stock.

Glue the snow and snowman to the 5 x 7 blue card. Notice the gap in the center caused by the thickness of the circles. The gap allows the card to fold flat. We'll cover up that gap later.
5. Dress the snowman
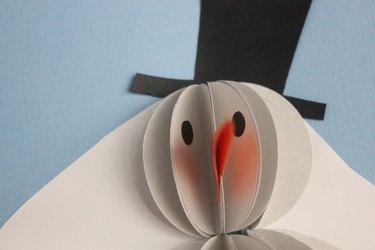
Cut out snowman features from colored paper or card stock: a hat, nose, eyes, arms and boots.
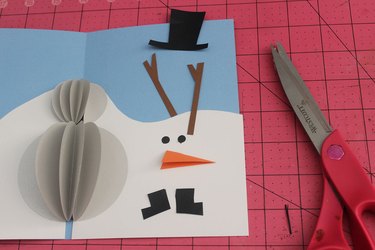
Glue the hat behind the snowman's head.

A folded orange triangle makes a perfect nose. Glue that to the center fold of the head.

Glue the eyes on either side of the nose. I used a hole punch to make the eyes.
Attach the arms to the body.

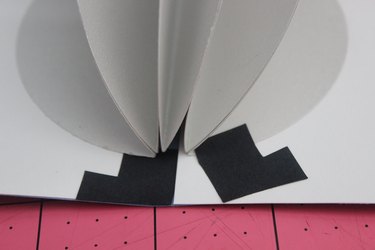
And remember the gap in the middle?
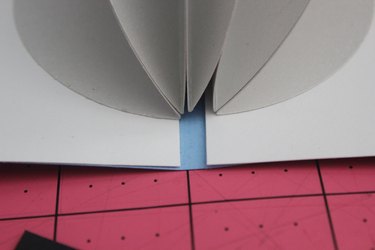
Cover up the gap with the snowman's boots.
6. Finish inside of card
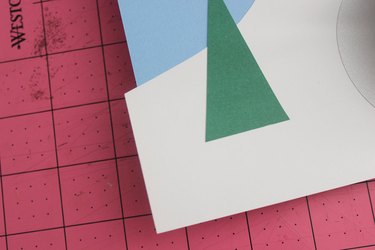
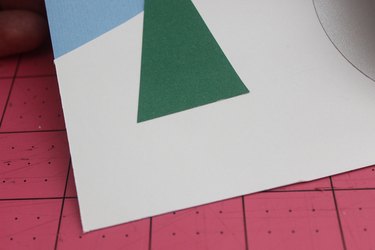
Cut out some green triangles to make trees for the background.
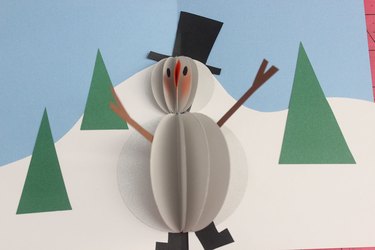
For an added touch of holiday cheer, cut out some stars to glue on top of the trees. I used a star punch, but you can do them by hand. You can also print out a Christmas greeting and glue it to the card.

You'll see that the white card stock extends past the edges of the card. That's because of the gap in the middle, which pushed the card stock out.
No problem. Just trim the excess card stock.
7. Decorate front
Create a design for the front of the card. A simple tree on a snowbank echoes the inside of the card. Another idea would be to decorate the front with a snowflake.
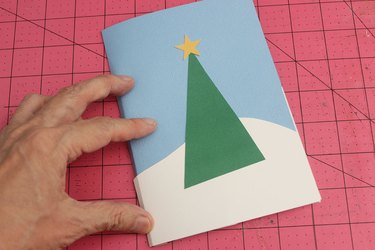
This snowman card is very adaptable to a variety of designs. The technique can be used to make a Santa card, a Christmas ornament or even a snow globe.
Now that you're a pop-up whiz, keep in mind that you don't have to make just holiday greeting cards. You can make pop-up gift tags or create pop-ups that can be part of your Christmas decor. This holiday season, your creativity will be popping up everywhere!