When I was little, I loved going with my mom to the Filipino markets in northern New Jersey to buy one of my favorite foods: freshly steamed buns. My favorite ones were the siopao asado — white, fluffy buns filled with sweet marinated pork. (Fun fact: Filipino siopao was influenced by Chinese cuisine, specifically char siu bao, aka Chinese BBQ pork buns. Let's just say I was pretty excited when I finally made the connection between the words siu bao and siopao!)
As much as I loved the classic steamed pork buns, I've always wanted to make a sweet version. And with Thanksgiving coming up (when our table is often filled with so many savory items), I started brainstorming different treats I could make for dessert.
Video of the Day
Video of the Day
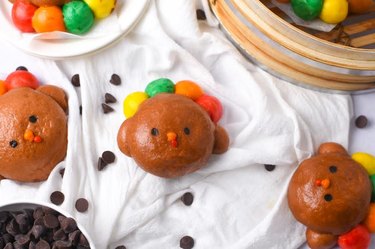
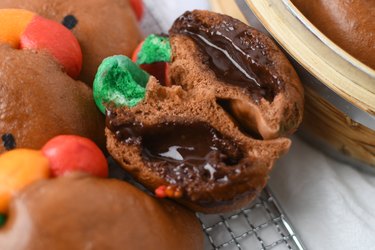
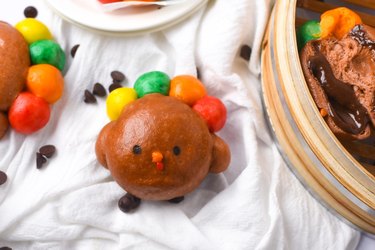
Enter these chocolate-filled steamed buns. They have all the fluffy goodness of the fresh steamed buns of my childhood, but they're filled with homemade chocolate ganache. Oh, and they look just like little turkeys! Cuteness + chocolate = best dessert ever!
Tip
This recipe uses a kitchen scale, one of the most important tools in the kitchen, especially when it comes to breads. Volume measurements (cups) aren't accurate enough to give consistent results, which can yield buns that are too dry, dense or flat. By using a scale, you'll get better results, aka light, fluffy, uniform buns!
QUICK RECIPE OVERVIEW
SERVINGS: 7 large turkey buns
PREP TIME: 30–45 minutes
RISE TIME: 60 minutes
COOK TIME: 20 minutes
TOTAL TIME: About 2 hours
Things You'll Need
80 g heavy cream
80 g chocolate
140 g warm milk
40 g granulated sugar
3 g yeast
10 g neutral cooking oil, such as vegetable oil or canola oil
250 g all-purpose flour
1/2 tsp. salt
Gel food coloring (brown, yellow, green, orange and red)
7 squares parchment paper, each about 3 x 3 in.
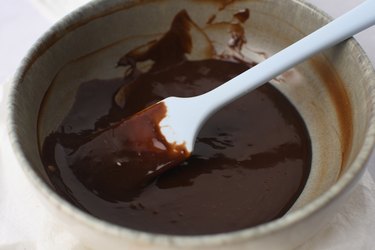
1. Melt the chocolate
In a microwavable bowl, add heavy cream and chocolate. Microwave for 1 minute, then stir. If the chocolate is not melted, continue to microwave at 15-second intervals and mix. Place the chocolate ganache in the fridge, taking it out every 10 minutes to stir, until set. The ganache should be shiny, spreadable and able to hold its shape, which will take about 30 minutes.
Tip
While waiting for the ganache to set, you can skip ahead and start prepping the steamed buns.
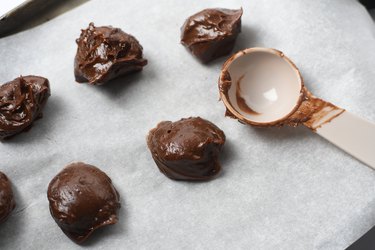
2. Scoop the ganache balls
Line a plate or small tray with wax paper or parchment paper. Using a tablespoon measuring spoon, scoop out seven balls from the ganache mixture and drop each onto the tray. Freeze until mostly firm, about 15 minutes.
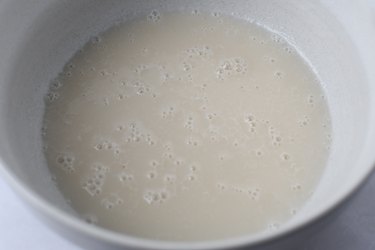
3. Prepare the yeast mixture
In a large mixing bowl or bowl of stand mixer fitted with dough hook, whisk together the warm milk, granulated sugar, yeast, and oil, until the yeast dissolves. If you are using instant yeast, you can continue to the next step. If you are using active dry yeast, then wait about 10 minutes to see if the mixture is bubbling. If it isn't, the yeast is dead and you will need to start over.
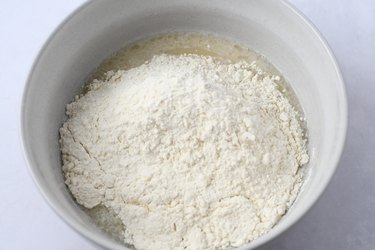
4. Add the dry ingredients
Add the flour and salt, mixing with a rubber spatula/wooden spoon or dough hook attachment until you get a shaggy dough. Then knead by hand on a work surface or stand mixer until you get a very smooth ball of dough, about 5 to 10 minutes.
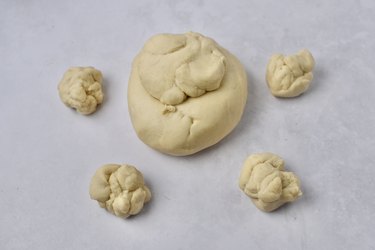
5. Split the dough
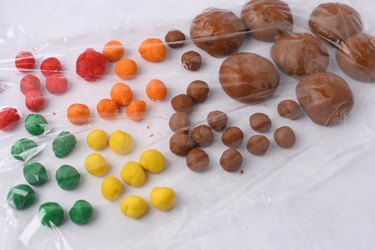
Divide the dough by weight prior to making it different colors:
- 322 grams — brown
- 28 grams — green
- 28 grams— yellow
- 32 grams — red
- 32 grams — orange
If you want to eyeball the green, yellow, red, and orange colors, they're each about the size of a cherry tomato. Cover all the pieces with plastic wrap to keep them from drying out.
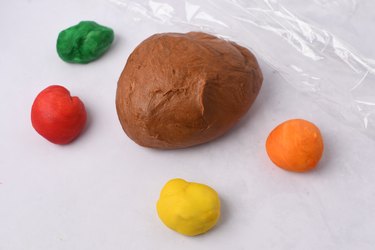
6. Dye the dough
Use food coloring to color the dough balls. I used gel food coloring because it's more concentrated than liquid food coloring and will add less moisture to the dough. I added about 1 to 3 drops for each color.
Tip
If you want to keep your hands clean, wear food-safe gloves!
Start with the lighter colors first, then make your way to the darker ones. This is so you don’t stain the lighter colors with the darker ones (like staining yellow dough with red dough!).
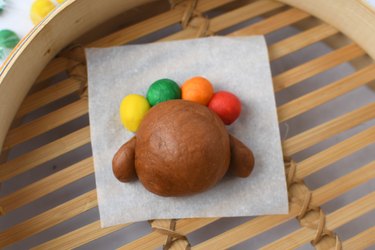
7. Form the dough balls
Divide the brown dough into seven pieces of 40 grams each (about the size of a mandarin orange) for the bodies, and 14 pieces of 3 grams each (about the size of a marble) for the wings.
Divide the yellow, green, red, and orange doughs into 4-gram balls (again, about the size of a marble) for the feathers. Keep the leftover red and orange dough pieces on the side.
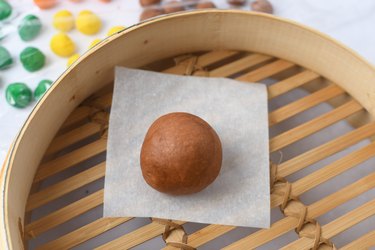
8. Shape the turkeys
Roughly form each brown piece into a ball, then flatten. Add a frozen ball of chocolate ganache, then bring the ends together around the ganache, shaping the dough into a ball again.
Tip
As you’re shaping the dough, pop any air bubbles you see.
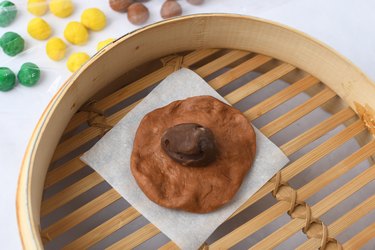
Place the body on a 3 x 3-inch square of parchment paper.
Place the feathers on top of the turkeys, using water as the "glue." Go with any color sequence you like!
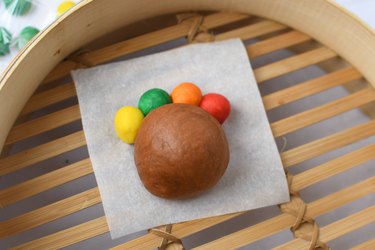
Add a wing to each side of the turkey, using water as "glue" again. You don't have to pinch the dough — it will stick together with the water.
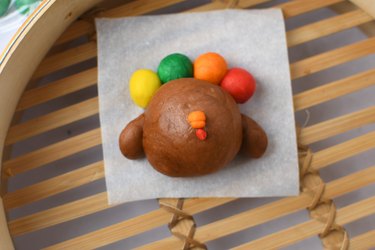
For the facial details, take the tiniest pieces of orange and shape it into the beak as pictured below. Then take a small ball of red and place it underneath the beak.
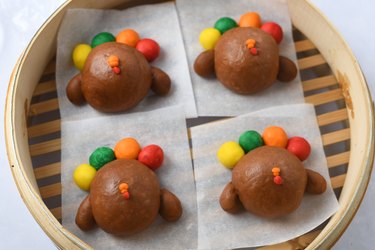
9. Proof the buns
Cover the turkeys and let the dough rise in a warm place for about 60 minutes, or until the buns have increased in size by about 50%.
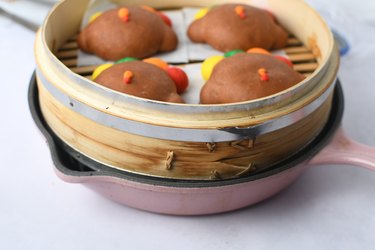
10. Steam the buns
Place the buns into a steaming basket about 2 to 3 inches apart, cover with the lid and put the basket over a wok or pan partially filled with cold water. Make sure there is about 2 inches of space between the bottom of the basket and the water.
Turn the burner on to high heat. Once the water begins to boil, set the heat to medium-low and simmer for 20 minutes. Then turn off the heat and leave the closed basket alone for 1 to 2 minutes so the cold air doesn't shock them. Then remove the lid and buns.
Tip
Try not to peak inside or the buns will wrinkle and become dimpled!
11. Decorate and serve!
Use edible food markers to add the eyes, then serve. If you're not going to serve them right away, no worries. You can store these buns in an airtight container at room temperature for about 3 days.
Tip
To reheat buns, place them on a plate and lightly cover with a damp paper towel. Microwave for 15–20 seconds, and the buns should be perfectly soft again.