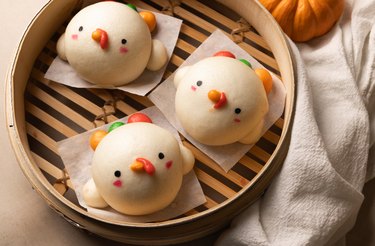
Dinner rolls are essential for most Thanksgiving spreads. And while simple bun and roll varieties are great, we decided to take things up a notch by creating turkey-shaped bread rolls that are as cute as they are tasty.
If this is your first time making homemade bread, don't worry! Our recipe includes step-by-step instructions to walk you through making fantastically fluffy buns. You can make them by hand or with a stand mixer and dough hook.
Video of the Day
After dividing and dyeing dough, the "turkeys" are assembled on squares of parchment paper. Then you'll steam the buns in a basket instead of baking them in the oven. This gives you the bright, white coloring instead of the usual golden brown color created by baking.
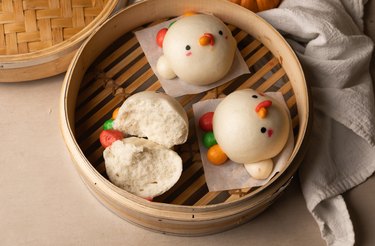
Video: A Fluffy Flock of Turkey-Shaped Rolls for Thanksgiving
Quick Recipe Overview
SERVINGS: 6 large turkey buns
PREP TIME: 30 minutes
RISE TIME: 60 minutes
COOK TIME: 20 minutes
TOTAL TIME: 1 hour 50 minutes
Things You'll Need
140 g whole milk, warmed
40 g granulated sugar
3 g instant yeast or active dry yeast
10 g neutral cooking oil or unsalted butter, melted
250 g all-purpose flour
1 Tbsp. cornstarch
1/2 tsp. salt
Gel food coloring (red, orange, green)
Parchment paper
Edible markers (black, pink)
Tip
This recipe uses a kitchen scale, which is really helpful when making dough! Measuring cups of flour by volume isn't accurate enough to give reliable, consistent results. By using a scale, you'll ensure soft, fluffy buns.
1. Combine the wet ingredients
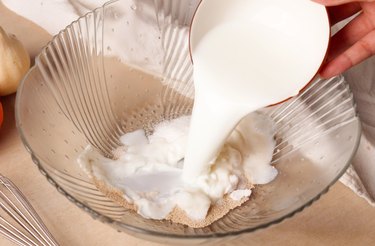
In a large bowl or the bowl of stand mixer, mix together the milk, sugar, yeast and oil or melted butter until the yeast dissolves.
2. Stir in the dry ingredients
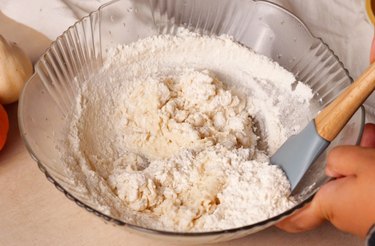
To same bowl, add the flour, cornstarch, and salt. Mix by hand with a rubber spatula or wooden spoon, or use a mixer and dough hook on low speed, until you get a shaggy dough. Make sure to scrape bottom and sides of bowl to get all the bits of flour.
3. Knead the dough
Knead by hand on a lightly floured surface until you get a very smooth ball of dough, about 10 minutes; alternatively, knead in a mixer with a dough hook on medium speed. This builds the gluten in the dough, allowing it to rise for a fluffy texture.
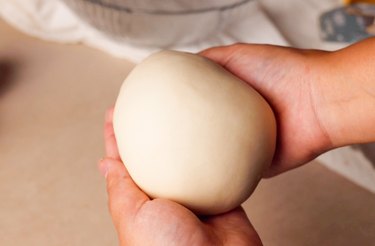
4. Divide the dough
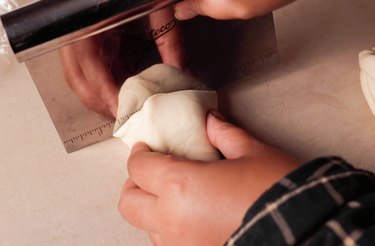
Using bench scraper or knife, divide the dough into four pieces with the following weights (for dyeing different colors):
- 318 grams — white
- 35 grams — green
- 45 grams — red
- 45 grams — orange
Divide the white dough into 12 3-gram balls (for turkey wings) and 6 47-gram balls (for bodies). Cover all of the dough pieces with plastic wrap or kitchen towel to keep from drying out.
5. Dye the dough
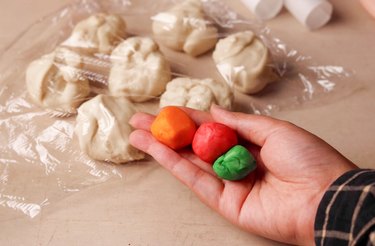
Dye the three smaller dough pieces with gel food coloring. Divide the green into 6 equal pieces, then shape them into balls. Divide the red and orange doughs into 7 equal balls each.
Note that each turkey will have one red, one green and one orange feather. The extra red and orange balls will be used to make turkey beaks and wattles.
Tip
If you want to keep your hands clean, wear food-safe gloves!
6. Assemble the turkey buns
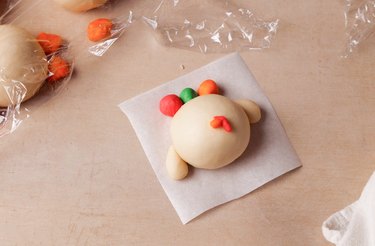
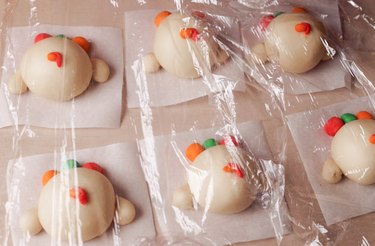
Cut parchment paper into 6 3 x 3-inch squares. To create each turkey:
- Place one 47-gram white dough ball on top of a parchment paper square.
- Add a 3-gram white ball on each side for turkey wings.
- Place red, orange, and green balls on top of the turkey head for feathers.
- Use some of red and orange dough to shape a turkey beak and wattle.
- Loosely cover the turkey in plastic wrap or a kitchen towel so it doesn't dry out.
Repeat the same process to make 6 turkeys in total.
Tip
If the dough pieces aren't sticking together, you can use water as glue!
7. Proof the buns
Let the dough rise in a warm place for about 60 minutes or until the buns have risen by 50%.
8. Steam the buns
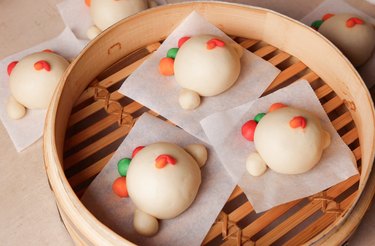
Transfer the buns to a steamer, and cover. (We used a bamboo steamer basket over a wok.) Steam for 20 minutes, then turn off the heat and leave the lid on. Let the buns sit in the closed basket for 2 minutes so cold air doesn't shock them. Remove the buns from the steamer.
Tip
Do not open lid to peek at the buns or they’ll end up wrinkled!
9. Decorate the turkey faces
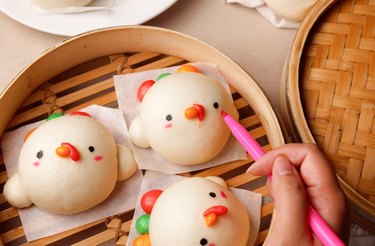
Use edible markers to add black eyes and little pink highlights to the turkeys.
Tip
You can store these dinner rolls in an airtight container at room temperature for about 3 days. To reheat, place them on a microwave-safe plate and lightly cover with a damp paper towel. Microwave for 15–20 seconds. The buns should be soft, refreshed and ready to be covered in buttery goodness (or whichever topping your taste buds desire).