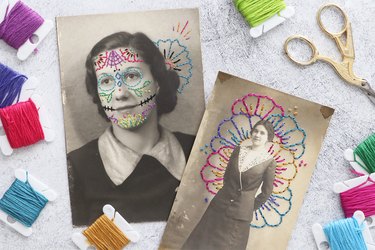
Whether you want to give new life to old family photos or love the concept of mixed media, you'll want to add these embroidered photographs to your DIY to-do list. This project uses needle and thread to embellish vintage black-and-white photos, letting you add color and whimsy to the image. It's the perfect accent for an ancestry wall or gallery wall at home, or as a craft with meaning to celebrate Grandparents' Day, Hispanic Heritage Month, Día de los Muertos, Thanksgiving or Christmas. It makes a heartfelt handmade gift too!
The best part? You don't need to be a fiber artist or expert crafter to embroider photos. This tutorial will teach you how to stitch basic flowers using simple drawing techniques. From there, you can switch up the embroidery design based on your style and imagination.
Video of the Day
For best results, practice drawing the pattern on paper first. This way, when it's time to draw the design on the photo, you'll know exactly what to do. It's also a good idea to have a high-quality eraser on hand, so you can easily adjust your design as you work.
If you don't have old photos, visit your local flea market. Here, you'll often find "found photographs" that would otherwise end up in the trash. Etsy and eBay are also great sources for vintage photos. Simply search for "vintage photos" or "RPPC," which stands for "real photo postcard." These are single-toned photos that are printed on sturdy card stock, which is perfect for stitching. The different colors of embroidery floss also really pop on these pictures.
Read on to learn how to embroider photos with a flower pattern, plus get tips for making it your own.
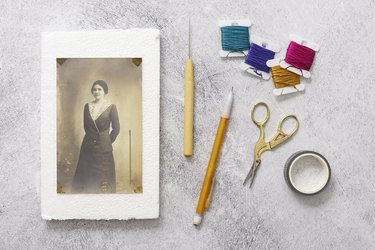
Things You'll Need
Old family photos or vintage photo postcards
Pencil and eraser
Paper for practicing
Roll of washi tape
Fine point awl (to make holes for stitching)
Foam block (at least 1/2 inch thick)
Embroidery thread in different colors
Embroidery needle
Scissors
Tip
You can buy a fine point awl on Amazon or at art supply stores—you can find it in the bookbinding or paper craft section.
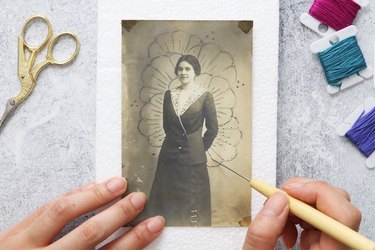
1. Draw circles to create a flower pattern
Your roll of washi tape will act as a template for the flowers. That being said, the final size of your flowers will depend on the roll of tape. Keep in mind that you can trace the outer and inner part of the washi tape as well. The choice is yours!
To create the flower pattern, trace the roll of washi tape several times around the person in the photograph. This will create the illusion that there are circles "behind" them.

Tip
If you don’t have a roll of washi tape, you can also use a large bottle cap or the lid of a small jar.
2. Divide each circle into wedges
Draw diagonal lines, making sure to space them out evenly. This will divide the circle into wedges.
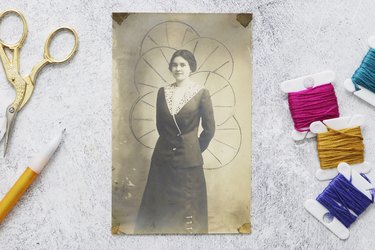
3. Round the top of each wedge, creating a petal
Draw a curved line at the top of each wedge. This will create the top of each petal.
Tip
You can also create a pointed tip at the top of each petal.
4. Add details to the flower embroidery pattern
Draw a few lines in every petal to give each one dimension. For some of the circles, you can also add a smaller circle to create the center of the flower.

Tip
For even more whimsy, draw simple dots or stars (like asterisks) around the photo.
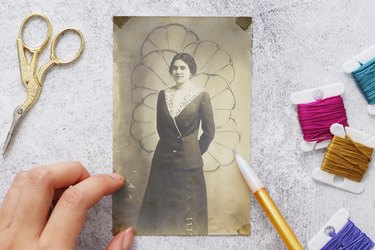
5. Pierce the embroidery design with an awl
Place the photo on a block of craft foam. Using a fine point awl, pierce the photograph to create holes. Try to space them out evenly so the stitches are somewhat even.
Also, when creating curved lines, you'll need to place the holes closer together in order to create a curve.
Tip
It’s best to use an awl for this step because it has a handle. This will make it more comfortable to use. But if you don’t have an awl, you can use a needle to pierce the paper.
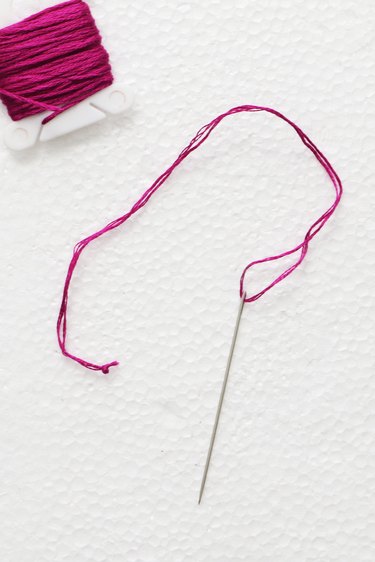
6. Prepare your embroidery thread for stitching
Use the scissors to cut a length of embroidery thread and remove two individual strands. (Most embroidery thread consists of six individual strands.) Thread both strands through the needle, then tie the ends together.
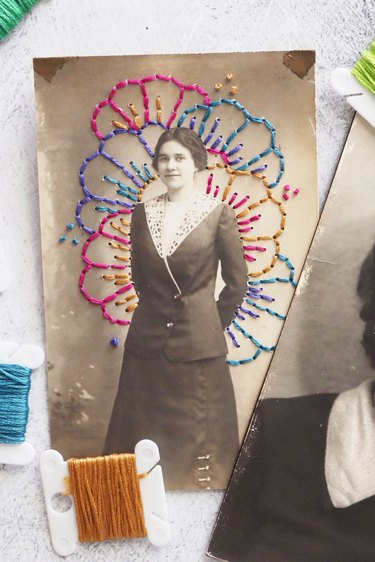
7. Embellish the photograph with embroidery stitches
Now it's time for the fun part! Insert the needle through the vintage photograph, moving from back to front. Reinsert the needle into the next hole to complete a stitch.
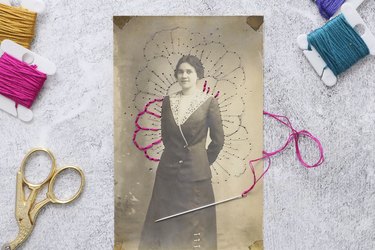
Continue this stitch throughout your entire embroidery pattern. You can also make dots by tying a knot and reinserting the needle through the same hole.
Tip
If you’re unhappy with a stitch, don’t worry. Simply use embroidery scissors to snip the stitches, then remove the thread.
8. Try embroidering close-up photos and adding more detail
Once you get the hang of hand embroidery on photos, try the technique on close-up portraits. This will allow you to add more detail to the person and play around with designs.
Happy stitching!