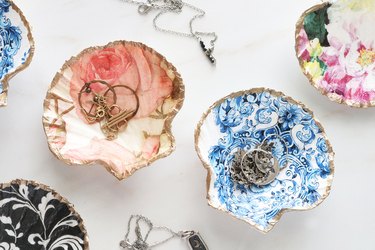
When you see sea shells by the sea shore, what comes to mind? If you're like us, you probably think about ... crafts! After all, seashells are perfect for DIY nature projects, and they're super versatile too. One particularly trendy way of crafting with shells is to make decoupage seashells, which you can use for jewelry dishes, trinket containers and general home decor.
Plus, with so many types of shells from which to choose, there's something for everyone. For example, if you prefer smaller dishes or irregular shapes, you can make decoupage oyster shells. But if you're looking for a bigger piece, try using large scallop shells instead. Oh, and if you're new to crafting? Don't worry because this project is appropriate for beginners.
Video of the Day
Video of the Day
Whether you're looking for unique DIY gift ideas or want to spruce up your desk, you'll want to make these decoupage shells. Read on for the full tutorial.
How to Make Decoupage Shell Dishes
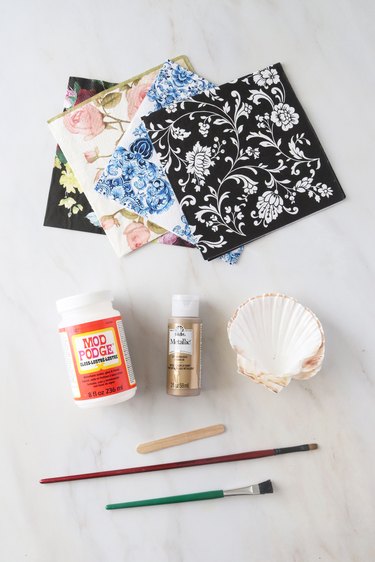
Things You'll Need
Decorative paper napkins
Decoupage glue, such as Mod Podge (matte or glossy)
Scissors (optional)
White acrylic paint (optional)
Gold acrylic paint
Shells, such as clam shells or scallop shells
Medium paintbrush
Thin paintbrush
Wooden ice pop stick (optional)
Tip
Decorative paper napkins are ideal for decoupage because they are thin and easy to work with—so much so that they’re sometimes known as “decoupage napkins”! You can find printed paper napkins in many different colors and prints at party stores and craft stores and on Etsy. Another option is to use printed tissue paper.
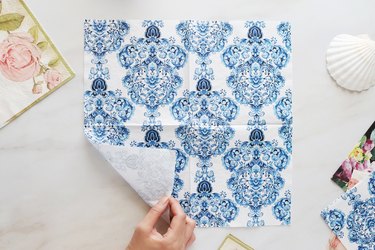
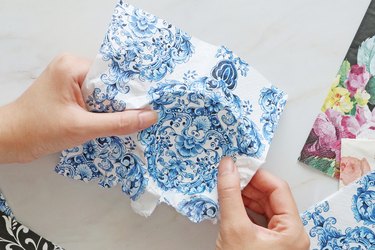
1. Unfold the napkin and separate the layers
To prepare the napkin, unfold it to create one large, square sheet. If it has a white layer attached to the back, separate the sheets. Discard the white backing or use it for another project, as you won't need it for this shell craft.
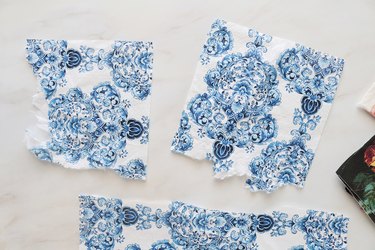
2. Rip the napkin into smaller pieces
Consider the designs and decide which parts you'd like to display on each shell. Next, carefully tear the napkin into a piece that's slightly larger than your shells. You can also use scissors for this step.
3. Apply decoupage glue to the inside of the shell
Using a medium-size paintbrush, apply an even layer of decoupage glue along the inside of each shell.
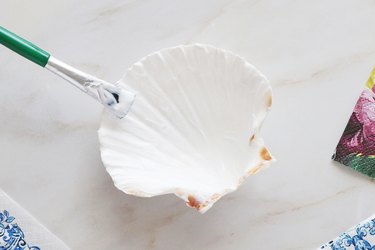
Tip
If the inside of your shell has an uneven color, consider painting them with white acrylic paint first. This is especially helpful if your decorative napkins are lighter or more transparent. Be sure to let the acrylic paint dry before applying decoupage glue.
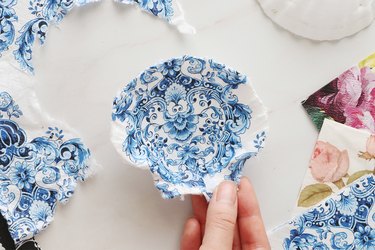
4. Dress up your shell with the printed napkin
Carefully press the decorative napkin along the inside of the shell using your fingers to smooth out the paper. For best results, move your fingers in the same direction rather than moving back and forth. Let it dry for at least one hour.
Tip
Use a wooden ice pop stick to help smooth out the paper. This is especially useful for working along the crevices at the base of the shell.
5. Remove the excess paper
Once dry, carefully remove the extra paper around the perimeter of the shell. You can do this by gently pulling the excess paper downward; the naturally sharp edge of the shell will help cut away the paper.
6. Add another layer of decoupage glue
To seal the decorative paper, apply a thin layer of decoupage glue on top. Use the paintbrush to "fold" the rough edges of the paper under the edge of the shell. Let it dry for at least one hour.
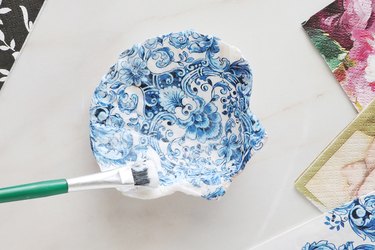
Tip
Avoid adding too much decoupage glue during this step. The excess moisture might make the colors in your napkin bleed or warp.
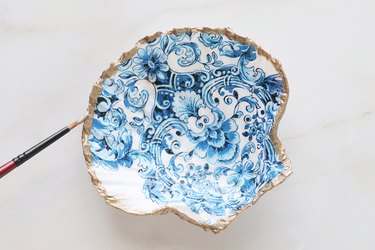
7. Apply gold paint along the border
To complete your DIY trinket dishes, use a thin paintbrush to apply gold acrylic paint along the edge. This is an excellent (and easy!) way to give the dish a gilded, finished look without using gold leaf. Depending on the consistency of the paint, you might need to add another layer to create a more opaque gold edge. Let it dry for one to two hours or until the paint is completely set.
Tip
Of course, you’re not limited to gold paint. Feel free to use other metallic acrylic paints, like silver or brass.
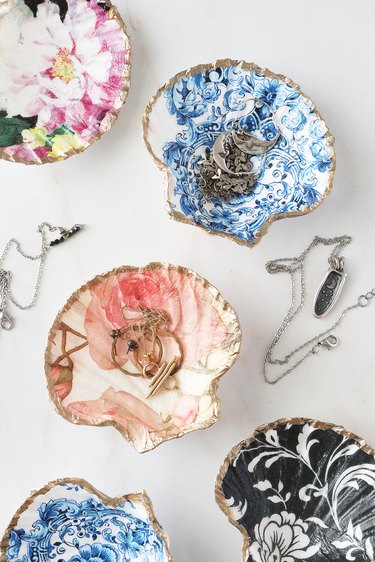
8. Display your shell ring dish
Once the gold edge has dried, your dish is ready to store necklaces, rings or random knickknacks.
Tip
To enhance the golden look, flip over the shell and apply a layer of acrylic paint to the back side.
How to Clean Shells Before Crafting
If you want to use shells from the beach, it's a good idea to clean them before crafting. One common method for cleaning shells is to soak them in water and bleach. This will help loosen up dirt, debris and the periostracum, which is the thin outer layer of shells.
To do this, combine equal parts water and bleach in a shallow container. Add the shells in a single layer, making sure they are completely submerged in liquid. Let them sit for about one to two hours. During this time, you'll see the periostracum come off in flaky pieces.
Keep in mind that bleach can discolor some types of shells, so you'll want to keep a close watch on your pieces. Avoid leaving them in the solution for more than two hours.
To finish cleaning your shells, take them out of the solution while wearing gloves. This will protect your hands from the bleach. Rinse the shells under running water and remove any leftover debris using an old toothbrush. Rinse them again and then let them dry before starting your project.
Warning
You can use shells from the beach. However, never take a shell that has a creature living in it. In this case, it’s best to leave the shell on the beach and look for an empty one.
Best Glues and Paints for Shell Craft Projects
The best glue for a shell craft depends on your specific project. For this decoupage shell DIY, you can simply use decoupage glue, also known as waterbase sealer. But if you want to glue something to a shell, you can use either hot glue or craft glue.
Hot glue might be more ideal if you want to adhere something to a curved surface. That's because the hot glue sets more quickly than craft glue. If you want to glue a shell onto another object, both hot glue and craft glue work great. You could even use a sea shell glue, like the Beacon Sea Shell Glue on Amazon, which is specifically designed for shell crafts.
To paint a shell, acrylic paint or spray paint works best. Compared to other paints, these mediums will be less likely to slide around on shells.