If you're looking to spruce up your space, you may be tempted to buy new home decor. But what if you could make a decor piece with things you already own? All it takes is a bit of creativity and basic crafting skills to make it happen.
This DIY tiered tray is the perfect example. It calls for upcycled candlesticks, cake pans and a charger plate, which you may already have at home. If not, you can often find these items at garage sales, flea markets and thrift stores. Some retailers, like Dollar Tree, also offer cake pans and charger plates for just a few dollars.
Video of the Day
Video of the Day
That being said, there are endless ways to customize this DIY project. The final result will depend on the specific supplies, so you can be sure that it will be unique. What's more, you can personalize the project to suit your home decor. For example, if you enjoy farmhouse styles, you can use hot glue to attach burlap ribbon around the cake pans and paint the candlesticks with chalk paint. Just like that, you'll have a farmhouse tiered tray.
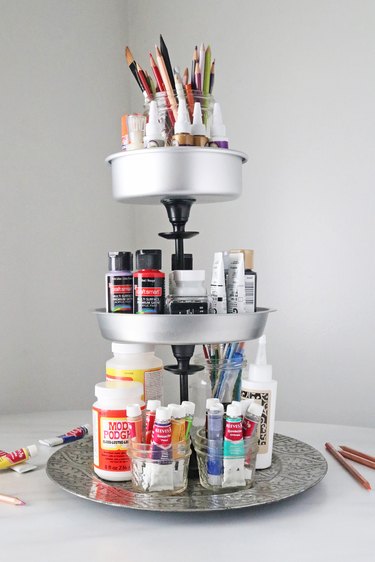
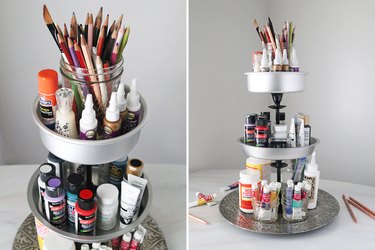
Regardless of your style, this easy DIY is ideal for giving old items a makeover. The tray can also be used to organize a wide range of items, from craft supplies to makeup. Are you ready to hack your own three-tier tray? Check out this three-tiered tray tutorial.
Things You'll Need
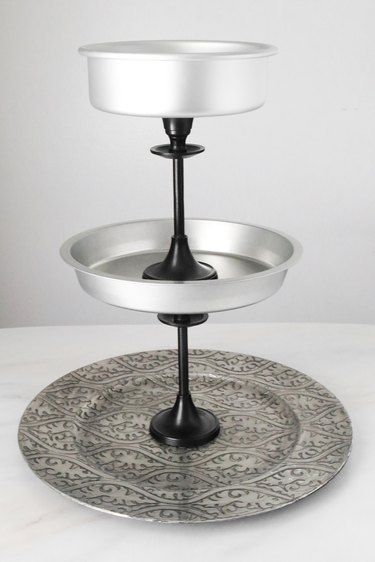
Small round aluminum cake pan (about 6 inches wide)
Medium round aluminum cake pan (about 8 inches wide)
Charger plate (or large aluminum cake pan)
2 candlesticks
E6000 glue
Paint and paintbrush (optional)

Tip
If you’d like, paint the candlesticks with acrylic paint or spray paint. Just make sure they’re fully dry before constructing your tiered stand.
Step 1
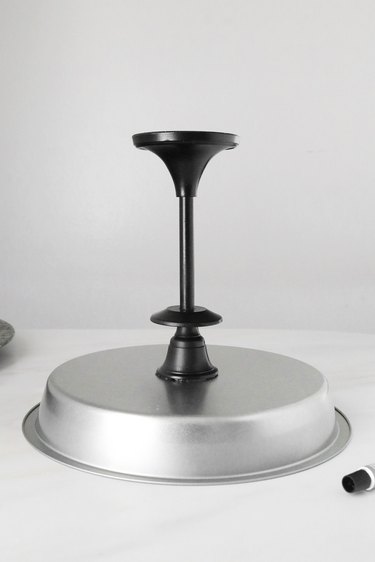
Turn over the medium cake pan. Apply E6000 glue to the top of one candlestick and then adhere it to the bottom of the cake pan. Make sure it's in the center.
Tip
If needed, use a ruler to make sure the candle holder is in the middle.
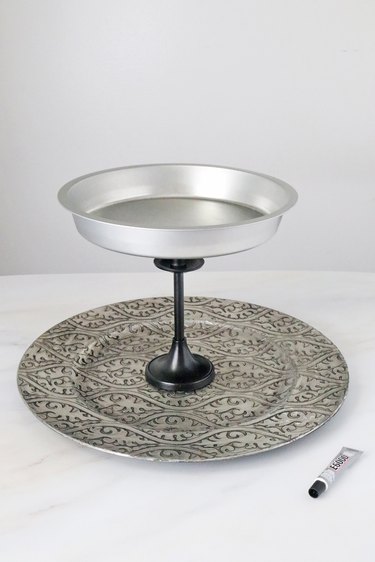
Step 2
Apply E6000 glue to the bottom of the candlestick. Carefully turn the candlestick right side up. Place it in the center of the charger plate, pressing it down firmly to secure it. This will make up the bottom half of your three-tiered tray.
Tip
The glue will not be dry yet, so it’s important to handle the candlestick carefully and slowly. To be safe, you can let it sit for at least 20 minutes after every step. The glue won’t be fully dry, but it will begin to set.
Step 3
Now, turn over the small cake pan. Apply E6000 glue to the top of the second candlestick and place it on the bottom of the cake pan. Again, make sure it's in the center.

Step 4
Apply E6000 glue to the bottom of the candle holder. Turn the candlestick right side up, just like you did with the first one. Carefully adhere it to the center of the medium cake pan. Let everything dry for 24 to 48 hours.
Once dry, your DIY tiered tray is finished. Use it to organize beauty products, spice bottles or office supplies, like glue sticks and pens.
You don't have to limit yourself to organization. This DIY project can also be used as a seasonal decor piece. For example, if you're planning a holiday party, make a themed tiered tray and use it as a centerpiece. If you love greenery, try using the tiered tray to display small cacti and succulents.