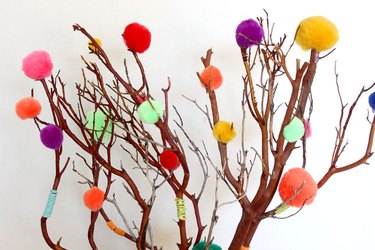
If you're looking for home decor ideas that will brighten your living space, look no further. One of the most colorful and easy craft projects to tackle is a DIY tree branch arrangement festooned with pompoms. It makes a delightful centerpiece for a dining table or a cheerful focal point on a coffee table or side table in the living room. You'll see from the tutorial that this craft idea is fun and simple to assemble. It can even be adapted to work as wall art or a hanging sculptural piece. So, it's not just an easy DIY project. It's an amazing idea for room decor that can be changed frequently depending on seasons and mood.

Video of the Day
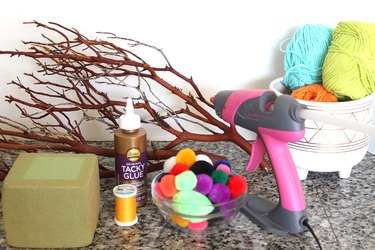
Things You'll Need
Tree branches
Plant pot or vase
Floral foam
Newspaper
Yarn
Craft glue
Pompoms
Hot glue
Needle and thread
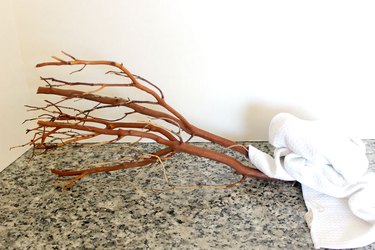
Step 1: Clean Your Branches
If you've foraged your branches from your yard or even if you bought them at a craft store, wipe them with a damp cloth to remove any dust or dirt. You'll be gluing pompoms on them, so a clean surface will help them to better adhere. Manzanita branches, birch branches and curly willow are ideal for this DIY craft. I like the natural state of the branches, but if you want an extra pop of pizzazz, you can spray paint them white or a bright color.
Video of the Day
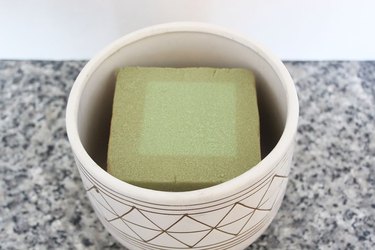
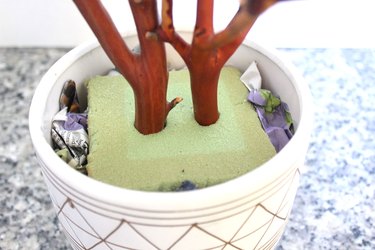
Step 2: Prepare Your Pot
Place a piece of floral foam inside your vase or plant pot. Floral foam comes in two varieties: dry floral foam for artificial arrangements and wet floral foam for fresh flowers. You can use either for this DIY project.
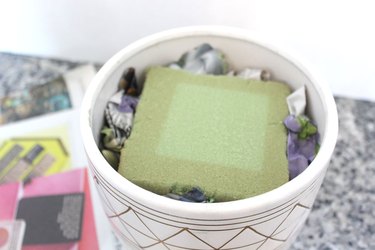
Then, stuff scraps of newspaper around the floral foam to make it nice and snug.
Step 3: Insert the Branches
Insert the branches into the floral foam to keep them upright. Position them deep enough in the foam so they do not move around. As an alternative to a pot with floral foam, you can use a tall vase and place the branches in it as you would cut flowers.
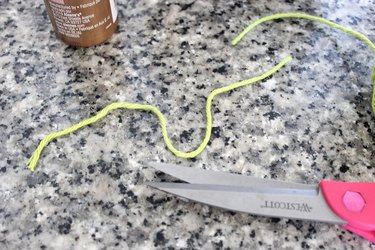
Step 4: Accent the Branches With Yarn
Let's start by adding pops of color to the branches even before the pompoms are attached. We'll do this by wrapping yarn around various points of the branches. The yarns coordinate beautifully with the pompoms. Cut a piece of yarn that is about 8 inches long.
Apply some craft glue to the section of the branch you would like to decorate with yarn.
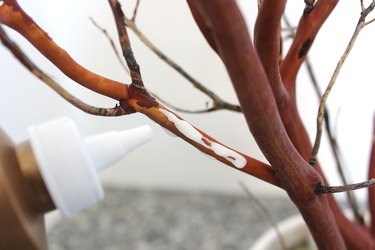
Wrap the piece of yarn around the branch where the glue was applied.
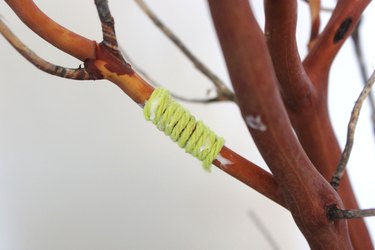
These yarn accents make the branches festive already. I kept them primarily at the base of the branches, but you can position them anywhere your creativity takes you.
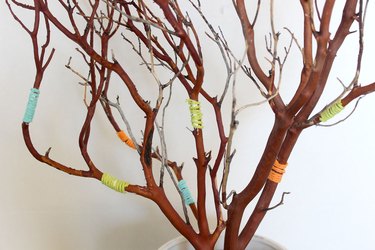
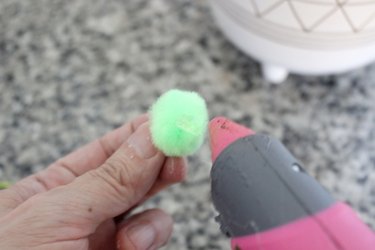
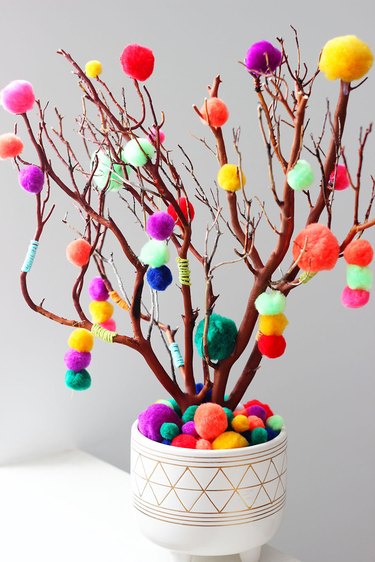
Step 5: Add the Pompoms
Few craft supplies induce as much happiness as yarn pompoms. They are fuzzy spheres of cheeriness, and they have a quirky quality that elevates the branches to pop art status. You can't say the same for artificial or paper flowers. To adhere the pom poms to the branches, begin by adding a dab of hot glue to each pompom.
Position the pompoms on the branches, holding them in place until the hot glue dries.
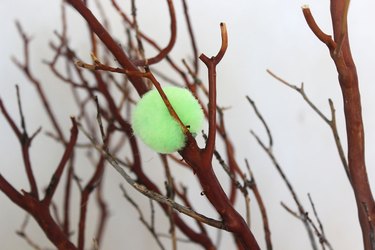
Glue some of the pompoms at the tips of the branches as if they were flower buds.
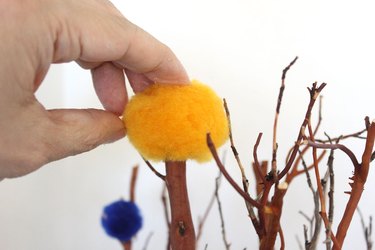
Turn the pot as you proceed to make sure that the pompoms are evenly distributed throughout the branches.
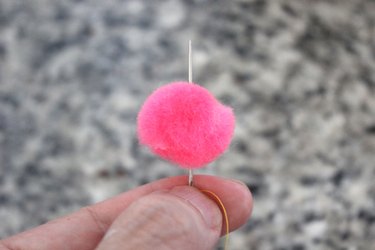
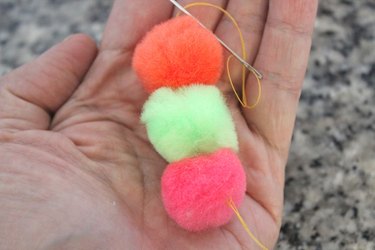
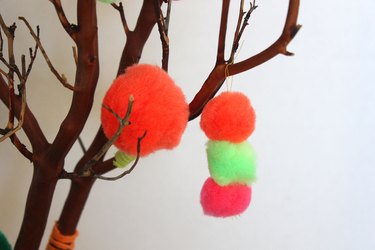
Step 6: Make Hanging Pompom Ornaments
To add another level of pompom goodness, create some ornaments that dangle from the branches. Thread a needle and insert the needle through the center of a pompom.
Keep going until you have three to four pompoms attached with thread.
Tie the ends of the thread to a branch. This pompom ornament hack works best for horizontal sections of the branches so they can hang freely.
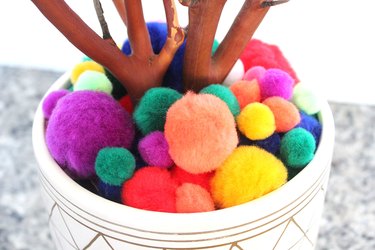
Step 7: Cover the Pot With Pompoms
Hide the floral foam and newspapers in the pot with more pompoms. The base of the pot is also an area that you can change with the seasons. Tailor the color of the pompoms to certain holidays. You can also substitute pompoms at the base for other decor items, like candy eggs for Easter or small Christmas decorations for the winter holidays.
This tree branch arrangement is one of the best DIY ideas for people who don't have a lot of time or money but still want a beautiful home decor piece.
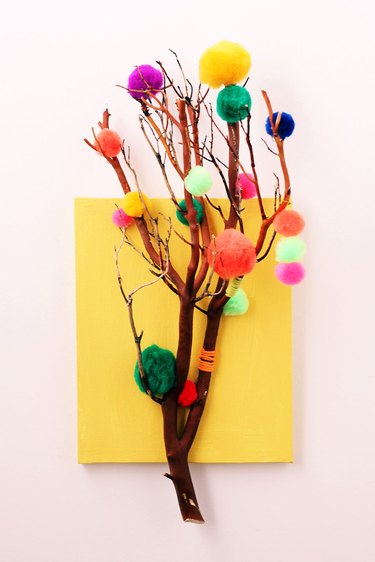
Another way to display your tree branch decor is to adapt it into a wall hanging. Find a picture frame or canvas that you might have in storage or purchase an inexpensive one from Dollar Tree and hot glue the decorated tree branches to it. Allow the branches to extend past the edges of the frame for wall decor that truly pushes boundaries.
One of my favorite tree branch decoration ideas is to hang the branches from a ceiling above a table. It's a dramatic home decor hack that always invites compliments. Tie fishing line or twine to the branches and hang them from the ceiling with eye hooks. I've even strung lights in the branches to turn the piece into a chandelier. You can also hang the branches on a curtain rod in a doorway.

Whether you turn this DIY home decor idea into a table centerpiece, a wall decoration idea or a suspended tree branch, you'll agree that when it comes to room decor, it's a good thing to branch out.