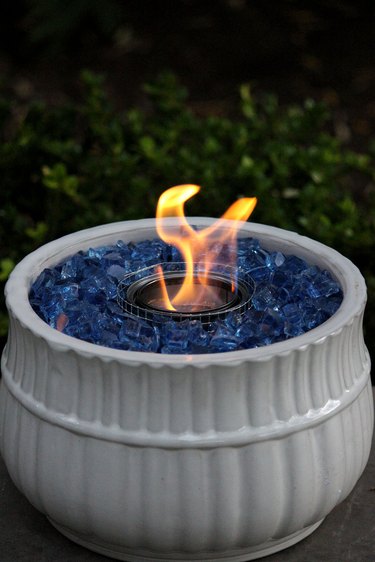
There's nothing like a fire pit when it come to summertime or even year-round gatherings. The mesmerizing glow of the fire along with the warmth puts everyone in a grand mood. Unfortunately, fire pits can take up a lot of room. They can be expensive, and frankly, they get a little unwieldy with the flames. If you want the perks of a fire pit without the hassles, then a tabletop version is the way to go. It's so easy to assemble one, and in no time, you'll have a portable fire pit that will be the highlight of your outdoor entertaining.
Video of the Day
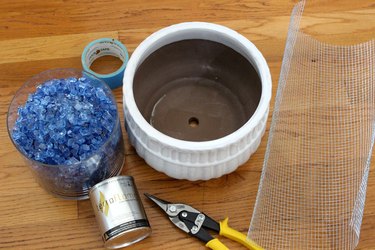
Things You'll Need
Large clay pot
Duct tape
Hardware cloth
Step 1: Choose Fire-Safe Materials
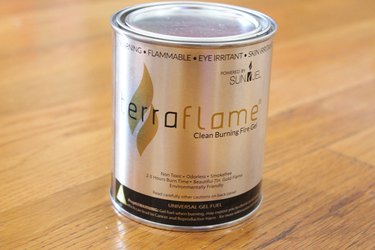
When working with a heat source, it's obviously imperative to consider safety first. Therefore, we want to make sure our tabletop fire pit uses materials that are safe. A good heat source is fireplace gel fuel in canisters. You simply open the lid of the can, light the gel and enjoy the flame. The gel fuel canisters burn cleanly without fumes or odors, and the flame is contained within the canister.
Video of the Day
Warning
As with any flammable mixture, use caution and keep it away from children. Read the instructions on the canister before using it.
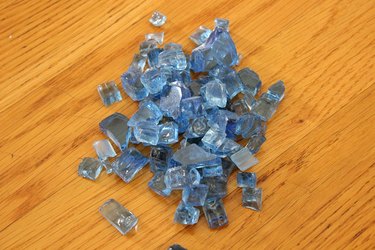
When choosing the types of rocks to use in this tabletop fire pit, select ones that are rated for extreme heat. While the rocks don't actually touch the flames, it's better to err on the side of caution. Fire glass, which is formulated for use in fireplaces, is ideal for our purpose.
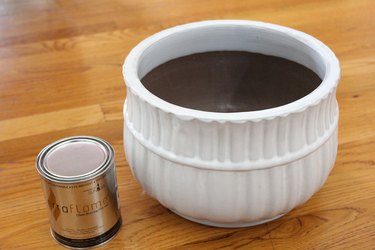
Step 2: Choose a Container
Select a clay pot that has a diameter wide enough to fit the gel fuel canister with some room to spare. I selected a container that was wider by about 4 inches all around. Again, the flame and heat do not touch the clay pot, but the wider container creates a physical barrier between the flame and surrounding objects, like your fingers.
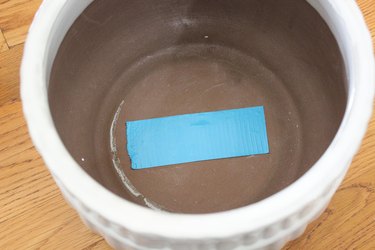
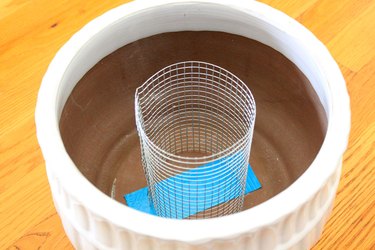
Step 3: Cover the Hole
If your clay pot has a hole in the bottom, cover it with a piece of duct tape.
Step 4: Create a Cylinder to House the Canister
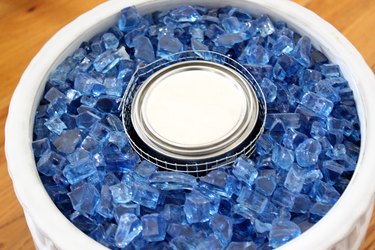
To create an opening in the clay pot where the gel fuel canister will sit, we need to create a tunnel, or cylinder, out of hardware cloth. I chose hardware cloth that has 1/4-inch openings, as this would be a dense enough barrier for the 1/2-inch fire glass. Start by wrapping a piece of hardware cloth around the canister, leaving some room around it so it is loose rather than too snug. Mark off this measurement and cut the hardware cloth to this width with metal snips.
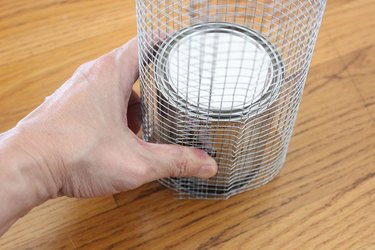
Measure the height of the clay pot and trim the hardware cloth to this height.
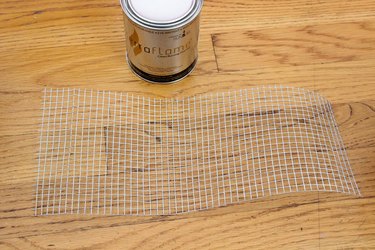
Connect the two ends of the hardware cloth with wire to create a metal mesh cylinder. The hardware cloth is usually rolled up with wire when you purchase it, so you can just reuse that wire instead of throwing it away.
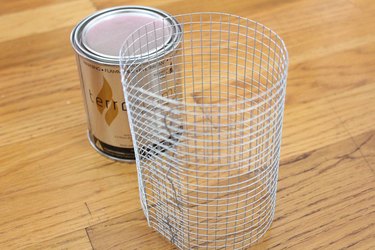
Position this cylinder in the middle of the clay pot.
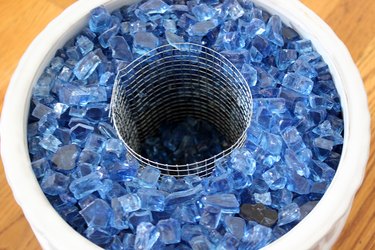
Step 5: Add the Fire Glass
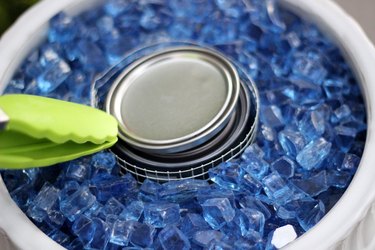
Pour fire glass into the perimeter outside the mesh cylinder, filling it to the top of the clay pot. Within the cylinder, add enough fire glass so that when the gel fuel canister sits inside it, the top of the canister lines up with the top of the mesh.
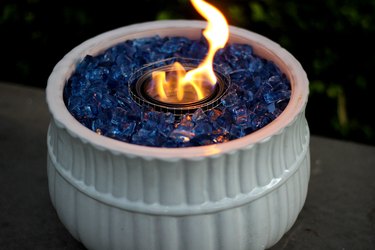
Step 6: Light the Fire Pit
To light the fire pit, remove the lid from the can and light the gel fuel. Instant ambience!
To extinguish the flame, hold the lid of the gel fuel canister with tongs and place it back on top of the canister.