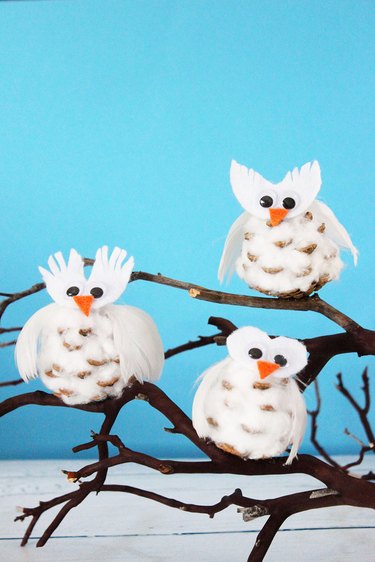
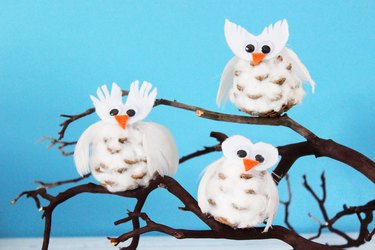
Is a snowy day keeping you inside? Celebrate the chill and make these snowy owls out of pinecones. Stuffed with cotton to give them a downy fur, these adorable owls are perfect for holiday decorating. They're also ideal for place card holders, party favors and tree ornaments. You might say they're a real hoot.
Video of the Day
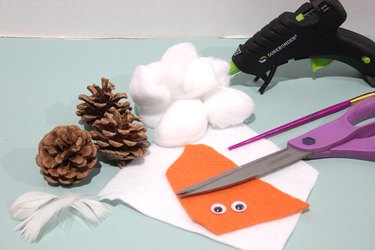
Things You'll Need
Pinecones
Cotton balls
Skewer or thin paint brush
White feathers
Hot glue
White felt
Scissors
Googly eyes
Orange felt
Step 1: Choose a Pinecone
Select a pinecone that is symmetrical and sits upright. Also, smaller pinecones are easier to work with for this project, as they require much less cotton. The pinecones I used were only about two inches high.
Video of the Day

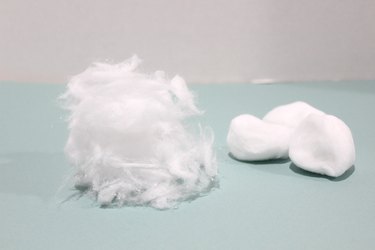
Step 2: Peel Apart Cotton Balls
Tear the cotton balls into little pieces. The smaller wisps will be easier to stuff between the pinecone scales, and the texture will be softer. One small pinecone requires about four cotton balls.
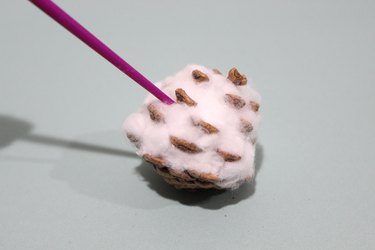
Step 3: Stuff Pinecone With Cotton
Stuff the cotton pieces between the scales of the pinecone, using a skewer or a handle of a thin paintbrush to push in the cotton. If you compact the cotton tightly, you will not need any glue to keep it in place. Continue adding cotton until just the tips of the scales are visible.
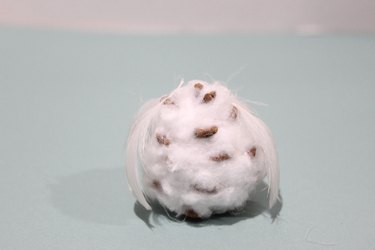
Step 4: Add Wings
For the wings, we're using small white feathers, which you can find at the crafts store. Decide which side of the pinecone will be the front of the owl. Then hot glue a feather to the left and right side of the body. Glue the top tip of the feather directly to one of the pinecone scales; the feather will not adhere securely to the cotton.

Cheat the feathers out a little to the front to make sure you can see them.
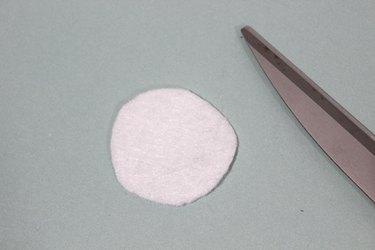
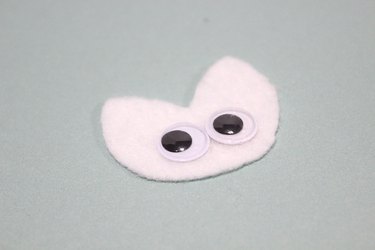
Step 5: Cut a Head Shape
Cut a circle from felt for the head. For these pinecones, I cut circles that were one and a half inches in diameter.
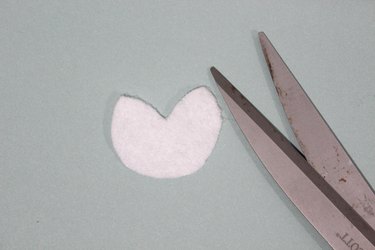
Technically, snowy owls have round heads without ear tufts. These pinecone owls are not anatomically correct to begin with, so I cut a heart shape out of the circle in some of my owls to give them tufts — they really help create that "owl" look. If you're making several owls, vary the shape of the heads so each owl has a different personality.
Step 6: Add the Eyes
Hot glue two googly eyes toward the bottom of the head. If you don't have googly eyes, you can draw some eyes on the head with a black marker or cut out some pieces of black felt.
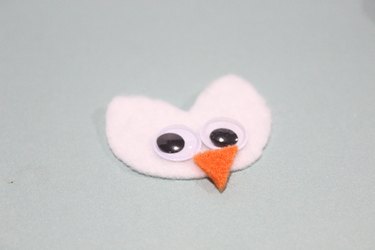
Step 7: Add a Beak
Cut some small triangles out of orange felt and hot glue them right under the eyes. Owl beaks are usually white and not orange, but I chose this color as people not schooled in ornithology associate orange with the color of beaks. Make a white beak if you prefer.
Step 8: Glue the Head to the Body
Hot glue the head to the body, adhering it to a pinecone scale to make sure it stays in place. If your pinecone is short and squat, position the head higher on the pinecone. If the pinecone is tall, position the head lower.
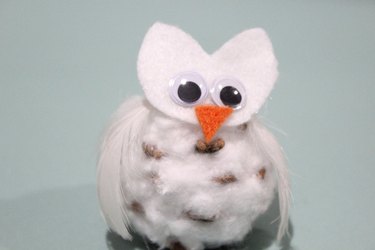
Gather a group of owls on a branch for a whimsical display, or decorate your holiday tree with them. And here's a piece of owl trivia: A group of owls is called a parliament, as they're considered wise — just a little conversation starter for your next holiday party.