I love to sew. For those of you who love it as much as I do, I see homemade bias tape in your future. Sure, you can go to the store and buy some plain trim, but why not sew bias tape of your own. It's easy, fun and the possibilities are endless. That's why I created this new make your own bias tape series for you. Today, I'll teach you how to make your own, and then, for the next few weeks, I'll show you the fun things you can do with all that bias tape I know you're going to want to make.
The beauty of bias tape is, because it is cut on the bias (45 degree angle) of the piece of fabric, it is super pliable, has stretch and it can curve around all kinds of shapes. It can be used to finish off a raw edge on almost anything—hems, armholes, necklines, ruffles, peplums and seams, just to mention a few sewing projects it's useful for. You can create your own in any color, pattern or size you'd like. Making your own saves loads of money. And DIY homemade bias tape makes a great gift for all of your sewing friends. So, what are we waiting for? Let's turn up some good music and get started. Happy sewing!
Video of the Day
Video of the Day
Things You'll Need
Fabric
Bias tape marker, optional
Rotary cutter
Tip
You don’t have to have a bias tape maker, but it does make the process a little easier. There are many out there on the market and they come in different sizes, but the main thing to remember is that the measurement listed on the package is for single fold bias tape. So, if you’re making 1/2 inch double fold bias tape, like I did here, then you’ll need a one inch bias tape maker.
Step 1: Choose the Fabrics
First, pick out some fabrics you like. For this tutorial on how to make bias tape, I chose cute cotton woven fabrics with a small print. You can also use satin, corduroy, knits or cotton blends.
Step 2: Fold the Fabric Into a Triangle
Now turn on some good music and fold your square of fabric to form a triangle.
Cut off the extra piece.
Step 3: Fold the Triangle in Half
Next, fold this triangle in half by taking the top corner and folding it down to meet the bottom corner. This will create a triangle with four layers of fabric that has one side with raw edges, one side with two folds, and one side with one fold.
Pivot your triangle so the straight edge with one fold is at the bottom and clean up the raw edges.
Step 4: Cut the Strips
Using your rotary cutter, cut 2 inch strips.
Line Up the Short Ends
Right sides together, line up the short ends of the fabric strips. Sew a quarter inch seam.
Trim off the little triangles that were sticking out.
Step 5: Iron the Seam
Press the seam open.
Step 6: Pull Into the Bias Tape Maker
Place the end of your long strip into the bias tape maker. Pull it through to the other side and start the fold.
Step 7: Press and Pull
Press the folded fabric on the ironing board as you pull the strip of fabric through the bias tape maker. One fold will be slightly smaller than the other fold.
Step 8: Fold in Half and Press
Fold the strip in half again and press with a hot steam iron. Notice how Fold the strip in half again and press with a hot steam iron.
I don't know about you, but to me, there is something very comforting about ironing and creating yards and yards of bias tape. With some good music playing, I could seriously do this all day long.
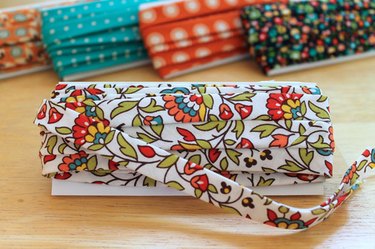
Now wrap your cute bias tape around some stiff cardboard and get started making more…