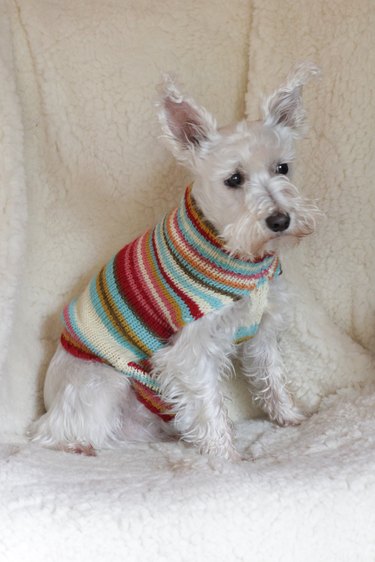
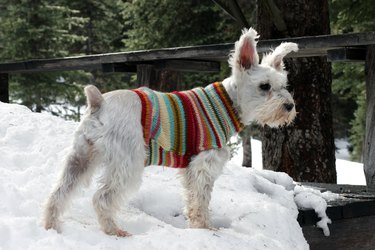
Now that winter is in full swing and the cold weather is here to stay, keep your furry friends warm with this adorable DIY dog sweater. When your dog arrives at the park wearing this charming sweater, everyone is sure to look twice and want to know which pet boutique sells this cute little number. They'll be amazed when you tell them you made it yourself from an old sweater and maybe you can tell them your how-to secrets while your pups run and play together.
Video of the Day
Things You'll Need
Sweater
Pen
Straight edge
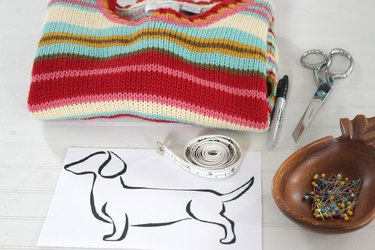
There's nothing like the feeling of creating something beautiful and knowing that you did the very best job possible. Taking your time, planning the project and choosing the right tools for the job can make all the difference in the world. The first step is to decide on the perfect sweater for your pup. You could find one hanging around in your closet or drawers, your local thrift store might have the ideal sweater or, if you don't want to leave your house, you could even even shop for one on-line at a thrift store like Thred Up. After you've found just the right thrift store sweater or old sweater from your closet, gather up the tools you'll need . Some of my favorite sewing supplies out there right now include the 60" Tape Measure With Fabric Cover, these Fiskars Sparkle Scissors and these straight pins. Now that you're armed with the perfect sweater and the right tools, you're ready to tackle this project with confidence and know when you finish, your dog is going turn heads this winter when you hit the dog park together.
Step 1
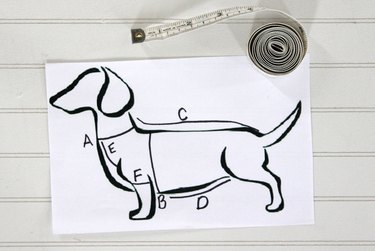
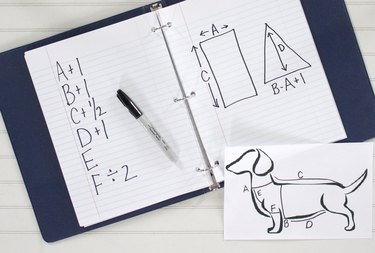
Start by taking the following measurements on your dog and doing a little math:
A. Neck circumference +1 inch
B. Chest circumference (right behind the front legs) + 1 inch
C. Length from collar to tail + 1/2 inch
D. Underside length from collar to just short of the "business end" + 1 inch
E. Distance from the top of the collar down to the top of the front leg
F. Front leg circumference x 1/2
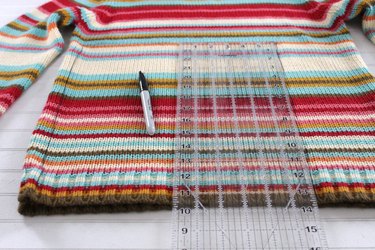
Step 2
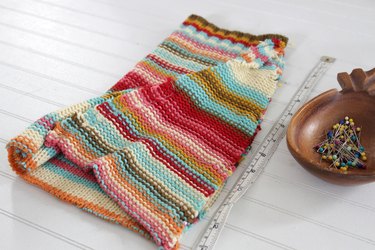
To help remember how to cut each piece, draw a rectangle that measures (A) wide x (C) long. Compute the difference between (B) and (A); add 1 inch. That measurement will be the bottom of the triangle piece. The height of the triangle will be your (D) measurement.
Step 3
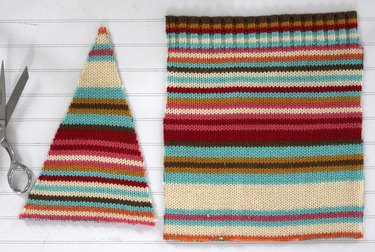
Use the finished bottom edge for the neckline and cut a rectangle that measures (A) wide by (C) long. From another piece of the sweater cut a triangle (B-A+1) wide by (D) long.
Step 4
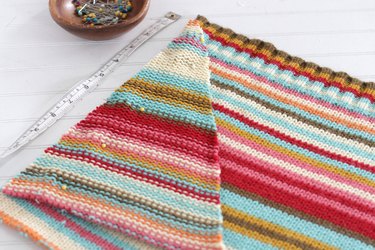
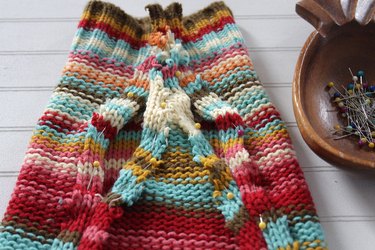
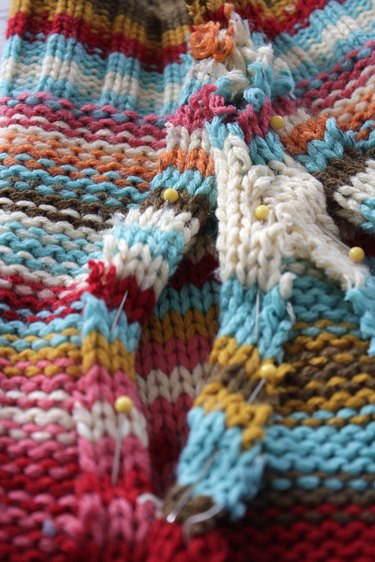
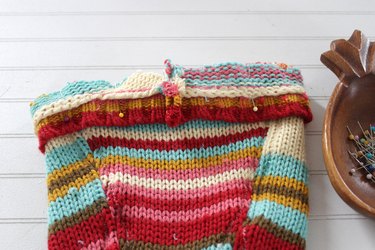
Pin the triangle to the main body of the doggy sweater with right sides facing so that the point of the triangle is lined up with the beginning of the neckline ribbing. The back edges of the sweater will not line up because the underside of the sweater needs to be shorter than the top.
Place one pin at (E); measure (F) from (E) and place a second pin at this point. The space between the pins will become the leg opening.
Step 5
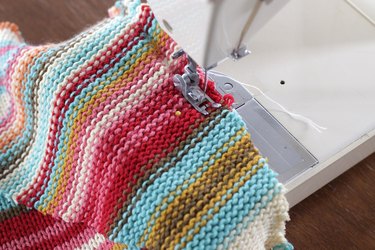
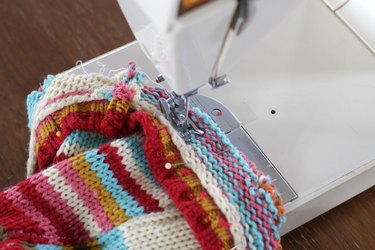
Using a 1⁄2-inch seam allowance and a stretch stitch or a small zigzag stitch, join one side of the triangle to the rectangle: Begin at the point of the triangle, backstitch, then stitch to the first pin (leg opening) and backstitch again. Skip the leg opening and repeat for the remaining portion of the seam, backstitching at the beginning and end.
Step 6
Pin the other side of the triangle to the other side of the sweater in the same manner as step 4.
Step 7
Sew with right sides facing in the same manner as step 5 so you have a leg opening. Sew all the way up at the top of the neck edge.
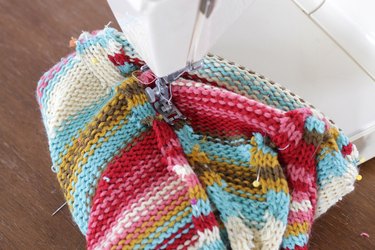
Step 8
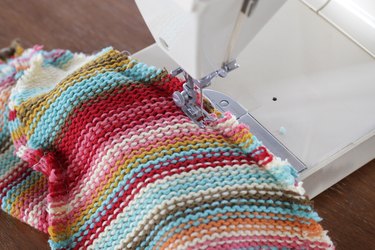
Pin the seam allowance to the body of the sweater. Using a wide zigzag stitch, stitch the seam allowance to the body of the sweater down one entire edge, catching the raw edge in the zigzag. This will finish the edge of the leg opening and reinforce the stitching. Repeat along remaining edges to hem both leg openings and finish the seams joining the underside triangle to the body of the sweater.
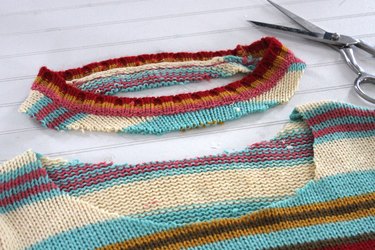
Step 9
From the original sweater, cut the neckline and add 1⁄2 inch. This will be used to finish the back edge of the dog sweater.
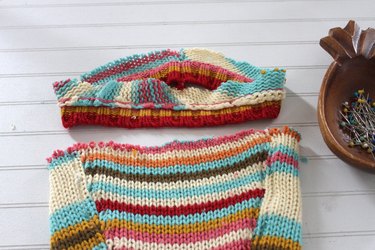
Step 10
Pin the collar ribbing to the raw edge of the sweater, right sides facing, stretching the rib to fit. Sew a 1⁄4-inch stretchable seam.
Step 11
Turn the sweater right side out and get your pup dressed and ready for the cold!