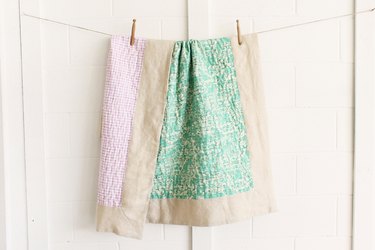
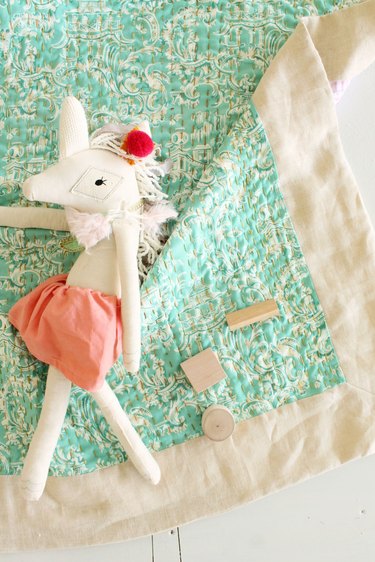
Favorite stuffed animals and blankets rarely leave the clutches of their tiny owners. Craft a treasured keepsake that holds even more meaning to the recipient by stitching a hand-quilted baby blanket. This simple sewing project can be completed with just a few yards of fabric, embroidery floss and a whole lot of love!
Video of the Day
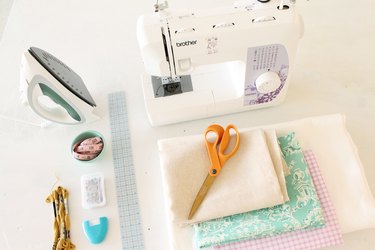
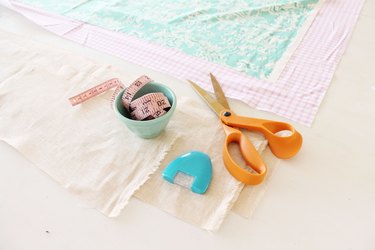
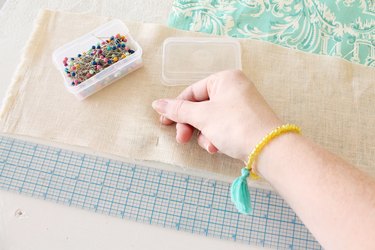
Things You'll Need
2 contrasting prints of cotton fabric, 1 yard each, 44" wide
2 yards of solid colored cotton or linen fabric, 56" wide
2 yards of washable cotton batting, 56" wide
Fabric scissors or a rotary cutter
Chalk marker or fabric marker
Straightedge
Measuring tape
Straight pins
Coordinating thread for sewing machine
Embroidery needle
12 to 15 skeins of colored embroidery floss
Iron and ironing board
Clear a flat work surface or table for cutting and pinning fabric and to keep fabric from dragging on the floor while you work. Thread your sewing machine with coordinating thread and test thread tension by sewing a few seams on a scrap piece of fabric.
Video of the Day
Step 1: Cut Pieces
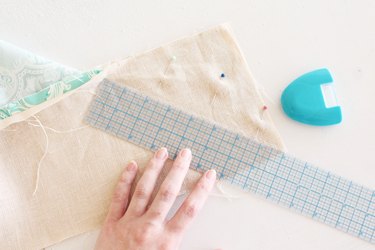
Press all yardage thoroughly with a steam iron. Smooth out the fabrics on a clean work surface, right-side up. Use a straightedge and chalk marker to measure and trace out the following fabric pieces. Cut each length of fabric carefully with fabric scissors or a rotary cutter:
(1) 44 x 36-inch piece of printed cotton for the front of the blanket
(1) 44 x 36-inch piece of printed cotton for the back of the blanket
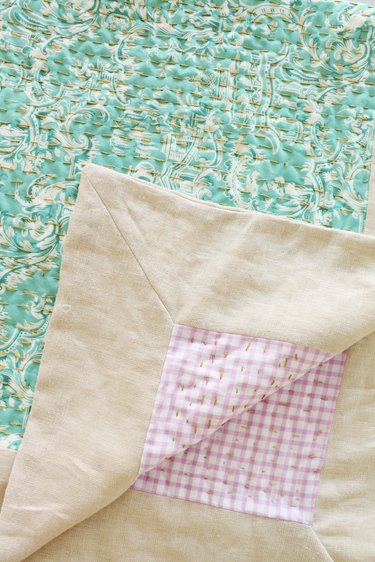
(4) 46 x 6-inch pieces of linen for the sides of the blanket border
(4) 56 x 6-inch pieces of linen for the top and bottom of the blanket border
(1) 54 x 44-inch piece of cotton batting for the interior
Step 2: Pin Border Pieces to the Main Pieces
Take the first 56 x 6-inch border piece of solid fabric and mark with a dash 6-inch in on either side with chalk. Place the first piece of patterned cotton fabric right side up, meaning the printed pattern facing up, flat on your work surface. Place the linen strip on top of the patterned fabric, flush with the bottom edge. Align the 6-inch mark on the linen strip with the bottom edge of the patterned fabric and pin along the edge. Distribute pins evenly and ensure there is a 6-inch overhang on both sides. Repeat marking and pinning each border piece to the edges of the quilt square, maintaining the 6-inch overhang on all sides.
Step 3: Sew the Border
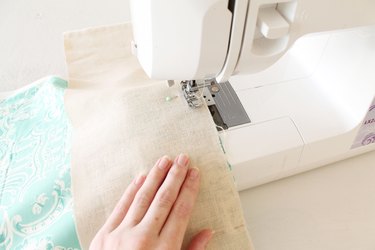
After pinning each border piece in place, align the fabric pieces underneath the foot of your sewing machine. Start sewing 1/2-inch from the top edge maintaining a ½-inch seam allowance and stop 1/2-inch before the bottom edge of the quilt square to accommodate the seam allowance of the remaining border pieces. Repeat until you have sewn each linen strip to its corresponding side.
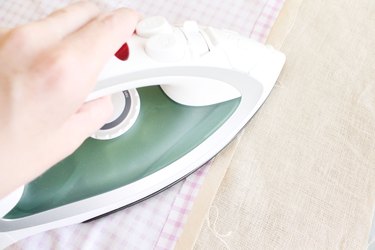
Tip
For a neat, professional finish, press the seam allowance open and flat with an iron after sewing each seam. Ironing as you go will make it easier to pin pieces together and help your machine sew through multiple layers of fabric without getting jammed.
Step 4: Trace and Pin Corner Seams
Fold over and align the 6-inch overhang at each corner with right sides together and the edges square. The raw edges of the seams should be facing out while the printed side of the fabric is facing in. Pin the two layers together in several places and trace a diagonal line at a 45 degree angle from the corner of the patterned square to the bottom corner edge of the linen border with chalk and a straightedge.
Step 5: Sew and Finish Corner Seams
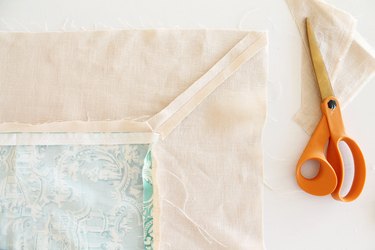
Align the corner under the foot of your sewing machine, starting where the two border strips meet. Sew down the traced line. This easy technique creates an mitered seam at the corner for an elegant touch. Trim the seam allowance to 1/2 inch. Press open the corner seam with an iron. Repeat these steps for tracing and sewing each corner on the front and back pieces.
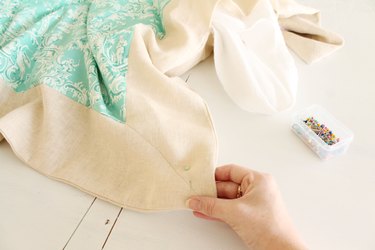
Step 6: Pin Together the Front and Back

After thoroughly pressing the front and back pieces with an iron, place the squares with their right sides (printed sides) together and the seams facing out. Line up each corner and edge placing pins along the way the to keep the pieces from shifting. Sew a 1/2-inch seam around the perimeter of the blanket, leaving a 12-inch opening at the bottom edge to insert the batting. Trim the seam allowance at each corner, about 1/8-inch away from the corner stitches so you can create crisp, square corners once the blanket is inverted.
Step 7: Insert batting
After you turn the blanket inside out, press all the seams and edges. Use the eraser end of a pencil if you need help pushing out the corners of the blanket. Fold up the piece of cotton batting and insert into the opening. Work the batting into the corners and shake until all the pieces lie flat on your work surface, much like stuffing a duvet cover. Place a pin in each corner and throughout the center to keep the batting from shifting while you hand-quilt the blanket. Fold the 1/2-inch seam allowance in the opening inward and press to create a crisp edge. Use pins to keep the opening closed while you stitch it by hand or with your sewing machine.
Step 8: Hand Quilt the Layers with Embroidered Stitches
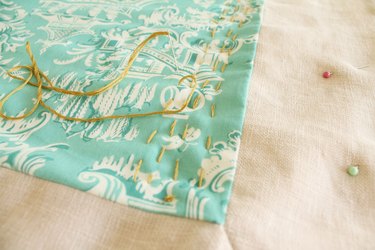
Thread a small needle with an arms-length of embroidery floss and knot the end. Start in the bottom lefthand corner and stitch rows of simple straight stitches to attach all three layers of material. Keep pins distributed over the surface of the blanket to keep all the layers of material in place while you stitch or take breaks. Stitch neat vertical rows, or sketch out a leafy motif with chalk and follow the guidelines. Be sure to leave at least 2 to 3 inches of extra thread to properly knot and tie off each row of stitching as you run out of thread.
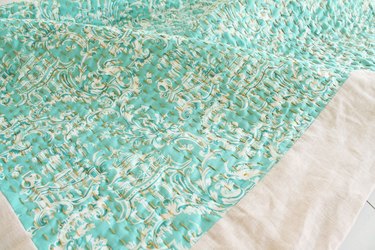
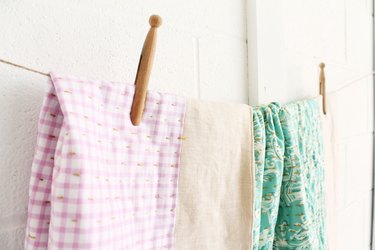
Once you've stitched the entire interior square, give it a shake and a final press. Caring for this handmade item should include washing on a gentle cycle and line drying to maintain the embroidery.
Fancy making a hand-embroidered blanket like this for grown ups? Simply increase the dimensions to suit the size of your bed and seam a bigger square or shop for wider yardages of fabrics at home decor fabric retailers.
