Overview
Peeps®, the yummy marshmallow candy, are a staple around Easter. This year, bring a sweet surprise to an Easter basket by sewing your own felt Easter bunnies that look like the iconic Peeps®. Plus, with only a couple of extra steps, these felt Easter bunnies can easily become wearable and shareable!
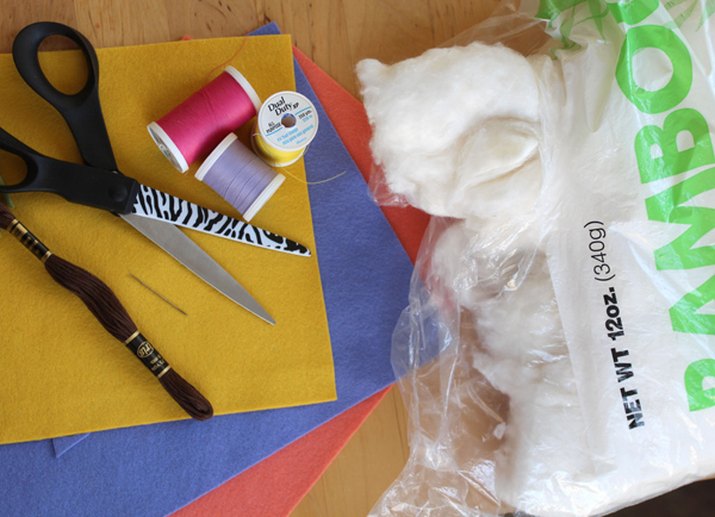
Materials
To make felt Easter bunnies, you will need: wool felt (in pink, yellow or purple), scissors, brown embroidery floss, a sewing needle, thread (in pink, yellow or purple), and batting. Optional supplies are an elastic headband, alligator hair clips, and tacky glue.
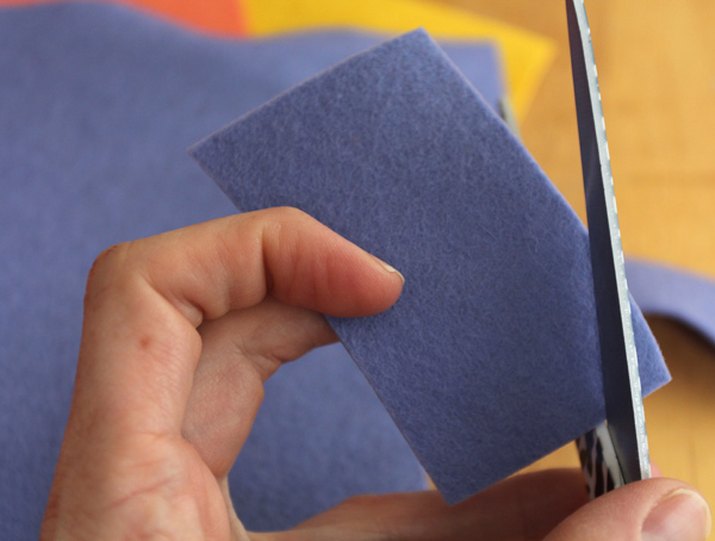
Start with a Rectangle
To get the basic bunny shape, start by cutting a rectangle of felt about 2.5 inches high and 1.5 inches wide. If you want a larger bunny, make a larger rectangle.
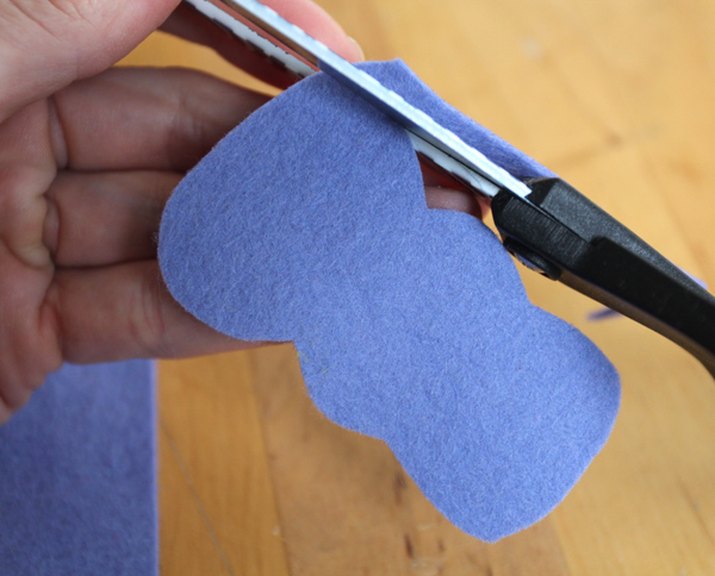
Cut Out a "Bow Tie"
Look at your piece of felt and imagine a bow tie with two larger circles of equal size on the outside, and one slightly smaller circle on the inside; this is the basic proportion of a felt Easter bunny.
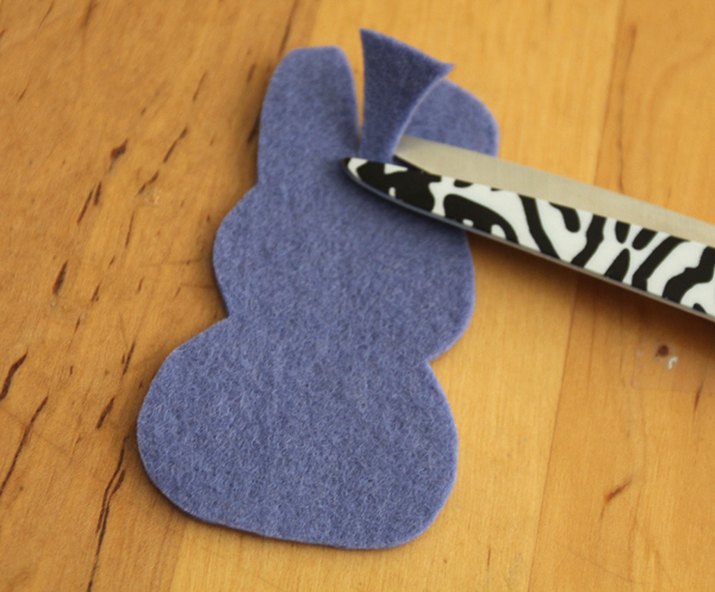
Cut Ears in the "Bow"
On one side of the "bow tie" cut out two ears of equal size.
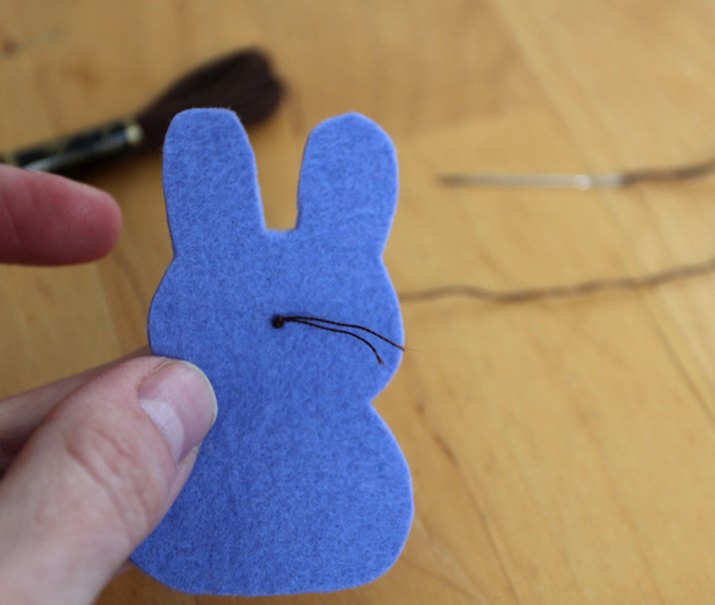
Make the Nose
Thread your needle with brown embroidery floss. Knot the floss several times. Run your needle and thread through the center of the bunny's face. Tie a second knot on the backside of the bunny face. There should be a large knot on both sides of the felt. Cut the threads after you've knotted both sides.
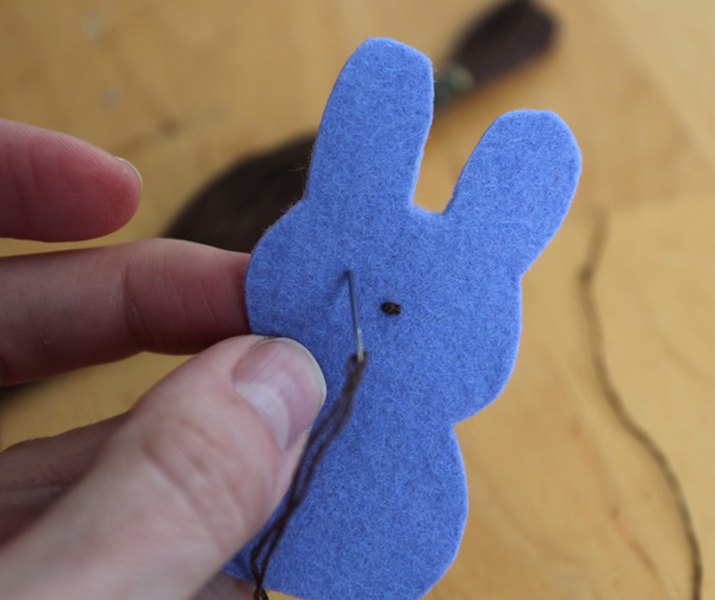
Knot the Left Eye
Cut the embroidery floss and knot it again. Run the needle about a centimeter to the left of the first knot and just a hair higher than the first knot. Knot the backside of the thread and cut the thread.
Knot the Right Eye
Run the embroidery floss-threaded needle through the felt about a centimeter to the right of the original knot and a hair above it. Knot the floss on the backside of the felt.

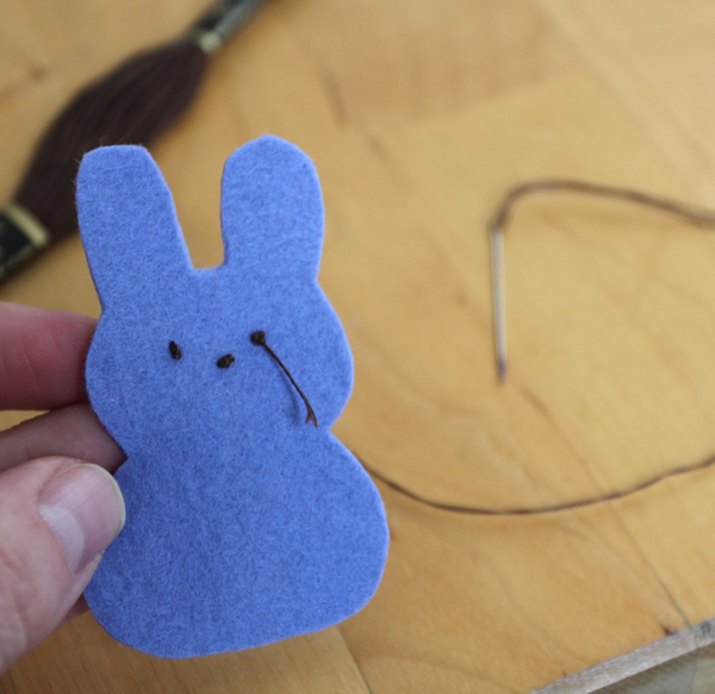
Cut a Second Bunny Body
Use your bunny as a pattern and cut a second bunny body out of the same color felt.

Stitch the Perimeter
Sandwich the two bunny felt pieces together and thread your needle with a piece of thread in a matching color. Use any style of stitching you like, but stay close to the edge.
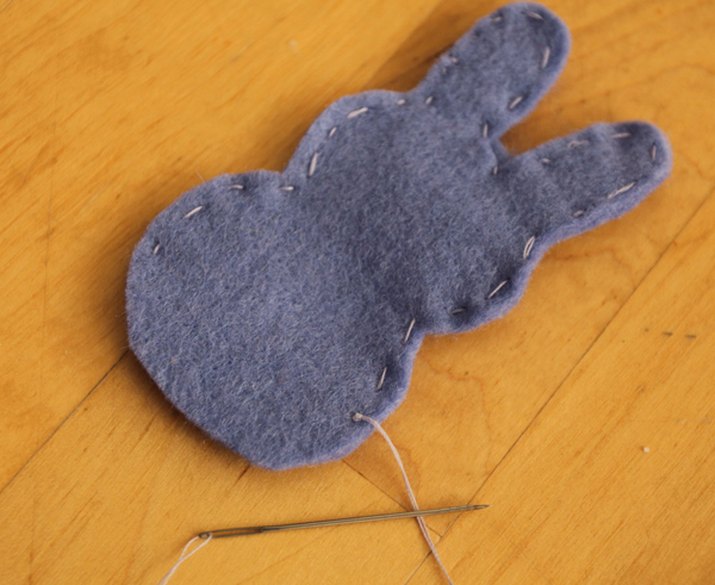
Finish Your Stitching
Measure about a centimeter up from the bottom of the bunny, and begin stitching around the perimeter--as close to the edge as you can get. Stop stitching when you reach the bottom centimeter of the bunny on the opposite side from where you started. Knot your thread and snip it.
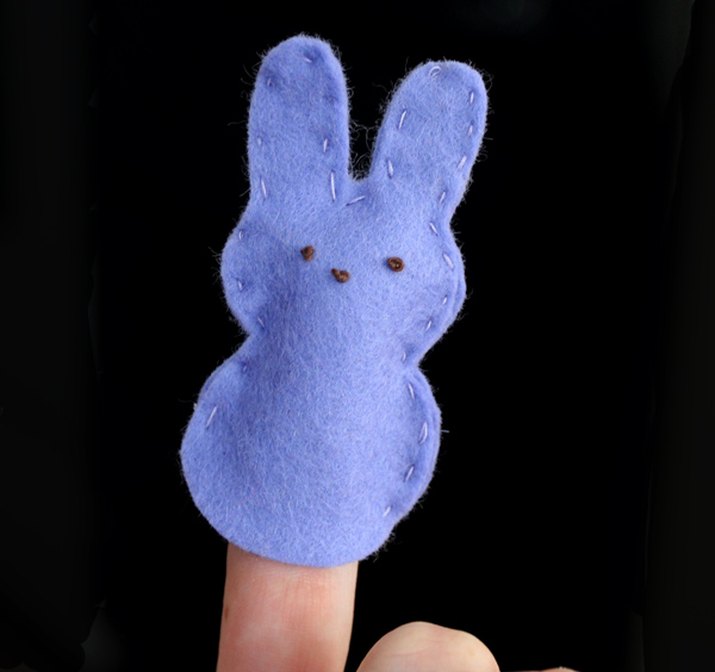
Variation: Bunny Finger Puppet
For a bunny finger puppet, knot your thread and stop here! You have an adorable puppet that your little ones will love playing with.
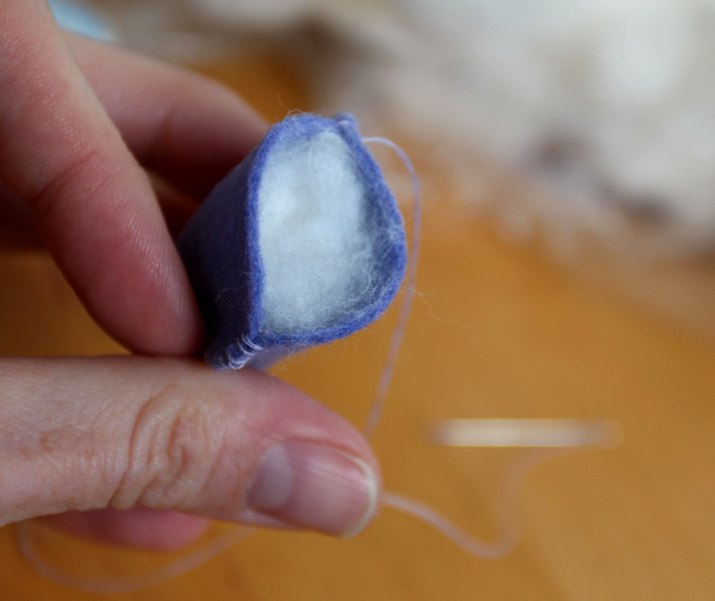
Going for Plush? Grab the Stuffing
Grab a small bundle of batting and stuff it inside your felt bunny. Thread your needle, and sew the bunny bottom closed. Use bunting, batting, tissue, or cotton balls--whatever you have!
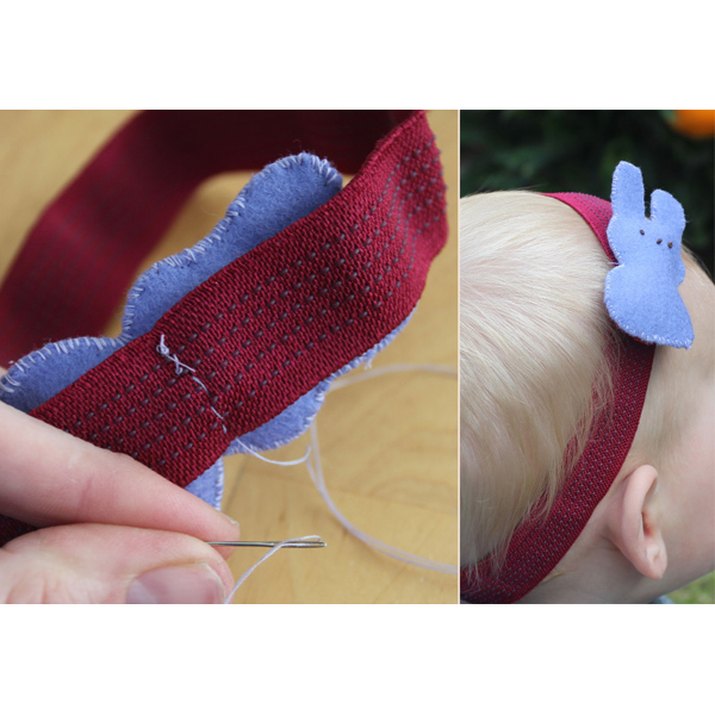
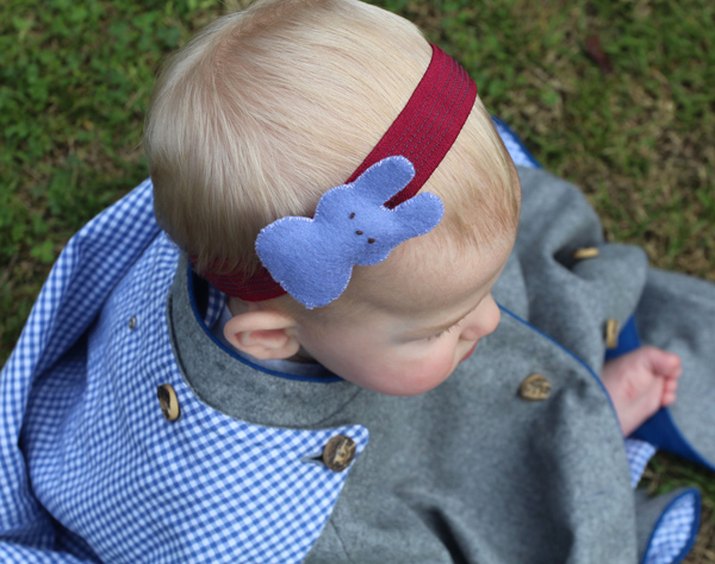
Variation: Headband Bunny
To make these little bunnies wearable, take an elastic headband, your needle and thread, and stitch the bunny directly onto the headband until it is secure.
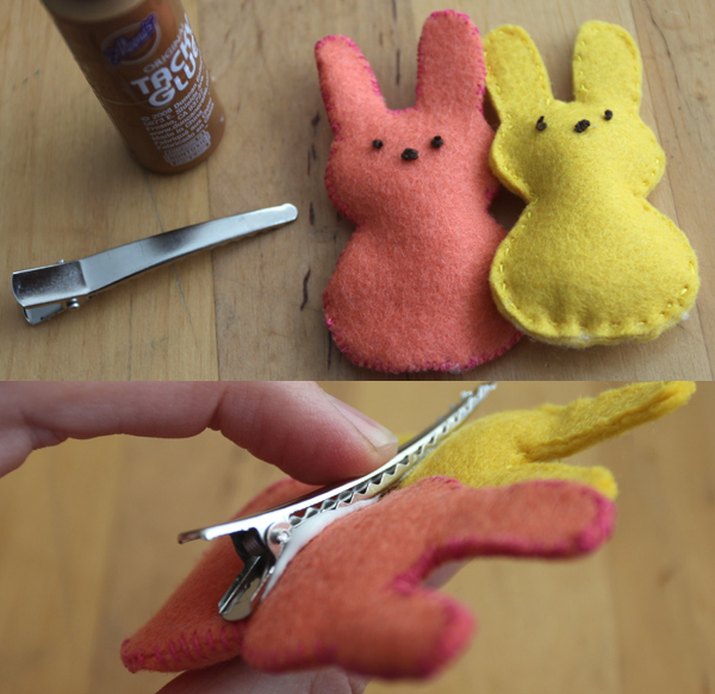
Variation: Hair Clip Bunny
Make a bunny hair clip (or tie clip if you want to include Dad in the fun!) by covering the top of a metal alligator hair clip with tacky glue. Press the felt bunnies against the glue until set. Be sure to let the glue dry completely before putting in hair!
Advertisement
Video of the Day