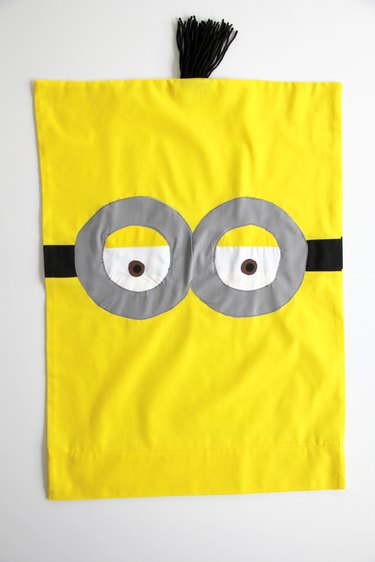
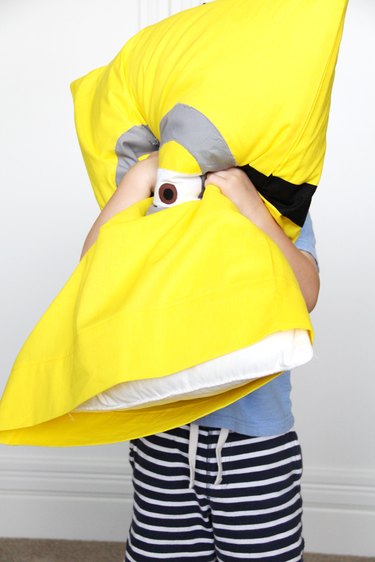
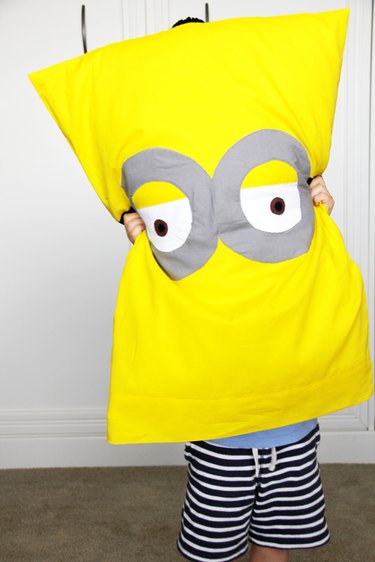
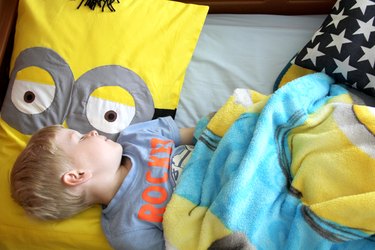
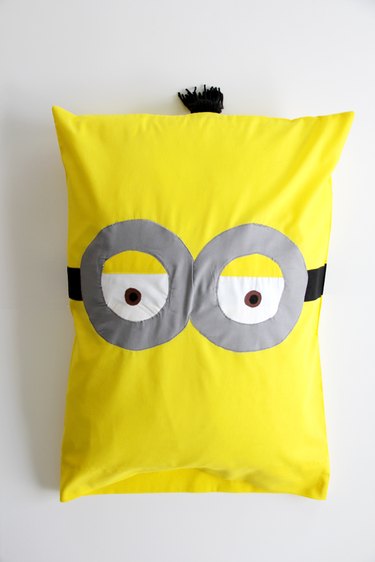
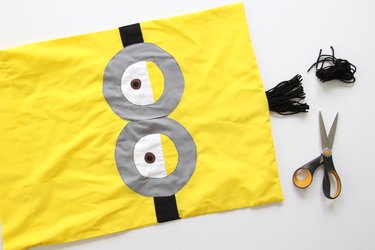
Do you love minions? Join the club! With minion mania abound, we are loving these minion pillowcases. With free sewing directions for a standard size pillowcase, you can make the perfect pillow for any toddler or twin bed. Customize with one eyeball or two -- either way, it's hard not to love these fun pillows! Give your kids despicable dreams with this easy, minion-inspired pillowcase sewing DIY.
Video of the Day
Things You'll Need
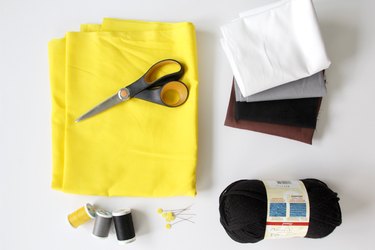
1 yard yellow cotton fabric
1/4 yard grey cotton fabric
1/8 yard black cotton fabric
1 fat quarter white cotton fabric
Scrap of brown cotton fabric
Black yarn
Coordinating thread
Pins
Scissors / rotary cutter
Sewing needle
Sewing machine
*Various sized bowls for tracing, or a compass
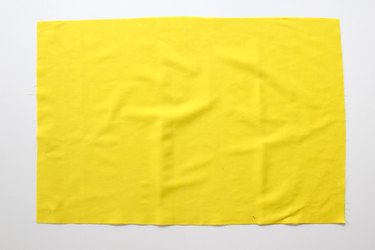
Step 1: Cut Main Pillowcase
Cut 2 main pillowcase pattern pieces from your yellow cotton fabric. Cut 2 pieces both 31"L x 21"W, for the pillowcase front and back. Make sure to cut nice, straight lines. A rotary cutter and ruler are helpful when doing this.
Video of the Day
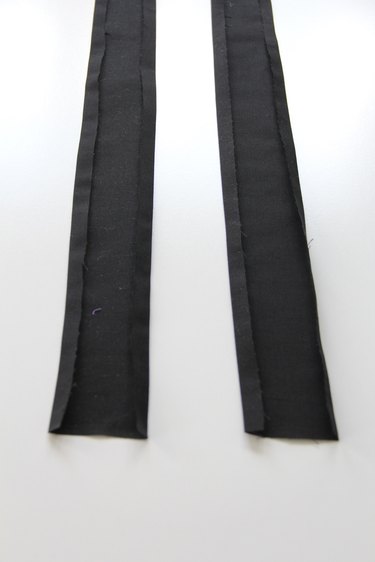
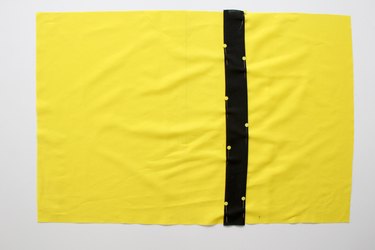
Step 2: Cut Goggle Headband
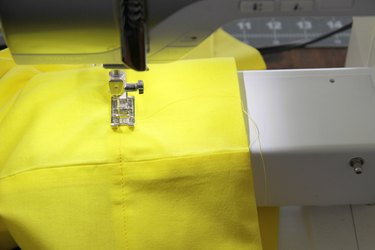
Cut 2 strips from your black fabric 3"L x 21"W each. Fold over the long edge on each side 1/2" towards the wrong side and press. Repeat for both strips.
Step 3: Sew Goggle Headband
Measuring 10" down from the top of your pillow front, pin the black cotton strip 'goggle headband' onto your pillowcase with the folded edges facing down. Sew both sides using a straight stitch 1/8" away from the edge. Repeat for back pillow piece.
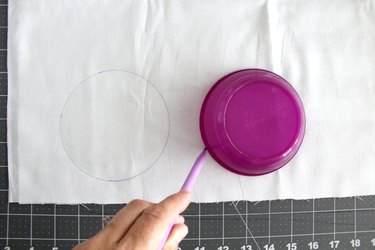
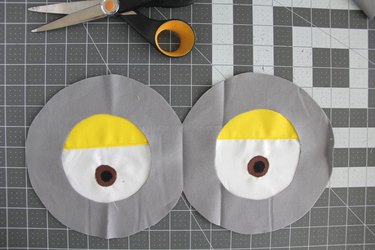
Step 4: Cut Out Eyes
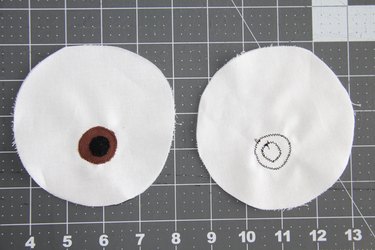
Using a small bowl (mine measures 4" in diameter), trace around the bowl side for a circular eye shape from your white cotton fabric. Repeat for both eyes. Use fabric scissors or a rotary cutter to carefully cut out the white circles.
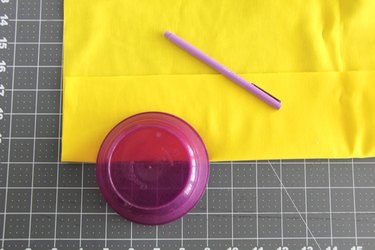
Fold yellow fabric in half, so that you have a bottom folded edge to work with. Place your small bowl directly on top of the fold at the halfway point. Trace around the top edge of your bowl, and cut out. This will give you a 'minion eyelid.' Repeat for both eyes, and press fabric on the fold when finished.
Cut 2 smaller brown circles for the iris, approximately 1 - 1.5" in diameter. I used the bottom of my thread spool for tracing. If desired, cut 2 smaller pupils from the black fabric for detail, approximately .5" in diameter.
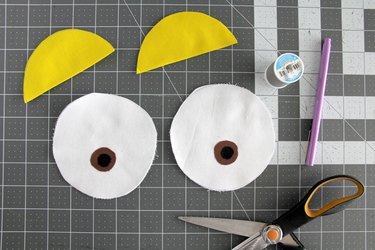
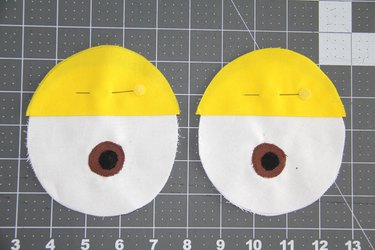
Step 5: Sew Minion Eyes
Pin the brown iris onto the top bottom center of your white eyeball. Sew around, using a zig zag stitch to secure. Your zig zag stitch should be adjusted so that it has shorter length stitches (the zig zag stitches are close together), and a medium length width (horizontal span).
When sewing, make sure the zig zag stitch goes over the brown iris raw edge to reduce fraying. If desired, it helps to use heat 'n bond or other fabric adhesive to help secure the small circular shapes prior to sewing.
Repeat for pupil if desired, sewing around the pupil's edge with the zig zag stitch.
Place yellow eyelid on top of white eye, with the folded eyelid edge in the middle of the eye. Pin in place, and sew a straight line along the bottom of the folded eyelid edge. Baste stitch around the top curved eyelid to secure in place.
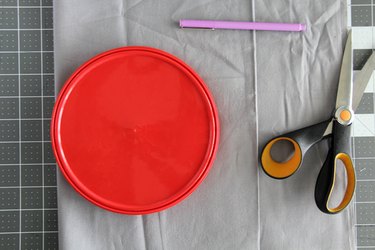
Step 6: Cut Minion Goggles
Fold your gray fabric in half, creating a folded edge on the side of your fabric. Using a medium sized bowl (mine is 7" in diameter), place the bowl so that it extends beyond the folded edge by 1/2". Trace around your bowl, and cut out.
Lastly, grab a small circular object. It needs to be slightly smaller than your small bowl used earlier (in my case, smaller than 4" in diameter). This small flower pot was 3.5" in diameter, and perfect for use. Place directly on top of your folded gray minion goggles in the center, and trace around. Cut out inner circles, being careful not to cut the outer portion of the goggles, using fabric scissors or a rotary cutter.
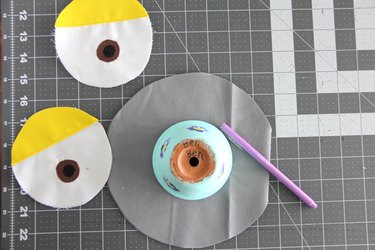
Once the goggles pattern piece are cut out, they should fit directly over your eyeballs, with the eyes circular raw edges completely underneath the goggles.
Step 7: Sew Minion Goggles and Eyes to Pillowcase
Place eyes on the front of your pillowcase, directly over the center of your black goggle headband. Shift the eyes so that they are directly underneath your gray goggles when in place. Pin all around the outer and inner edges of your goggle circles. Sew all raw outer and inner goggles edges, securing the goggles and the eyes to the pillowcase, using a small zig zag stitch.
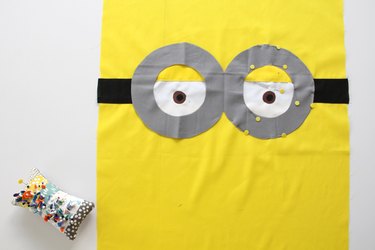
Repeat for both sides of the goggles and eyes, and press.
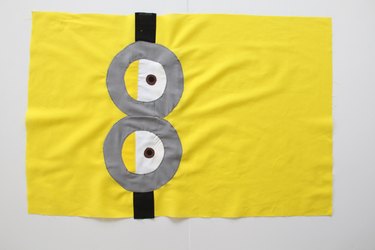
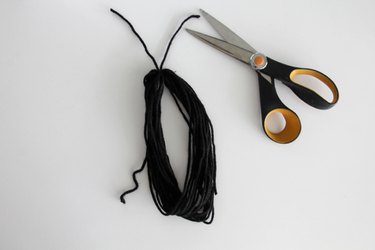
Step 8: Cut and Sew Minion Hair
Wrap black yarn around a small book, over and over, until you have a nice bunch of 'hair'. You can make the hair as thick or thin as you would like, just remember - the thicker the hair, the more your sewing needle has to sew through. Cut off yarn string.
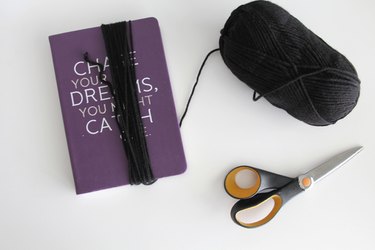
Slip the yarn off of your book edge carefully, being sure to keep the yarn's circular shape. Cut a smaller piece of yarn, and tie a knot around one side of your yarn circle.
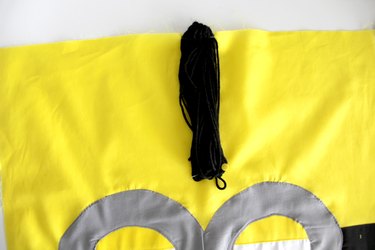
Place the top yarn knot along the upper center raw edge of your pillowcase. Pin in place and sew 1/8" away from the pillowcase edge to secure, going back and forth over your sewn line a few times.
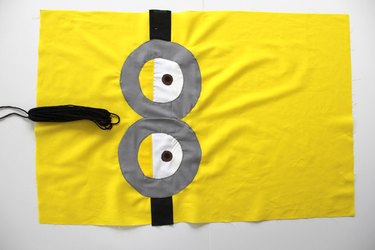
Pin the bottom edge of your minion hair loop in place to your pillow. This will keep it from shifting in the next few steps.
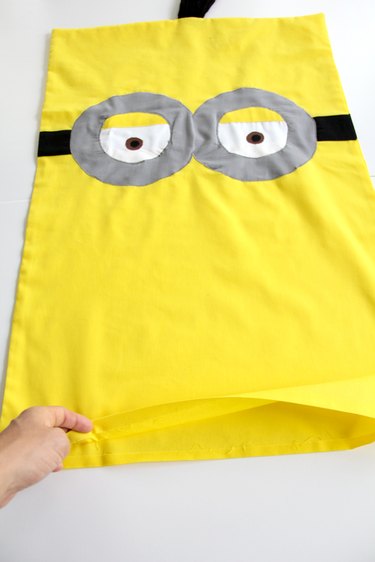
Step 9: Sew Pillowcase Back and Front Together
Place the front and back pillowcase pieces right sides together, making sure to match up the goggle headbands on either side. Pin around the 2 sides and top, making sure to leave the bottom open. Sew using a 1/2" seam allowance. Finish seams with either a serger, zig zag stitch or pinking shears. Turn pillowcase right side out and press.

Step 10: Press and Sew Bottom Edge
Fold the bottom open edge of the pillowcase 1/2" towards the wrong side and press. Fold again 4" towards the wrong side and press. Pin in place.
Sew around to hem the pillowcase 3.75" up from bottom pillowcase edge. This will create a nice pillowcase band, and enclose the bottom pillowcase raw edge within.
Step 11: Trim Minion Hair
Making sure your minion 'hair' is nice and flat, use a pair of sharp scissors to trim your minion's hair down to size. My minion's hair is about 3" in length after getting his haircut.
Step 12: Press and Enjoy
Iron out any wrinkles, slip a standard sized pillow inside and enjoy!