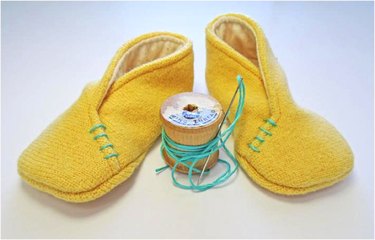
Making felt baby slippers is a rewarding project you can complete in an afternoon. Felt is simple to work with and so cute for baby. The full lining is soft and comfortable on his or her tiny tootsies.
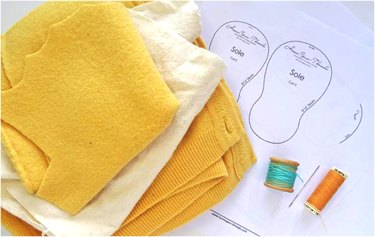
Be sure to choose your materials carefully. Good, high-quality felt will last and wear well. You can also felt your own wool and use it for these slippers as I have here. It's a great textile repurposing project.
Video of the Day
Video of the Day
Things You'll Need
[Free, downloadable baby slipper sewing pattern](http://www.craftsy.com/ext/eHow_Felt_Baby_Slippers_1.html)
Felt (approx. ¼ yard for outer & lining)
[Heavy fusible interfacing](http://www.craftsy.com/supplies/tools-notions?fopts=batting-stabilizers-adhesives_interfacing-stabilizers) (optional – see Step 2 below)
Matching [thread](http://www.craftsy.com/supplies/thread)[](http://www.craftsy.com/supplies/thread?_ct=rbew&_ctp=206810)
Embellishments, such as [embroidery floss](http://www.craftsy.com/supplies/tools-notions?fopts=embroidery_embroidery-floss)[](http://www.craftsy.com/supplies/tools-notions?fopts=embroidery_embroidery-floss&_ct=rbew&_ctp=206810)
Sewing machine
[Scissors](http://www.craftsy.com/supplies/tools-notions?fopts=cutting-tools_scissors)[](http://www.craftsy.com/supplies/tools-notions?fopts=cutting-tools_scissors&_ct=rbew&_ctp=206810)
[Removable fabric marker](http://www.craftsy.com/supplies/tools-notions?fopts=marking-tools_markers)[](http://www.craftsy.com/supplies/tools-notions?fopts=marking-tools_markers&_ct=rbew&_ctp=206810)
[Sewing pins](http://www.craftsy.com/blog/2015/09/types-of-sewing-pins/)
Step 1
Once you've downloaded the pattern, Follow the designer's directions to print the pattern pieces and cut them out.
Step 2
When choosing fabric, look for a soft flannel for the lining. You can also consider using non-slip gripper fabric for the outer soles when making slippers for walking babies. Pre-wash and press the fabric to avoid having it shrink later.
Step 3
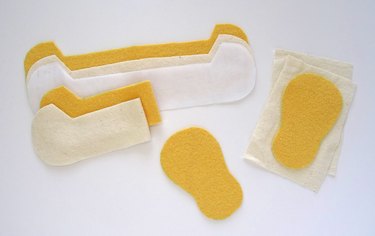
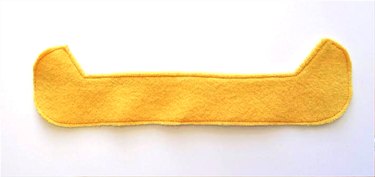
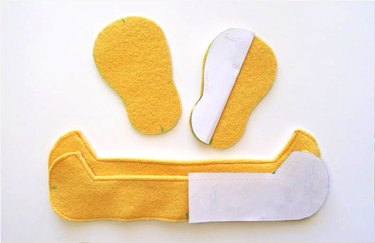
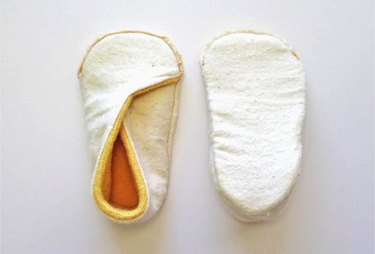
Cut your fabric following the pattern pieces. Be sure to cut the upper slipper felt and lining on the fold. You'll need to create the following:
- 2 outer soles
- 2 outer upper slippers
- 2 lining upper slippers
- 2 rough-cut pieces of lining large enough to fit the
sole of the slipper
- 2 upper slippers in heavyweight fusible interfacing to stabilize lightweight felt (optional)
Step 4
Fuse interfacing to the wrong side of the outer felt for extra stability if desired. Make sure your felt can withstand the heat of the iron.
Step 5
Place the outer and lining right sides together and pin the straight edges.
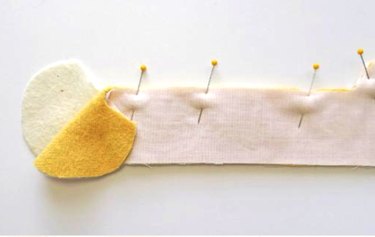
Step 6
Stitch as indicated in the instructions, pivoting at the inside corners. Clip inside corners into, but not through, the seam.
Step 7
Trim your felt seam allowance by half to reduce bulk.
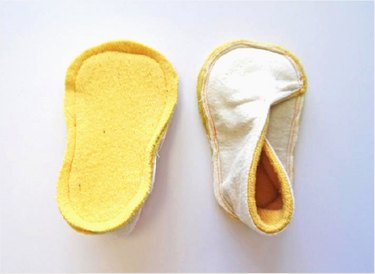
Step 8
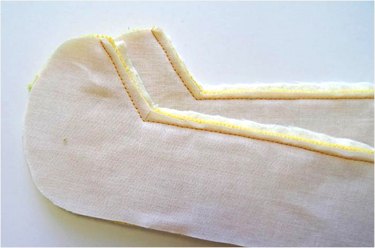
Open out fabrics, press and match them wrong sides together. Topstitch the straight edges if desired and baste the curved edges together. With thicker felt it is simpler to baste the curved edges first and then topstitch the straight edges.
Step 9
Mark the center front and back on the sole of slipper using the pattern piece. Also mark the heel and center toe of the slipper upper.
Step 10
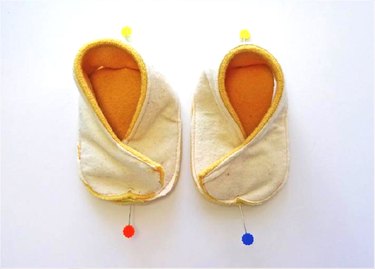
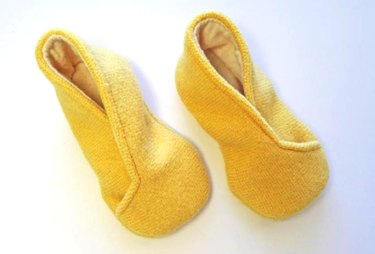
Match the slipper upper and sole together, pinning center front/back and center toe/heel marks. Make sure to cross the kimono toe of the upper slipper in opposite directions to make a left and right slipper.
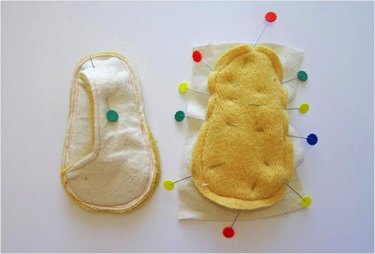
Step 11
Pin the rest of the outer felt in place, fitting it to the sole of the slipper. Pin generously starting at the toe and working back on each side to the heel.

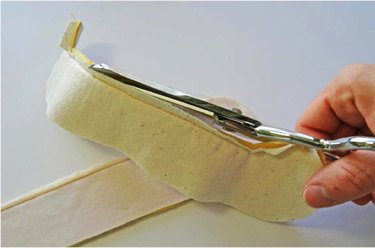
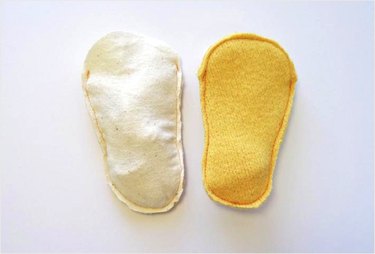
Step 12
Stitch the sole and outer together with a 3/16-inch seam. It is simplest to sew with the sole on the bottom and the outer felt directly under the presser foot. When sewing the heel, stop every ½-inch or so to lift the presser foot and re-position the upper felt. This makes it easier to sew the tight curve.
Step 13
Fold the slipper into the center of the sole and place the upper slipper right sides together with the rough-cut slipper lining fabric. Pin edges.
Step 14
Stitch around sole, leaving the toe open as indicated in the pattern and following the previous seam. Trim excess lining sole fabric and seam allowance to reduce bulk.
Step 15
Turn slipper through the toe opening. Turn slipper again so it is right side out. Check seams to ensure they are sewn correctly then turn the slipper wrong side out again. Stitch the toe opening closed over the previous seam. Trim toe opening seam to reduce bulk.
Step 16
Turn slipper, pushing seams out with a blunt object to get a smooth seam. Press.
Step 17
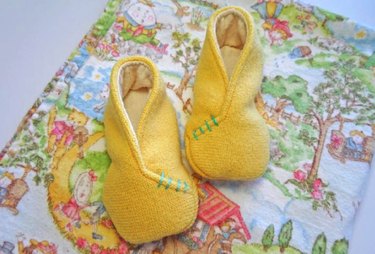
I chose to add simple unisex lines with embroidery floss over the kimono toe.
Find more FREE sewing patterns!
Explore hundreds of free patterns available for instant download from the world's best indie designers.