Things You'll Need
Tape measure
Pencil
Tubing cutters
Sandpaper
Nitrogen
Rags
Water
Oxygen-acetylene torch
Silver-based solder
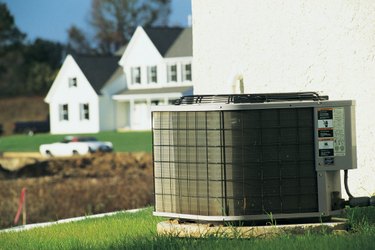
A filter drier in an air-conditioning or refrigeration system captures contaminants in the refrigerant. The suction line's filter drier, a single-direction refrigerant filter, prevents the contaminants from reaching the condensing unit's compressor. The liquid line filter drier stops the contaminants from blocking the evaporator coil's office or thermal expansion valve. A filter drier's tubing size, refrigerant type, refrigerant flow rate and filtration capacities must match the condensing unit it protects. Many condensing units come with a filter drier pre-installed inside of the unit. Other manufacturers supply a filter drier for the technician to install in the suction line.
Step 1
Measure the filter drier's housing between its pipe stops with a tape measure. The tubing connections, located on each end of the filter drier, contains pipe stops about 1/2 inch from the end of the tubing connections. The pipe stops prevent the refrigerant tubing from reaching the filter drier's housing.
Video of the Day
Step 2
Place two pencil marks on the suction line. Make the first pencil mark about 6 inches from the condensing unit. The second mark should go at the appropriate spot on the suction line for the filter drier, using the distance measured between the filter drier's pipe stops as a placement guide.
Step 3
Cut the refrigerant tubing on the pencil marks with tubing cutters. A tubing cutter uses a cutting wheel to slice through the suction line. The wheel makes a smooth-edged cut without burrs. Discard the removed section of the suction line.
Step 4
Clean the cut ends of the suction line with sandpaper.
Step 5
Locate the arrow on the suction line's filter drier. The arrow identifies the refrigerant flow direction through the filter drier. The arrow on a suction line's filter drier faces the condensing unit.
Step 6
Pull the plastic caps off the filter drier. Two caps cover the tubing connections and two caps cover the service ports, located on the filter drier's housing.
Step 7
Slip each of the filter drier's tubing connections onto the cut ends of the suction line with the filter drier's arrow facing the condensing unit. Push each end of the suction line into its respective tubing connection until it hits the pipe stop.
Step 8
Purge the refrigerant line of air with nitrogen. Use one of the filter drier's service ports for access to the refrigerant line.
Step 9
Dampen two rags with water. Place one rag on the filter drier and the second rag on the condensing unit's service valve, the valve the suction line connects to as it enters the condensing unit.
Step 10
Heat one of the filter drier's tubing connections with an oxygen-acetylene torch. Braze the filter drier's tubing connection with a silver-based solder. Repeat this for the second tubing connection.
Step 11
Let the filter drier's housing cool before removing the damp rag.
Step 12
Thread the filter drier's manufacturer-supplied needle valves into filter drier's service ports. Tighten the valves with the C-shaped end of one of the service valve caps.
Step 13
Screw the filter drier's service valve caps onto the ports.
Warning
Leak test all brazed fittings at the condensing unit, the evalporator coil and any fittings in the refrigerant lines before charging the system with refrigerant.
Video of the Day