Things You'll Need
Mason jar
Drill with 3/8” drill bit
Scissors
Needle nose pliers
Copper coupling reducer, 3/8” x ¼”
Fiberglass tiki torch wick
Citronella tiki torch fuel
Wire for hanging
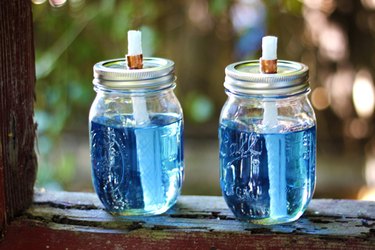
Whether you're camping in the woods or enjoying your backyard on a summer evening, citronella tiki torches are perfect for lighting and keeping the bugs away. The mason jars give the torches a charming vintage feel, so they are as stylish as they are useful. You can make them either to sit on a table, or hang from a hook. Either way, they make the great outdoors even greater.
Video of the Day
How to Make Mason Jar Tiki torches
Step 1
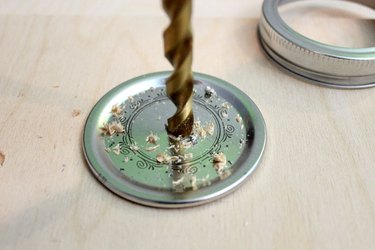
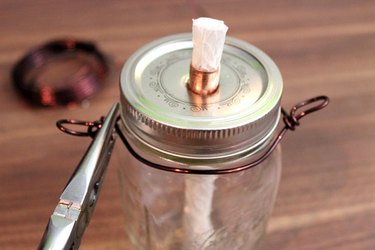
Drill a hole in the middle of the jar lid using a 3/8" drill bit. If your jar lid is in two pieces like those for new mason jars, separate the two pieces and work on the middle lid section.
Step 2
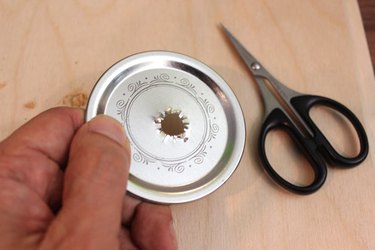
Cut slits around the hole in a starburst pattern.
Step 3
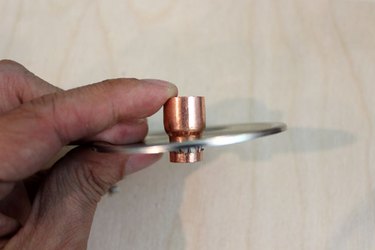
To keep the tiki torch wick supported upright and away from direct contact with the lid, we will create a wick holder with a copper coupling reducer. A coupling reducer has one wide section and one narrow section. You will find these in the plumbing aisle of the hardware store. Push the narrow section through the hole in the lid. The slits you have cut will help the coupling reducer slide through. Keep pushing the coupling reducer through the hole until it goes no further.
Step 4
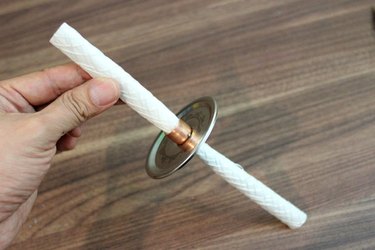
Slide a tiki torch wick through the coupling reducer. Fiberglass wicks, available at the hardware store, last indefinitely and are not consumed during burning like cotton wicks.
Step 5
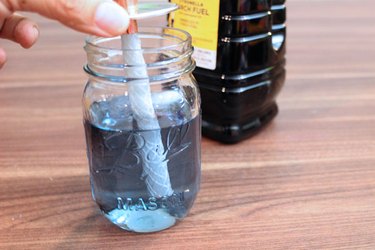
Fill the jar about three quarters to the top with citronella tiki torch fuel, also available at the hardware store. Cut the wick so about a half inch is exposed above the copper channel. Let the wick be completely saturated with fuel before lighting.
Step 6
If you would like to hang the mason jar tiki torch, wrap wire around the jar just below the lid, creating two loops on opposite sides. Secure the loops with a pair of needle nose pliers.
Step 7
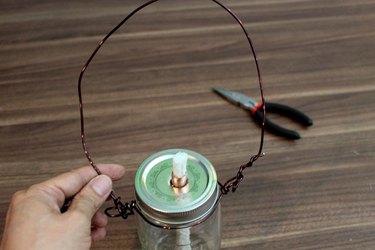
Tie wire around the two loops to form a handle. Be careful, the handle will be hot when the torch is lit.
Warning
Watch your fingers when drilling a hole in the lid. Also, wear protective eyewear, as particles may fly in the air.
Never leave a lit torch unattended, and keep away from children.
Video of the Day