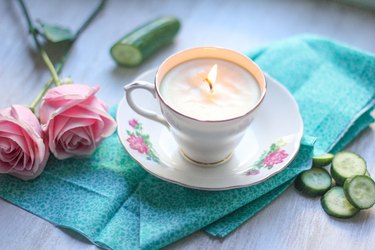
A vintage teacup candle is sure to delight any tea lover. Mix and match the cup and saucer for a bit of flea market style, customize the color and fragrance according to the recipient's personality or add a tea-inspired scent like green tea and cucumber to up the charm factor.
Things You'll Need
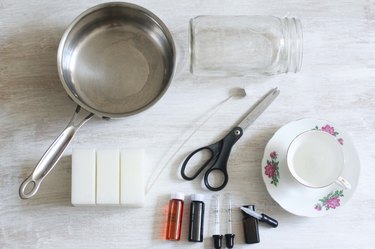
Teacup and saucer
Wick
Hot glue gun and hot glue
Pencil or drinking straw
Candle wax, 5 to 8 ounces (paraffin, soy or beeswax)
Large chef knife (optional)
Double boiler
Wooden spoon
Liquid dye (optional)
Essential oil (optional)
Scissors
Tip
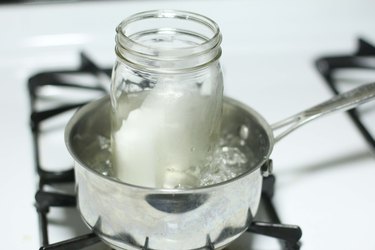
For the double boiler, avoid using a glass bowl like you would normally use for food. Use a large mason jar instead. It is inexpensive and can be reused to make candles in the future.
Step 1:
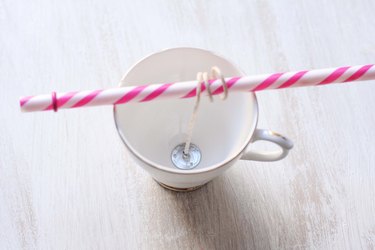
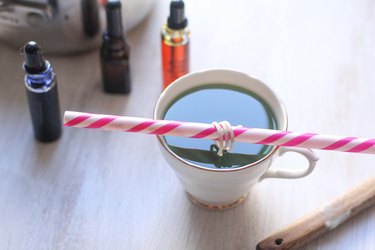
Dab some hot glue on the bottom of the wick and glue it inside the bottom center of the teacup. Straighten the wick, roll the excess length around a pencil or straw and balance the pencil or straw on the rim of the cup.
Video of the Day
Step 2:
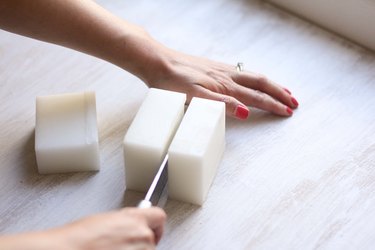
Cut up your block of wax (if necessary) so that it will fit inside the large mason jar. Some wax comes in chips or flakes, in which case you will just need to measure the amount needed. You'll need between 5 to 8 ounces of wax, depending on the size of your teacup.
Step 3:
Fill a saucepan with an inch of water and bring it to a boil. Place the large mason jar in the boiling water and place the wax inside the jar. Reduce the heat to medium and simmer until the wax is completely melted, stirring occasionally, about 15 minutes.
Video of the Day
Step 4:
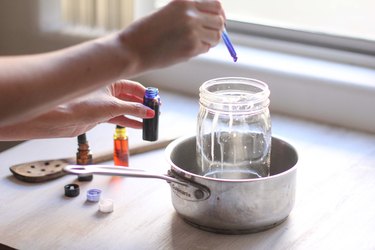
Take the wax off the heat, add a few drops of liquid dye and stir. Continue adding liquid dye a few drops at a time until the wax is your desired color. If you'd like to add a fragrance to the candle, add several drops of essential oil to the melted wax and stir.
Step 5:
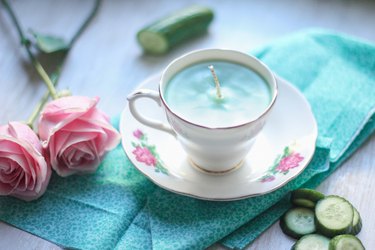
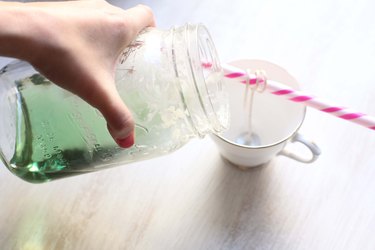
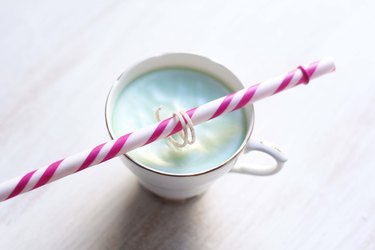
Pour the melted wax into the teacup, leaving about 1/4 inch of room at the top.
Step 6:
Allow the wax to cool for at least 30 to 40 minutes.
Step 7:
Unravel the wick from the pencil or straw and trim it to 1/2 inch.

Place the finished teacup candle on the saucer and give it as a gift it to any of your tea-loving friends or family. You could secure the cup and saucer together with ribbon, or place them upright in a large see-through bag tied with ribbon.