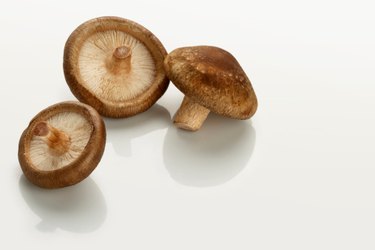
Growing your own mushrooms, a pursuit that's part gardening, part science experiment and part culinary art, might seem mysterious. However, it's a rewarding and achievable project even for a novice. Other than a syringe filled with mushroom spores, available through specialist suppliers, the tools needed to grow mushrooms at home are all inexpensive and easy to find. There are many techniques that are suitable for growing different species of mushrooms, but one of the most approachable is growing mushrooms in glass jars. Mason jars or other brands of canning jars are ideal.
Mason Jars, Mushroom Spores and More
Video of the Day
The key pieces of equipment required for growing mushrooms in glass jars are Mason jars; mushroom spores, which are sold in a suspension preloaded into a plastic syringe; and a substrate, or growing medium. Prepare the Mason jars by making four holes in the lids using a hammer and nail. You can use a DIY substrate of brown rice flour and vermiculite among other options. Some common mushroom species you can grow inside Mason jars include oyster, shitake, enoki and lion's mane.
Video of the Day
Growing mushrooms also requires a pressure cooker or large lidded pot for sterilizing the jars, a bowl in which to mix your substrate, distilled water, a lighter, masking tape, aluminum foil, rubbing alcohol, cotton balls and paper towels. Most home mushroom growers improvise a "fruiting chamber," which can be any large container with an open top, such as a storage container or aquarium.
Clean and Sterilize Everything
When you're growing mushrooms in glass jars, it is vital to thoroughly clean and sterilize every single surface and piece of equipment you use. Harmful organisms, such as mold and bacteria, easily grow in the same substrate as mushrooms, and it's very important to prevent contamination during every step.
Wash your hands with hot, soapy water followed by hand sanitizer or rubbing alcohol. It's also a good idea to shower, wash your hair and put on clean clothes. Thoroughly wash your Mason jars, seals and lids and all the other tools in your lineup and then wipe them with rubbing alcohol. Do the same for all the surfaces around the area where you will be working.
Prepare the Mason Jars
Prepare the substrate, a mixture of two parts vermiculite with one part distilled water, plus one part brown rice flour. The mixture should be fully saturated with water but with no excess liquid. Loosely fill the Mason jars up to the level of the bottom of the ring band and then top them with dry vermiculite. Put the lids on top of the jars, screw the bands in place and put masking tape over the holes. Finally, wrap squares of aluminum foil around the tops of the jars.
Sterilize the substrate-filled jars in a pressure cooker or by steaming them in large pot. With the pressure cooker method, set the jars on a rack, add 1 cup of water and then cook the jars for 45 minutes at 15 psi. Otherwise, steam the jars – also set on a rack – in a lidded pan for 60 to 90 minutes. After either method, let the jars cool to room temperature before continuing.
Inoculate, Incubate and Wait
Your spore syringe might come with instructions, but you will generally need to shake the spore solution and inject a portion of solution into the substrate in each of the jars through the holes in the lids. Before the first inoculation and in between the jars, sterilize the needle by holding it in the lighter flame until it's red hot and then wiping it with an alcohol-soaked cotton ball. Cover the lid holes with masking tape after each inoculation.
Move the inoculated jars to a warm, dry, dark space and periodically examine them for growth. Most mushroom species grow best in temperatures of around 75 to 85 degrees Fahrenheit. Expect to see a few white, weblike growths after three to five days and a full covering of the substrate in two to three weeks. If you see any colors other than white, consider those jars contaminated and dispose of them. When you start to see pinhead-sized mushroom caps, it's time for fruiting.
Fruiting Mason Jar Mushrooms
Fruiting means letting the mushrooms grow large enough to harvest. Experts recommend dunking the cake (substrate plus mushroom growth) with water before fruiting to increase its yield. Simply remove the Mason jar lids, saturate the cake with water, replace the lids and place the jars in the refrigerator for 24 hours.
You can leave the mushroom cake in the jar, remove the lid and cover the jar with a plastic food-safe bag with a corner cut off for air. Or, you can transfer the Mason jar mushroom cakes to a fruiting chamber at room temperature in indirect sunlight. An easily improvised chamber could be a plastic container with water-soaked paper towels or perlite in the bottom. Slide the cakes into the chamber and then spritz with water once or twice a day.
Mushroom Harvest Time
You should see some substantial mushroom growth within two weeks. The ideal temperature, humidity level and time frame for the fruiting and harvesting of Mason jar mushrooms will vary by mushroom. For more specific recommendations, consult a mushroom growing book.
When you have clusters of fully formed mushrooms of a decent size, slice them off with a clean, sterile knife or tear them off with clean hands.
- EZ Mushroom: Growing Mushrooms Without Plastic Bags
- EZ Mushroom: How to Grow Lion’s Mane Mushroom [In a Jar]
- Myco Supply: How to Grow Mushrooms at Home Using Jars
- Everything Mushrooms: Making A Simple Mushroom Grow Chamber
- Tiny Plantation: How To Grow Mushrooms From Spores: The Right Way To Do It At Home