Things You'll Need
Piece of wood
Graphite paper
Stylus
Masking tape
Pencil
Scissors
V-tool
Various-sized gouges
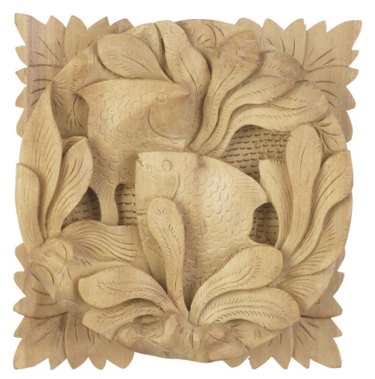
Relief carving in wood is a versatile type of carving where almost any scene or pattern can be created in almost any thickness of wood. High relief adds dimension to the carving by creating shadows. The type of wood you select can add or detract from a scene. Highly grained woods are generally better used on a larger subject instead of one with fine detail. Soft wood is easy to carve, while harder wood holds the detail better.
Step 1
Select the wood you'll use for your relief carving. Types that work well include basswood, butternut and white birch. It should be flat without warping, planed and 3/4-inch to 1-inch thick. Draw a line along the edge of the wood to indicate the stopping point to which you will carve. Leave about a 1/4-inch to 1/2-inch thickness for the background.
Video of the Day
Step 2
Trace your pattern onto the wood using graphite paper and a stylus. Position your pattern on the wood, and then place a piece of masking tape at the top to hold the pattern in place. Slide a piece of graphite paper under the pattern, making sure that the darker side of the paper is facing the wood.
Step 3
Mark the different levels of your carving using numbers on the wood or different colors on the paper pattern. Do whatever will be easiest for you to follow. There will be a focal point that will stand out more than the rest of the carving, and a background, which will be the lowest point and will be carved down the farthest.
Step 4
Cut a copy of the pattern into pieces according to the different levels, as recommended by carver and pattern designer Lora Irish. These can be used to redraw the pattern onto the wood as the different levels are carved.
Step 5
Use a v-tool to cut just outside the lines of the highest level of the pattern. If you are a beginning carver or want a shallow relief, only carve down 1/4 inch to 1/2 inch. Do not undercut – concentrate on keeping your cuts straight up and down instead of angling underneath the lines. The size of the v-tool you use will depend on the size of your carving; use one large enough to complete this step efficiently.
Step 6
Using a wide #3 or #5 gouge, carve down the wood — except for the focus point you just carved around — to the next level. Use the pieces of the pattern to trace the lines for the next level.
Step 7
Continue carving around the objects or features of each level and retracing the pattern until you've completed all of the levels.
Step 8
Round or square the features as needed to achieve the shape the pattern requires. At this point, you're preparing the foundation so you can add the details.
Step 9
Draw or trace the details of the pattern onto the carving once you are satisfied all of the levels are where they should be and the features are the shape you want.
Step 10
Carve in the details, using various v-tools and gouges. This is where you can be the most creative. Once you feel you're finished with the carving, take it into the sun where imperfections will be clear. Look at the finished carving from different angles to verify that everything looks as it should. Touch up any areas that need further work. You're finished when you're pleased with the result.
Tip
Make clean cuts, which means not leaving “fuzzy” areas where the wood isn’t all cut away with each slice of the tool.
Details are the last thing you should carve. If you put them in too early, you may end up carving them off if you need to make a level deeper.
Warning
Always keep both hands behind the blade to avoid cutting yourself.
Video of the Day