Things You'll Need
Pattern paper
Drafting pencils
French curve ruler
Knit serge pattern (optional)
Paper scissors
Notcher tool
Straight pins
Lycra blend fabric (1 to 2 yards)
Sharp fabric scissors
Tailor’s chalk
Elastic thread
Serger or overlock machine
Mini elastic
Sewing machine
Flexible tape measure
Pre-made skirt pattern (optional)
Gathering foot attachment
Woven fabric (2 to 3 yards)
2-inch-width elastic
Cotton thread

Prayer ceremonies, vigils and processions during religious events often incorporate praise and worship dance. The costumes for these liturgical dance routines generally include draped silhouettes with stitching details. Designers creating dance leotards benefit from using serge patterns, which are pre-made flat patterns especially made for serge or overlock machines. Over the leotard, performers often wear angel-sleeve dresses, shawls or handkerchief dresses, for modesty. By making pull-on sillhouettes like full skirts with different colored scarves, you can create outfits that are interchangeable for a variety of performance needs.
Making the Dance Leotard
Step 1
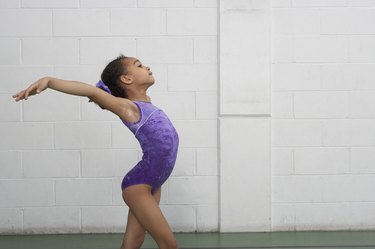
Draw a long-sleeved leotard pattern on pattern paper with drafting pencils. Use a French curve ruler to define the shaped and contoured lines around the side seam, leg opening, armhole and boat neckline. Alternatively, trace a leotard knit serge pattern as the base pattern. Though developing your own pattern is possible, it is challenging. The shape requires precision for accurate movement and ease in the finished garment.
Video of the Day
Step 2
Cut out the pattern with paper scissors. Mark all notches with a notcher, which is a pattern-making tool. Notches are used as sewing guides to ensure fabric parts are aligned accurately prior to stitching, reducing sewing errors. For example, a sleeve pattern is usually marked with one notch indicating the front and two notches indicating the back.
Step 3
Pin the cut patterns with straight pins onto a Lycra-blend fabric, such as cotton jersey/Lycra. Dance attire requires textile with stretch and fabric recovery, which refers to the textile returning to its original shape without sagging or distortion. You'll need 1 to 2 yards for this pattern, depending on your size.
Step 4
Cut the pattern parts with sharp fabric scissors. Transfer notches with tailor's chalk.
Step 5
Thread the serger or overlock machine with elastic thread to avoid unnecessary broken stitches. Serge the front and back of the leotard. If your design includes a snap crotch, make sure to leave this end open. Finish the ends with a merrow stitch or hem. Stitch the snaps with a hand-sewing needle. Pin the sleeves, matching the fabric notches, and serge together.
Step 6
Insert narrow elastic at the leg opening by slightly stretching the elastic while straight stitching with a sewing machine. The fabric begins to gather when the elastic is released after stitching.
Pull-on 3-Tier Prairie Skirt
Step 1
Measure your waistline by placing a flexible tape measure around the thickest part of the waist. Position the tape at your side to measure the skirt's side seam length.
Step 2
Wrap the tape loosely around your knees. Multiply the specification twice for a full sweep. For example, if your spec measures 34 inches, the sweep is 68 inches.
Step 3
Draw the pull-on full sweep skirt pattern on pattern paper, using the measurements from Steps 1 and 2. If you are working with a pre-made skirt pattern, trace the front and back panels onto the pattern paper. Draw two horizontal seam lines to divide the skirt pattern into three tiers. For example, if your side seam length is 27 inches, draw two seam lines 9 inches apart.
Step 4
Mark notches to match each skirt tier, with tailor's chalk.
Step 5
Repeat Section 1, Steps 4 and 5 to machine-stitch the skirt tiers together, if you are working with a woven cotton fabric like batiste, poplin or gauze. If you are working with a full sweep with shirring, which is a term referring to stitched gathers, make sure you use a gathering foot attachment with your sewing machine. The skirt requires 2 to 3 yards of fabric.
Step 6
Insert 2-inch-wide elastic at the skirt's waistband by repeating the process from Section 1, Step 6.
Making Praise and Worship Handkerchiefs/Scarves
Step 1
Draw a handkerchief pattern by drawing a vertical line 36 inches in length. Position the ruler horizontally at the top of the line and draw a line measuring 12 inches. Position the ruler vertically along the 12-inch line and draw another vertical line 24 inches in length. Connect the two vertical lines by angling the ruler. The handkerchief pattern appears like a half-diamond shape.
Step 2
Cut out the pattern with paper scissors and pin onto fabric such as lightweight cotton batiste or poplin. Alternatively, cut the pattern on delicate sheer fabric such as organza, georgette or chiffon. If you are working with delicate fabric, make sure to pin the straight pins along the seam allowance to avoid pin-holes. The scarves require 1 to 5 yards of fabric. If you are making multiple scarves for the costume, you'll need more fabric.
Step 3
Repeat Section 1, Steps 4 and 5 to finish and stitch the handkerchiefs. If you are working with knit fabric, use elastic thread and a serger machine to finish the scarf. If you are working with woven fabric, use cotton thread with a sewing machine. Cut away all loose threads from the leotard, skirt and handkerchiefs prior to wearing your praise and worship dance attire.