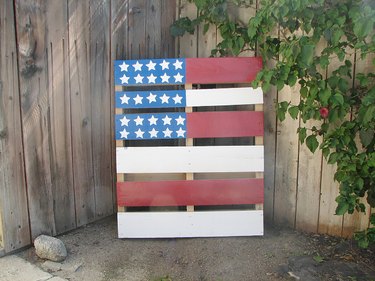
People may think of pallets as scruffy pieces of wood put together for the purpose of carrying cargo, but through the eyes of a crafty DIYer, the common pallet becomes a giant blank canvas just waiting to be upcycled into something unexpected and creative, like a brightly painted American flag.
This patriotic decoration could be leaned against a tree in your yard, placed in a corner of your porch or patio, or even hung on a wall in your home. It also makes a great piece of festive decor for a holiday barbecue or an outdoor party.
Video of the Day
Video of the Day
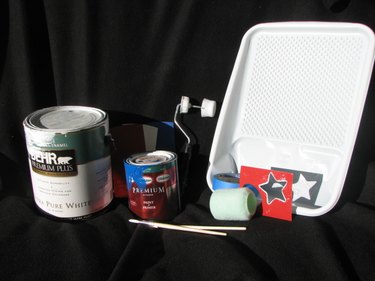
Things You'll Need
Tarp
Paint roller tray
5 paint roller tray liners
(4) 3-inch semismooth paint roller covers with 3/8-inch nap
3-inch paint roller
1 gallon exterior paint primer
Reclosable plastic bag (optional)
Painter's tape
1 quart red exterior water-based paint
1 quart white exterior water-based paint
1 quart blue exterior water-based paint
2-inch star stencil
Size 8 acrylic round paintbrush
Cloth
Tip
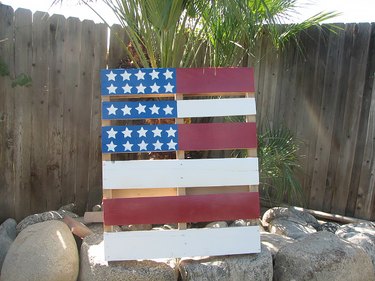
Pallets come in various sizes. The pallet used in this project was 32 by 39 inches.
1. Lay the pallet on a tarp
Lay down a tarp and place the pallet on top with the side you want to paint facing up. If you have a used pallet, make sure to clean off any grease or grime.
Tip
Put some plastic bags on top of the tarp if you want to keep the tarp clean.

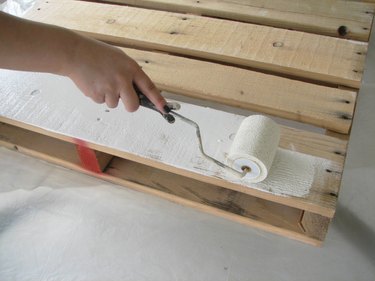
2. Apply two coats of primer
Line a paint roller tray and pour some of the primer into it. Cove the paint roller and dip it into the primer. Apply the first coat of primer to the pallet using the roller brush. After it has dried completely, apply a second coat to the pallet. Two coats is best because the first coat usually soaks into the wood. You need a second coat to have a good base.
Tip
Between coats, put the roller (with the brush still on it) into a reclosable plastic bag and seal it. This helps keep the roller from drying out too quickly.
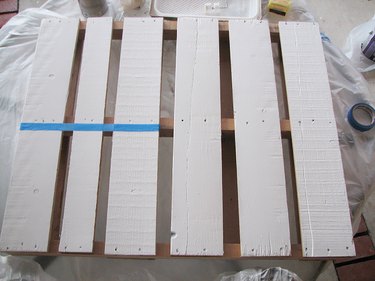
3. Design the layout
Decide whether you want to paint the flag in a vertical or horizontal format. Use painter's tape to section off the area that will be painted blue. Be sure the tape is pressed firmly onto the pallet; otherwise, the paint might bleed through a little bit.
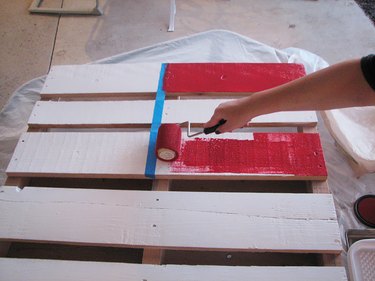
4. Apply the red and white paint
Replace the liner in the roller tray and pour in some of the red paint. Replace the roller cover with a new one and start applying the red paint on every other board. If you wish to have a more rustic look, use only one coat of paint. If you would like a cleaner look, add a second coat of paint once the first coat is completely dry.
Replace the tray liner and roller cover again and pour in some of the white paint. Apply one or two coats of white paint to the boards that are not painted red. Do not paint in the area that is taped off for the blue paint.
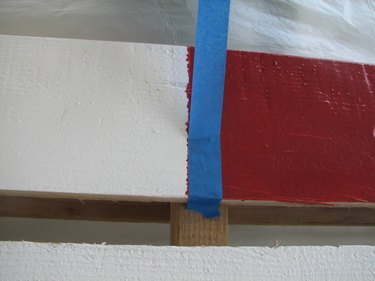
5. Reapply the painter's tape
Once the red and white paint is completely dry, remove the painter's tape and reapply fresh tape to the edge that you just painted on the red and white side, boxing in the blue area.
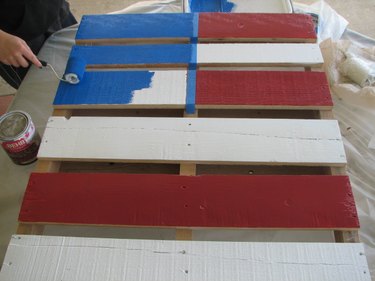
6. Apply the blue paint
Replace the liner in the roller tray and pour in the blue paint. Replace the roller cover and apply the blue paint in one or two coats. Once the paint is completely dry, remove the painter's tape.
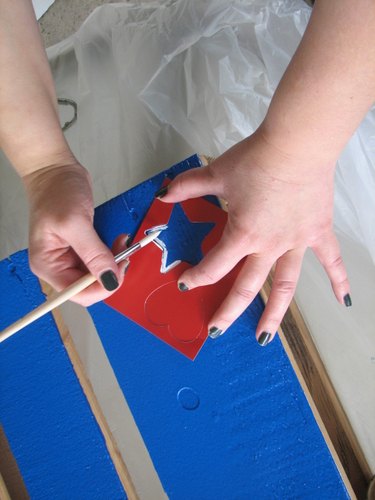
7. Paint the stars
Replace the liner in the roller tray and pour some of the white paint into the tray. Place the star stencil within the blue area. Dip the acrylic paintbrush into the white paint and paint an outline of the star.
Carefully pick up the stencil and wipe it clean of any wet paint. Fill in the star, taking care to stay within the outline. Continue to paint as many stars as you would like in the blue area. You can space them as close or as far apart as you like.
Display your artwork proudly!
Where can you find a free pallet to use for this project?
There are plenty of sources for free pallets. Try asking small businesses in your community, like locally owned hardware stores, furniture stores, and liquor stores. You can also check Craigslist and Facebook Marketplace. You may want to avoid pallets that come from grocery stores since they may harbor bacteria from spilled or spoiled foods.