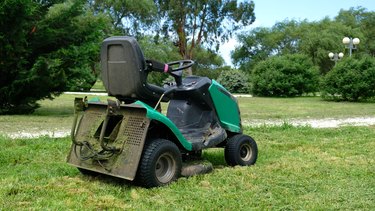
If you need to replace a drive belt on your Cub Cadet LT1042 riding mower, it helps to have specific guidance. A Cub Cadet LT1042 drive belt diagram is an excellent starting point. However, you will also need step-by-step instructions and the proper tools to perform the job correctly. Keep in mind that this DIY task is not one for beginners, so if you feel lost after doing the necessary research, you can also take your LT1042 to an authorized dealer for servicing.
Cub Cadet LT1042 Deck Belt Replacement
Video of the Day
It is best to familiarize yourself with an LT1042 deck belt diagram before beginning the work. This can make things much easier, and it can save you some time. New belts can be purchased online, so you should have your model number in hand before shopping for one. Be sure to only purchase manufacturer-approved belts; otherwise, you can expect poor performance or damage to the lawn mower. The new drive belt should be 42 inches, and they usually cost around $20.
Video of the Day
To get started with the Cub Cadet LT1042 deck belt replacement, you first need to lower the mowing deck. To begin, put the mower on a level surface, turn off the power, remove the key and then wait until the mower has cooled down completely. Disconnect the spark plug wire and disengage the power take-off lever. Adjust the height lever to the highest position and then put a wood block under the deck's edge. Then, you can lower the deck.
Next Steps in Deck Belt Replacement
Remove the "J" hooks from both sides. This releases the deck from its brackets. Then, take off the click pins from the front deck's hanger rod and remove the belt keeper rod. Then, you should be able to remove the belt from the engine's pulley.
Now, pull the bow-tie clip and release the power take-off cable. This releases the tension. Then, remove the spring from the deck.
Turn the wheels to your left and leave them in this position. Then, pull out the deck from the right. Take off the belt keeper cover from the outer pulleys. Loosen up the nuts and bolts that are securing the two idler pulleys. Next, rotate your belt keeper attachment from the idler arm bracket and you can now lift off the deck belt.
Installing the New Deck Belt
Reroute your new deck belt by following the removal process in the reverse order. Make sure to rotate the belt keeper attachment to its original position and secure the deck idler pulley nuts and bolts. Then, replace the belt covers and slide the deck under the mower.
Next, you can attach the tension spring and cable to the mower deck. Wrap the other end of the belt around the engine's pulley and replace the belt keeper rod. Return the click pin into the front deck's hanger rod. Put the "J" hooks back into their places to reattach the deck to its brackets. Finally, reconnect the spark plugs ignition wire.