Things You'll Need
Level bar
Chalk
Concrete grinder
Push broom
Self-leveling compound
Bucket
Electric drill
Paddle bit attachment
Measuring tape
Chalk line
Ceramic tiles
Thinset mortar
Notched trowel
Tile cutter
Carpenter’s level
Rubber-headed mallet
Grout
Grout float
Sponge
Clean lint-free cloth
Tile and grout sealer
Brush
Ceramic tile needs a smooth level surface for a successful installation, so rough concrete floors pose a few installation problems that will increase preparation time. Attempting to install directly to the rough concrete without preparation will lead to cracked and broken tiles, as well as failure of the tile to bond with the surface. Once you've smoothed and leveled the concrete though, you'll be able to install the tiles without much trouble, creating the ceramic surface you desire without fear of future damage due to rough concrete beneath.
Step 1
Check that the concrete floor is level using a level bar. Place ceramic tile onto a level surface to avoid problems with binding and to create a smooth tiled surface. Place the bar flat on the floor starting in a corner and then drag the bar across the floor's surface looking under the bar for hills or valleys that denote high or low areas of the floor. Mark these areas with a piece of chalk for correction.
Video of the Day
Step 2
Lower high areas of the floor to the same level as the surrounding concrete surface with a concrete grinder. Run the grinder over the raised area using small circular motions to grind the floor level. Remove grinding particles from the floor with a push broom.
Step 3
Smooth the rough concrete floor for tile installation by spreading self-leveling compound across the floor. Mix the compound according to the manufacturer's instructions in a large bucket using an electric drill with paddle bit attachment. Pour the compound over the floor, concentrating at the low areas marked with chalk. Fill the low areas with the compound and spread the compound over the entire surface in a thin layer using a squeegee. Allow the compound to dry for two hours.
Step 4
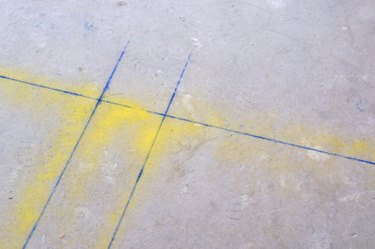
Measure the length of the room with measuring tape and place a mark across the span of the room at the halfway point by snapping a chalk line across the floor. Do the same for the width of the room to create a cross at the room's center. Use the chalk line by attaching it to both sides of the room and then raising the string of the line slightly from the floor. Release the string to snap against the floor leaving a chalk line across the floor's surface.
Step 5
Determine tile placement by laying two test rows crossing each other at the room's center. Place the tiles so that you use as many full-sized tiles as possible in a row, with cut tiles necessary only at row ends. Mark the final tile placements and remove the tiles from the floor.
Step 6
Mix a batch of thinset mortar in a bucket with the drill and paddle bit to the consistency of peanut butter. Spread the thinset in the center of the room with a notched trowel, using the crossing lines as guides for tile edges, covering a space that's about 4 by 4 feet. Use the flat of the trowel to spread the thinset, tilting the trowel on edge to use the notches to raise ridges in the adhesive.
Step 7
Press the ceramic tiles firmly into the thinset, wiggling them slightly as you place them to spread the thinset evenly along the rear of the tiles. Use the chalk lines as guides for tile edges and place two tile spacers between adjacent tiles to provide uniform spacing. Work outward from the center toward the walls in 4-foot square sections. Cut the tiles as needed with a tile cutter and leave a gap of 1/4 inch between the tile surface and the walls to allow for expansion.
Step 8
Check that the tiles are level using a carpenter's level with each section finished. Place the level across the tiles and make adjustments as needed by tapping tiles lower into the thinset with a rubber-headed mallet or adding thinset beneath a tile to raise it into place. Allow the thinset to set overnight.
Step 9
Remove the spacers between the tiles and grout the joints that the tile spacers created. Spread the grout over the face of the tiles and then push it into the joints using a grout float. Wipe the excess grout left on the tile faces after filling the joints with a damp cloth. Wait two hours and then wipe the tile faces again with a clean lint-free cloth to ensure that you've removed all grout residue. Allow the grout and thinset three weeks' curing time.
Step 10
Brush a grout sealant onto the grout lines to seal the joints from moisture. Wait 48 hours after sealing before using the floor.
Tip
Protect your skin, lungs and eyes during the installation process by wearing gloves, face mask and safety goggles.
Video of the Day