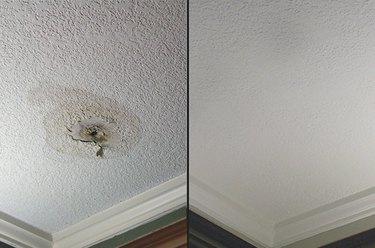
At some point, every house develops a flaw in the ceiling, whether it's from a plumbing leak, a fixture being moved, a crack from the foundation settling or another physical damage. Although not a particularly fun project, this type of repair is a task that an average homeowner can accomplish successfully. Whether you're matching a popcorn ceiling or a knock-down texture ceiling, the process is basically the same. It requires few tools but lots of patience.
Supplies You Will Need for the Repair
Video of the Day
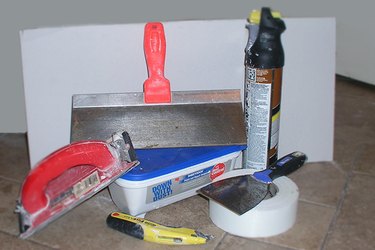
- Scrap of drywall large enough to fill patch area
- Scrap lumber for support
- Self-adhesive fiberglass drywall tape
- Drywall patching compound
- Utility knife
- Putty knife
- 12-inch drywall blade
- Drywall sanding paper, 100 and 220 grit
- Spray texture to match ceiling
- Ceiling paint
Video of the Day
Repair the Source
When you notice a flaw in the ceiling, immediately start investigating the problem. If left alone, the damage will only get worse. Never start a ceiling repair without solving the source of the damage.
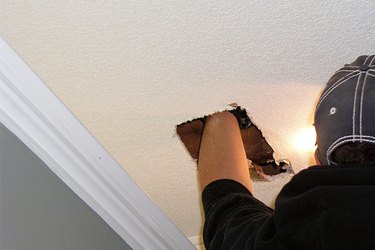
Trim the Patch Area
Start the repair by trimming the opening in the ceiling into a square or rectangle, enlarging it as necessary with a drywall saw or utility knife. Score through the top layer of the drywall and paper backing with a utility knife, about 2 to 3 inches beyond the opening. Peel this layer away by sliding a putty knife under the paper and working it down the score line.
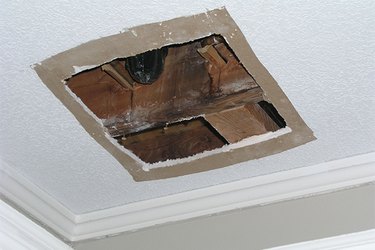
Locate and Install Support Boards
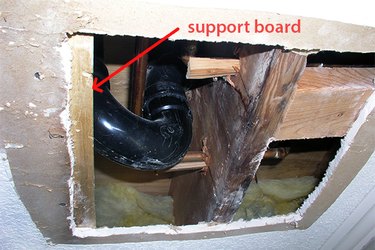
Check the opening for the location of framing boards to which you can attach the drywall patch. Most likely, you will need to add a piece of wood for support. Cut a scrap of lumber to fit the opening, extending beyond the edges in both directions. Drive drywall screws through the drywall into the wood supports to hold it firmly in place.
Install the Drywall Patch
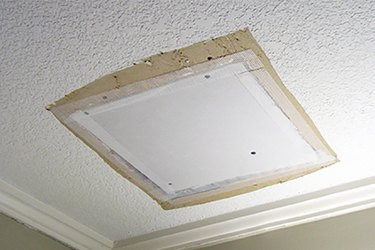
Measure and cut a piece of drywall about 1/8 inch smaller in both dimensions than the opening. Attach the patch to the wood support structure with drywall screws. Apply self-adhesive fiberglass drywall tape to the perimeter, spanning the space around the patch.
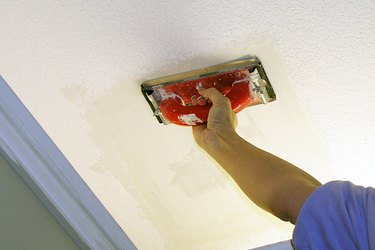
Apply the First Layer
Using a broad putty knife, apply a thin layer of drywall compound to the edges of the patch, starting from the center and extending outward across the seams. This layer will not be perfect, but it should cover the tape and fill the space between the patch and the ceiling. Avoid overworking the compound. Let the patch dry overnight.
Sand the First Layer
When the patch is completely dry, sand the area with a 100-grit drywall screen on a sanding pad. Drywall patching compound sands easily, so don't be too aggressive and sand through the tape. The finish should now be smooth with only a few low spots and imperfections.
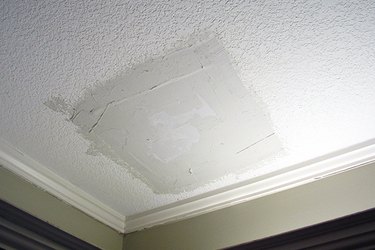
Complete the Patch
Apply another layer of drywall patching compound with a 12-inch drywall knife, holding it at a 20-degree angle and covering the entire patch area. This layer should appear smooth. Let it dry for 24 hours, and then sand with 220-grit drywall sandpaper. At this point, the patch should appear flat and even with the surrounding area, unnoticeable except for the lack of texture. If it doesn't, redo this step until the desired result is achieved.
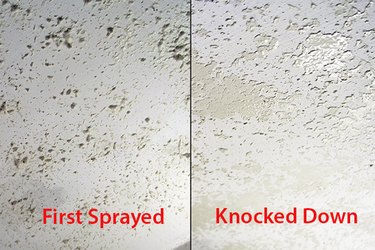
Practice With Texture
Spray wall texture is available at most home improvement stores and works well for small patches, usually covering as much as 8 square feet. Follow the instructions on the can and shake hard for a full minute. Don't skimp on this step. Practice spraying in a circular motion with small bursts on a sheet of cardboard or an extra piece of drywall. If you're matching knock-down texture, test for the optimal drying time before knocking down the spray with a drywall blade. Temperature and humidity play a big part in this timing. The drying time should not take more than a couple of minutes.
Spray on Drywall Texture
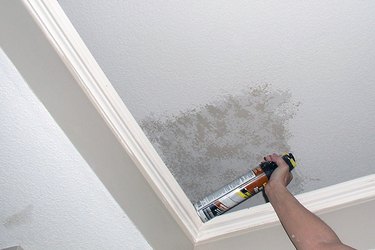
Aerosol knock-down texture is generally made for walls, so the cans are designed to spray at a 90-degree angle. The nozzle won't work for long while it's pointed up at the ceiling, but if you simply shake it every few minutes, it will continue to spray. Popcorn texture is made for ceilings, so it will spray without many problems.
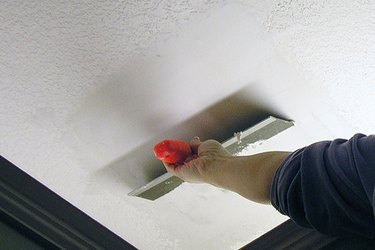
Knock Down the Spray Texture
Start with light coverage, wait a few minutes, and knock down the splatter with a wet drywall blade if applicable. Add areas of texture until the patched area matches the surrounding ceiling texture pattern. This may take several attempts before you are satisfied.
Prime and Paint the Repair
Let the texture dry overnight. Prime and paint the patched area to match the rest of the ceiling. It might be necessary to paint the entire ceiling to achieve a completely invisible patch.