Things You'll Need
Blueprint
2-by-4 or 2-by-6 lumber
Carpenter square
Straight edge
Miter saw
Gusset plates
Box nails
Hammer
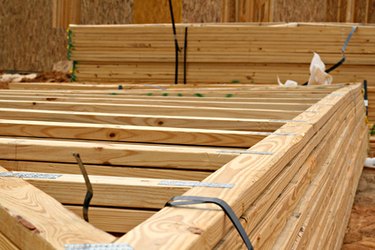
Traditional roof framing required two gables to be constructed and braced in place by a ridge beam spanning the entire length of the roof. From the ridge beam, rafters ran down to the caps of the side walls where they were joined to joists that ran across from side wall to side wall. All of this work had to be done in place, lifting and installing each board as you went along. With modern trusses, the entire assembly can be constructed on the ground in triangular frames, and the most challenging part of the work is determining the angle at which to cut your pieces. Most trusses are built from 2-by-4 lumber; for larger structures 2-by-6 lumber can be used.
Step 1
Find the pitch of your roof as labeled on your blueprint. Every elevation that shows the roof should be labeled with a fraction, such as 6/12, or an equation, such as 6:12. The first number in the series represents the number of inches at which your roof will rise vertically. The number of inches of the horizontal run is indicated by the second number. The first number typically ranges from 4 to 10, while the second number is always 12 (or 1 foot).
Video of the Day
Step 2
Translate the pitch to an angle by using a carpenter square. Lay the square on a table with the long blade extended in front of you and the shorter tongue to the right. Mark the run of 12 inches on the tongue and the rise on the blade. Use a second square or other straight edge to connect the two marks diagonally and read the angle on the center of the blade. This is your angle for cutting your trusses.
Step 3
Start by cutting the bottom piece of the triangle, or lower cord. Cut it to the length according to the blueprint, to overhang the walls on each side by the correct amount. Cut the ends flush at 90 degrees.
Step 4
Cut the top angles, or upper cords, of your truss next. Cut one end of each piece at the angle you located on the carpenter square blade. Set your miter saw by releasing the pivot table, either by lifting up on the locking trigger or by twisting the handle counterclockwise depending on the saw. Adjust the pivot until the indicator is aligned with the proper angle and then make your cuts.
Step 5
Match the angled ends of the upper cords face-to-face to form a peak. Position the lower cord on top of the legs of this angle and adjust it until the upper corners are aligned with the outside edges of the upper cords and the distance from the peak—along each angle to the top of the lower cord—is equal. Mark the intersection between the lower and upper cords on each piece. Cut the lower cords at the mark, using the same angle from the peak cut, in reverse. If your peak was cut right, turn the pivot to the same angle left and vice versa.
Step 6
Fit these three pieces together to form the triangle outer frame of the truss. Cut the end of a fourth piece, using the same angle from the upper cords. Use a square to mark a line up into the board 6 inches from the center of one end. Cut off one corner of the board at the angle you have set. Flip the board to the opposite corner and cut again, so that the angles meet in a peak on the center line you drew. This piece is your killing post, or center brace.
Step 7
Measure from inside the peak of the upper cords to the top edge of the lower cord. Cut the killing post flush at the end opposite the point you created, at that distance from the peak of the point. Fit the killing post with the point fitted to the underside of the upper cord peak and with the bottom flush with the top of the lower cord.
Step 8
Use steel gusset plates, available in most common pitches, and box nails to fasten the joints of your truss securely together.
Tip
Diagonal pieces, known as webs, can be added from the corner of the killing post and lower cord to the middle of the bottom edge of each upper cord for additional support.
Plywood gussets can be used as a substitute for steel. Use wood glue and box nails to fasten them in place.
Video of the Day