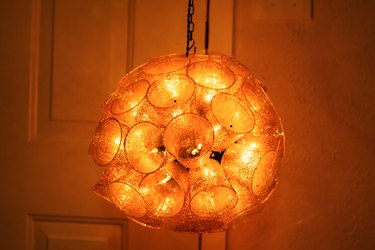
The lighting in a room adds to the decor of that room as well as the room's mood. You can make your own fun and funky light ball from inexpensive plastic cups and Christmas lights to use as decoration in a child or teen's bedroom, or even your living room. Craft several light balls to use as decorative lighting at a school dance or birthday party.
Video of the Day
Things You'll Need
12-Inch Length Of Chain
Glitter
Paper. Plate
100-Light Strand Of Miniature Christmas Lights
Spray Adhesive
Pliers
2 S-Hooks
Soldering Iron
Clothespins
9Oz Plastic Punch Cups, 50
Step 1
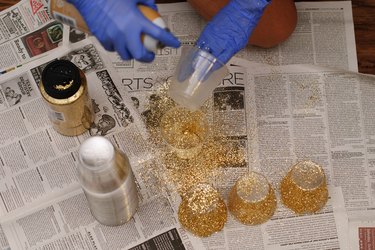
Spray the cups you're going to use for this project with spray adhesive -- on at a time -- before sprinkling them with glitter over a paper plate. Set the cups aside to dry.
Video of the Day
Step 2
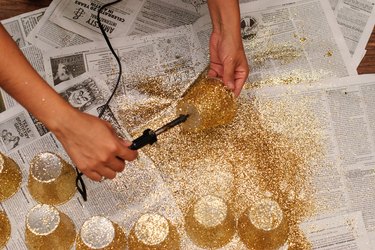
Use a soldering iron to put a 1/2-inch hole in the bottom of each cup, once all the cups have dried.
Step 3
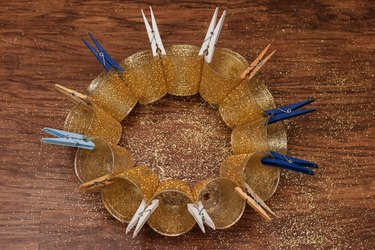
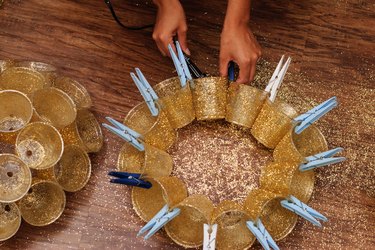
Lay twelve cups on their sides in a circle and use clothes pins to hold them together by the rims.
Step 4
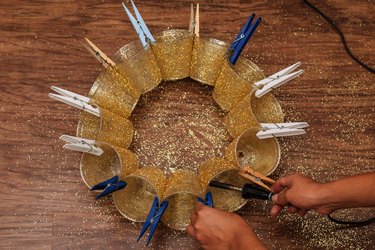
Melt the cups together using the soldering iron near the bottoms of the cups by placing the soldering iron inside one cup and melting through that cup to the second cup.
Step 5
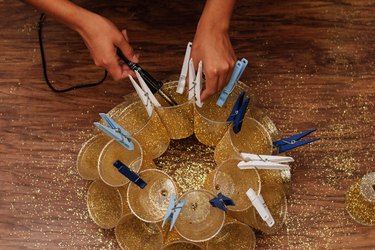
Add a second layer of cups on top of the first; this layer is made of nine cups. Use clothespins to hold the cups in place while you solder them to each other and to the first layer of cups.
Step 6
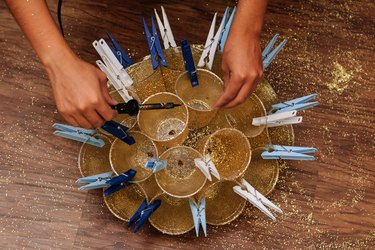
Place the final layer of four cups on top of the nine cup layer. Again, use clothespins to hold them in place while you solder them.
Step 7
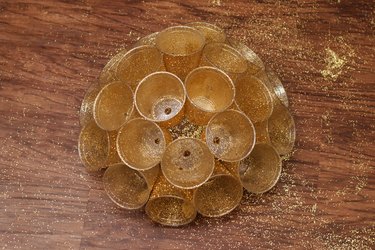
Remove all the clothespins once the cups have cooled.
Step 8
Create a second hemisphere of cups in the same way you create the first.
Step 9
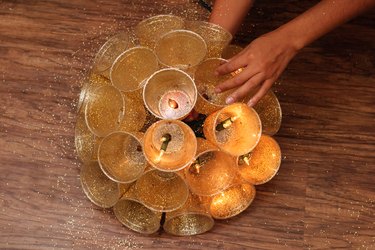
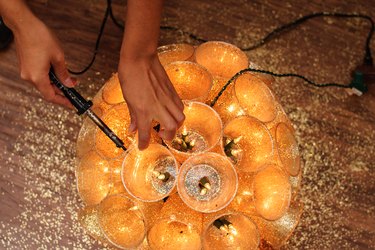
Push two bulbs through each hole in the bottom of each cup, starting at one end of the strand and working with one hemisphere. Start with one of the cups in the twelve cup layer and zig-zag up and down the layers as you push the bulbs through.
Step 10
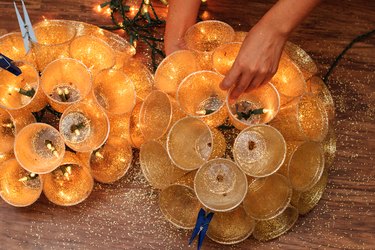
Repeat the bulb-pushing process with the other hemisphere, this time starting with the other end of the strand of lights.
Step 11
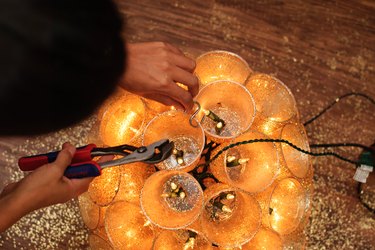
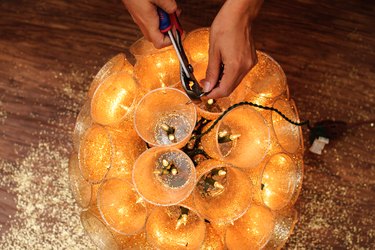
Push the two hemispheres together, once each cup has two bulbs, making sure that the plug to the lights sticks outside the ball. Solder the two halves together to make a ball.
Step 12
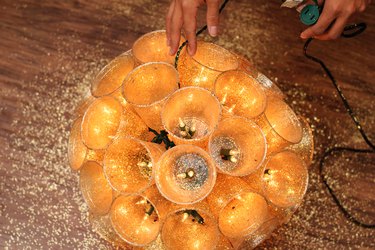
Solder the rims of the cups together where they touch naturally to strengthen the light ball.
Step 13
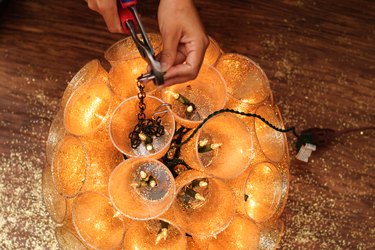
Solder a hole through two adjoining cups, a little below their rims, and slip one end of an S-hook through the hole. Clothes that end of the hook with pliers.
Step 14
Slip one end of your chain onto the other end of that hook and close that end with pliers.
Step 15
Slip one end of the second S-hook through the other end of the chain and close it with the pliers. Use the other end of that hook to hang your light ball.
Tip
Use clear plastic cups tinted in different shades or different colors of Christmas lights to make your light ball more interesting or a better match for pre-existing decor.
Warning
Only an adult should handle the soldering iron.