Things You'll Need
Balloon
Flour
Pot
Newspaper
Pin
Acrylic paint
Paintbrush
Scissors
Cardboard
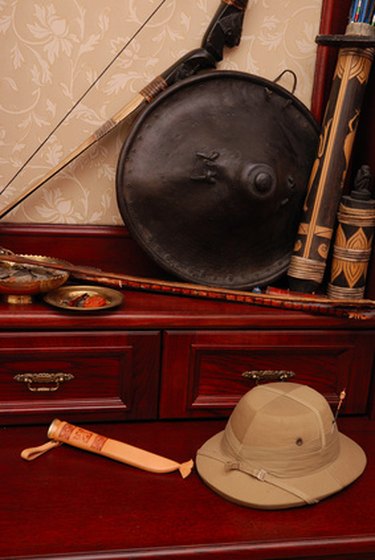
You would want to wear a pith helmet during a safari or adventure excursion to keep the sun off of your face and stay cool in the heat. If you are teaching students about safaris or adventuring around the world, you can make their lessons more exciting by showing them how to make their own pith helmet out of basic craft supplies.
Step 1
Inflate a balloon and tie off the end.
Video of the Day
Step 2
Cut out a circle from cardboard that measures about 10 inches in diameter. Cut out a circle from it large enough for the balloon to fit through the center.
Step 3
Pour 3 cups of flour and 1.5 cups of water into a pot.
Step 4
Heat the flour mixture until it begins to rapidly bubble. Remove it from the heat.
Step 5
Allow the flour mixture to cool down completely.
Step 6
Cut newspaper into strips that measure about 2 inches wide by 6 inches long.
Step 7
Dip strips of newspaper into the flour mixture, and drape them over half of the balloon as well as the cardboard circle.
Step 8
Add layers of paper mache strips until there are about four to five layers. Allow to dry.
Step 9
Pop the balloon with a pin.
Step 10
Paint the pith helmet with acrylic paint. Allow the paint to dry.
Video of the Day