Things You'll Need
Heat gun
Sandpaper
Alcohol
Glue made for water pipes
Epoxy made for water pipes
Fiberglass-resin tape
Bucket
Water
Rubber
C-clamp
Neoprene coupler
Screwdriver
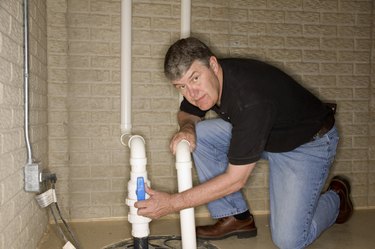
If you have a leaking drain pipe, it is almost imperative that you fix it immediately. A leak can start out small but quickly grow into a big problem. In many cases you can fix the problem yourself without calling a professional plumber by applying an epoxy, tape, or cold-weld adhesive over the leak. Applying such fixes to solve problems with leaky drain pipes, even a novice can fix a leaking drain pipes.
Step 1
Dry the area thoroughly. A heat gun will help evaporate moisture. Cut out a small piece of sandpaper and use it to rough up the leaking area of pipe. Clean the area with alcohol. Buy some specially made glue that is made for use on water pipes. Add a thick layer of the glue, pushing it into the seam of the leak as best as you can. Do not turn the water on for 12 hours. If you wait a full 24 hours, most glues will be at full strength. If you want a different kind of fix, proceed to the next step.
Video of the Day
Step 2
Buy some putty that is made to stop water leaks. Sand the area with sandpaper, then clean the area with alcohol. Mix and apply the putty according to the putty manufacturer's directions. Do not put any water down the drain for the recommended amount of time the putty needs to cure.
Step 3
Buy some fiberglass-resin tape. Soak the fiberglass-resin tape in a bucket of water according to the tape manufacturer's directions. Simply wrap the tape around the leak. Wearing gloves, smooth over the taped surface with your hands. Leave the tape on to cure according to the manufacturer's directions.
Step 4
Apply a cold-weld adhesive. This type of compound comes as a two-part liquid epoxy or it comes as a putty that you knead before applying. With this cold-weld adhesive, you need to work quickly. Rub the area with sandpaper to rough it up, then clean the area well with with alcohol. Mix the cold-weld adhesive according to directions. Once the chemical reaction starts and the mixture heats, you need to apply it.
Step 5
Wrap the leaking place tightly with rubber. To hold the rubber in place, put a C-clamp over it. Tighten the screw on the C-clamp with a screwdriver to make the area watertight. You can also pick up a neoprene coupler. This is a rubber sleeve with metal clamps already attached. They tighten the same way as a C-clamp.
Tip
Do not use the drains until the recommended amount of time has elapsed. Read and follow all manufacturer's directions. Work in a well-ventilated area. Wear gloves to protect your hands.
Video of the Day