Things You'll Need
Hammer
Chisel
Vacuum
Cleanser
WonderBoard
Nail gun
Nails
Tape measure
Pencil
Chalk line
Water
Thinset mortar
Trowel
Tile
Tile spacers
Wet saw
Straight-edge tool
Needle-nose pliers
Grout
Grout float
Sponge
Bucket
Paper towels

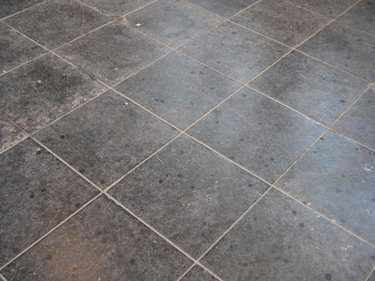
One way to improve the appearance of your home is to lay a new tile floor. This is a fairly simple home improvement project that you could do by yourself in a day and it can give the room a whole new look. If you're like some people, you'll want to take the project one step further and lay the tile at angle rather than laying it straight. It involves a little more work, but the results will be well worth it.
Step 1
Remove the old floor by chipping away at the existing surface with a hammer and chisel until you're down to the subfloor. Vacuum the floor to remove any debris and clean it with a cleanser to remove any impurities which may prevent mortar from adhering properly.
Video of the Day
Step 2
Inspect the subfloor. If it's damaged, tear it up and replace it with WonderBoard. Lay the WonderBoard by staggering the boards so that the corners don't meet up at any adjacent points and drive in a nail every four inches.
Step 3
Measure the halfway point at each wall and make a small mark at the bottom of the wall. Temporarily drive a nail partway into the floor next to each of the marks. Hook the end of a chalk line to one of the nails. Run the chalk line straight across the room to the next nail, wrap it around, and snap the chalk line. Repeat this with the other walls. This will divide the room into four equal quadrants, with the spot where the lines intersect being the center of the room.
Step 4
Mix a batch of thinset mortar by following the instructions on the package.
Step 5
Pick a quadrant to begin in and apply a layer of thinset to cover an area 2 feet by 3 feet in one of the corners by the wall. Use the smooth edge of the trowel to spread the mortar.
Step 6
Hold the trowel at a 45-degree angle and with a broad, curved wiping motion, create notches in the mortar with the notched edge of the trowel. Finish with a final pass the makes the notches go in a straight line.
Step 7
Lay the first tile in the corner at an angle so that two corners of the tile are pointing at the wall in front of you and the wall next to you, with tile spacers separating the walls and the corners of the tile.
Step 8
Put a tile spacer next to the corner of the tile and lay another tile next to it the same way you laid the first. Continue adding thinset to the subfloor and laying the tile in this fashion until you reach the chalk line, then lay the next row the same way until the quadrant is done.
Step 9
Go to the next quadrant and lay the tile the same way that you did for the first quadrant, except instead of starting at the corner where the walls meet, start along the wall next to the last tile that you laid in the first row. Continue this process until all four quadrants have been completed except for along the walls where you'll need to place cut tiles.
Step 10
Measure the dimensions of the areas where you'll need to cut tiles and count how many you need at each size.
Step 11
Cut one tile at each size needed with a wet saw and using them as templates, mark cut lines on other tiles with a pen or pencil and cut as many tiles as you'll need. Cut the tiles by placing the tile against the guide on the wet saw and lining it up so the the blade is aligned with the pencil mark, then make the cut by slowly moving the tile into the blade. Don't force it; let the saw do the work.
Step 12
Lay the cut tiles in place on the floor and give the mortar about an hour to set.
Step 13
Scrape away any mortar that might have oozed through the tiles with a straight-edge tool and remove the spacers with needle-nose pliers.
Step 14
Mix a batch of grout by following the directions on the packaging.
Step 15
Starting in one of the back corners, lay one or two scoops of grout on the floor and spread it into the tiles with a grout float. Hold the grout float at a 30-degree angle and use a wiping motion at an angle to the tiles so you're sweeping over the corner of the tiles and going diagonally across them. Go over the area several times to make sure the gaps between the tiles are completely filled.
Step 16
Wipe any excess grout into the next section of tile and repeat these steps until the entire floor has been grouted.
Step 17
Allow the grout to set for the time specified in the instructions (usually about 20 minutes).
Step 18
Wipe up any excess grout with a damp sponge. Rinse the sponge frequently and squeeze out as much water as possible.
Step 19
Wait about 45 minutes, then wipe away the haze that covers the tile with a paper towel.
Warning
--Wear safety goggles and follow the instructions when using the wet saw to cut the tiles. --Also, make sure that the water is continuously running in the wet saw to keep the saw blade and tile cool when the tiles are being cut, as well as prevent dust from being kicked up.
Video of the Day