Things You'll Need
Cabinet opening, 8 x 12 x 8 inches
5 hardwood slates, 1/2 x 2 1/8 x 12 1/2 inches each
Tambour router set with profile bit, socket bit, round-over bit
Router table
Table saw with 1/8-inch kerf blade
2 hardwood boards, 1/2 x 8 x 8 inches each
Pencil
1/2-inch straight router bit
Router
Fine-grit sandpaper
Wood finish of your choice
1 box of flush trim wood screws
Screwdriver
Knob with provided screw
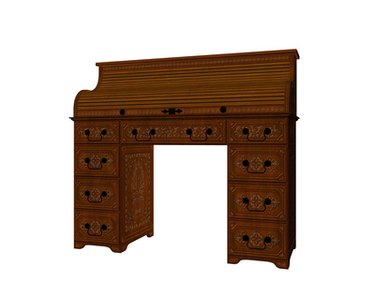
Roll top doors, also known as tambour doors, are used for roll top desks and small sections of cabinetry, such as built-in bread boxes. While some roll top doors use canvas or cables to connect the wooden slats, using a ball-and-socket method will add value to your project because of its solid wood construction.
Step 1
Make profiles in the slats. Install the profile bit on your router table. Run four of the 1/2 x 2 1/8 x 12 1/2-inch hardwood slats with the 1/2-inch side down against the table. Run both 2 1/8-inch sides of each of the four slats, making two passes. Run only one 2 1/8-inch side on the fifth board, making two passes. The fifth slat will create the top and bottom of the roll top door because it does not need a ball and socket on the top and bottom portion.
Video of the Day
Step 2
Cut slits. Using a table saw, cut an 1/8-inch slit down the centers of the 1/2-inch faces on each slat. This will ease the path for the socket bit. On the fifth slat, cut the one side with the routed profile.
Step 3
Round edges. Insert the round-over bit into the router table. Round the all four edges of the four center slats. Round only the side of the fifth slat that you routed with the profile bit.
Step 4
Create sockets. Insert the socket bit into the router table. Run the 1/2-inch sides of the four center slats through the router table along the center of the 1/8-inch slit you previously cut. Route only the one side of the fifth board.
Step 5
Rip the slats in half. With a table saw, cut all five slats in half to create 1/2 x 1 x 12 1/2-inch slats. Each slat will have a one side with a ball and the one with a socket. The slat with just a socket is the bottom of the door. The slat with just a ball is the top.
Step 6
Create a groove for the slats. Place the 1/2 x 8 x 8-inch boards on a work surface. Using a pencil, on one board draw a curve for the channel the door will follow when it rolls open and closed. It should start close to the front edge of the board and follow a curve to the back edge. Draw an exact mirror image on the other board. Insert the 1/2-inch straight router bit into the router and set the router to make a cut 1/4 inch deep. Route both boards along the inside of your pencil line. These boards will be inserted into the left and right sides of the cabinet.
Step 7
Prepare the door for assembly. Sand all the parts using fine-grit sandpaper. Apply a wood finish to match your cabinetry and allow it to dry before handling.
Step 8
Assemble the door. Slide the slats together, starting with the top slat. Continue until you reach the bottom and slide the bottom slat into place. Insert the connected slats into the left and right cabinet insert grooves.
Step 9
Install the door. Place the assembly into the cabinet opening. Screw the side boards into the cabinet sides with flush trim wood screws, placing two screws along the top and bottom edge of each side. Test the door by opening and closing it.
Step 10
Install the knob on the bottom slat by screwing the provided screw from the back side into the knob using a screwdriver.
Tip
Use a different kind of wood for the top and bottom slat to provide a decorative accent to the roll top door in the cabinet.
Warning
Wear eye protection when working with wood. Follow wood finish safety precautions for safe use.
Video of the Day