Things You'll Need
Finishing trim
Drywall saw
Stud finder
Wire-pulling fish
Screwdrivers
Needle-nose pliers
Wire strippers
ROMEX® strippers
2 ROMEX® connectors
Wire connectors
Electrical tape
12-2 ROMEX® cable
Pencil
Plastic dropcloth
Voltage tester
Recessed lights, commonly called can lights, offer a pleasing finish to virtually any room and make for a reliable source of inconspicuous lighting. But some homeowners may be reluctant to install them if they don't have access to attic space above the room where they would like to have the can lights installed. In reality, as long as you can feed the wire across the ceiling using a wire-pulling fish, you can easily install can lights in any room, even one without attic access.
Step 1
Place the stud finder against the ceiling and map out the location of the ceiling joists. This will enable you to choose the best location for your can light.
Video of the Day
Step 2
Place the cutting template that comes with your recessed light fixture against the ceiling and trace it with a pencil.
Step 3
Cut away the hole with the drywall saw. To help keep cleanup to a minimum, spread a plastic dropcloth on the floor and any nearby furniture to catch the drywall dust before cutting.
Step 4
Turn off the circuit you are going to be using to feed your can light. Test the circuit with a touch-type voltage tester before you touch any of the wires. Press the button on the tester and touch the tip of it to each wire to make sure the circuit is dead. If the tester beeps or lights up, the circuit is still live. Try additional breakers until you find the correct one.
Step 5
Feed the wire through the space above the ceiling from point A to point B, using the wire-pulling fish. Feed the fish through the hole you made for the new can light to the location where you are picking up the feed. Once there, use electrical tape to secure the ROMEX® cable to the fish and then pull the fish with the wire cable back through to the hole for the recessed light.
Step 6
Remove about 6 inches of sheathing from the cable, using ROMEX® strippers. Then, using wire strippers, strip about 3/4 inch of insulation from the ends of each wire.
Step 7
Slide the wires through the ROMEX® connector and secure the connector in place by tightening the clamp screws with a screwdriver. The clamp should be positioned over a sheathed section of the ROMEX®, not the exposed individual wires. Remove the locknut from the threaded side of the connector.
Step 8
Punch out one of the pre-cut knockout holes on the can fixture's junction box, using needle-nose pliers.
Step 9
Feed the wires through the knockout and secure the connector to the box, using the locknut.
Step 10
Connect the ground wire from the ROMEX® cable with either the ground wire from the fixture or directly to the ground screw (depending on the fixture). Connect the white wire from the ROMEX® cable with the white wire in the junction box, using a wire connector. Connect the black wire from the ROMEX® cable with the black wire in the junction box, using a wire connector, and wrap electrical tape around each individual connection.
Step 11
Install the junction box cover and lift the fixture up into the ceiling.
Step 12
Set the metal holding tabs in place by lifting them up and snapping them in place. You may need to use a screwdriver or needle-nose pliers to get them to fully snap into place once they reach a certain point. When all of the tabs are secured, the can fixture is set in the ceiling.
Step 13
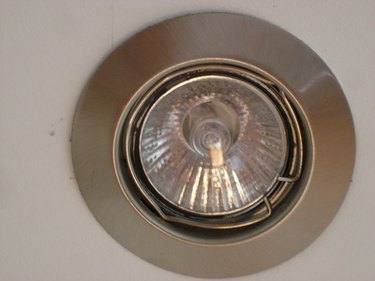
Install the accent trim to finish off the installation. The accent trim is the ring that covers the cut drywall and it is usually installed using a number of springs.
Step 14
Connect the ROMEX® cable to the circuit you are using to power the can light by following Steps 6 through 10 at the junction box.
Step 15
Install a light bulb in the can light and turn the circuit on to test your installation.
Tip
Always test your tester on a circuit you know is working before you test the circuit you'll be working on. This is to ensure the tester is functioning properly.
Purchase an "old-work" recessed lighting fixture. This type is for installing in finished ceilings.
Warning
If there is insulation above the ceiling, purchase an IC-rated recessed light fixture. This fixture is designed to come into direct contact with insulation.
Video of the Day