Things You'll Need
Large paper bag
Scissors
Silver spray paint
Black marker
Acrylic paint
1 gallon milk jug
Shoelaces
Cardboard
Vinyl fabric
Stapler
Realistic homemade medieval knight costumes are made of chain mail and, while they look impressive, they can be very heavy and uncomfortable to wear. Constructing a simple costume out of everyday household materials is a much easier option if you would rather not carry around heavy metal and you do not have the time to invest in learning how to craft chain mail.
Armor
Step 1
Turn a large paper grocery bag upside down so the bottom of the bag is facing up.
Video of the Day
Step 2
Cut a hole in the center of the bag's bottom large enough to fit over your head. Try the bag on. If it is difficult to put on, cut a slit in the back of the bag to allow yourself more freedom of movement.
Step 3
Cut holes in each narrow side of the bag for your arms.
Step 4
Paint the outside of the bag with silver spray paint to make it look like armor.
Step 5
Draw two lines on the front of the bag with a black marker to divide it into four equal squares.
Step 6
Paint two of the squares with acrylic paint in your desired color.
Helmet
Step 1
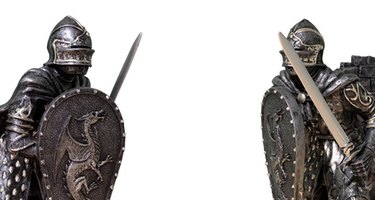
Cut a one gallon plastic milk jug with a pair of scissors to remove the handle and the top of the jug. Continue to cut away at the jug until you have created a rough helmet shape. See the photo in the Reference link for a possible helmet design.
Step 2
Paint the milk jug helmet with silver spray paint to match your armor.
Step 3
Poke two small holes near the bottom front of the helmet.
Step 4
Thread a shoelace or piece of string through each hole and tie a knot in the end to hold it in place. Tie the shoelaces together to hold the helmet in place.
Shield
Step 1
Cut the shield shape of your choice out of a piece of cardboard. See the photo in the Reference link for a possible shape, or choose another, such as oval, circular or rectangular.
Step 2
Cut two strips of vinyl, or another heavy fabric, approximately eight inches long and three inches wide.
Step 3
Staple the top and bottom of each strip of fabric to the back center of the shield to create two loops through which you can slip your arm to hold the shield.
Step 4
Paint the shield with silver spray paint.
Tip
Print an emblem onto a sheet of ink jet sticker paper and affix the emblem to the front of your armor or the center of your shield.
Add a toy sword to complete the costume or spray paint an empty cardboard wrapping paper tube silver for a makeshift sword.
Pair the costume with thick silver tights or gray sweat pants.
Video of the Day